https://wingsofintent.blogspot.com/2019/01/rwd-8-172-completed.html
Having built the RWD-5 and RWD-6, both posted here, I decided to follow suit with the RWD-8, another ungainly but ultimately charming Polish effort:
Fforeseeing this event, I had also purchased a Part after-market set of photo-etched parts, and two sets of Yahu instrument panels:
This old but still reasonably good kit was gifted to me by my good friend Sønke Schulz, an Evil Genius that has a lair in a Volkano, in the country of Volkania, of which you may haven't heard before.
Here is his note, from his very hand:
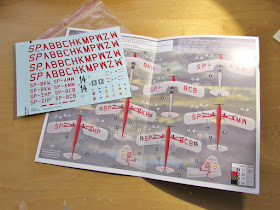
The decals may have the wrong colors, more on that later:
As said, the kit is still holding:
The parts have been separated and cleaned up. The tiny ones were cautiously left on the sprues. The gift was missing the vertical tail, which will have to be scratched:
Notice the two additional nose parts, nose tip and chin, that are a brilliant solution to avoid to seams right where it's really a pain to fix them, a clue many manufacturers could take from this old kit:
The wing strut supports -that were a ted prominent- are erased, in order to apply putty to subdue the exaggerated rib detail:
The cabane and horizontal tail struts are mere chunks of rectangular plastic and should be replaced. The handles are a nice touch, but will make new ones from thin wire. The items on top of the photo are the external levers for the control cables, and are reasonable:
A liberal amount of putty is applied to subdue the surface detail on the flying surfaces. The cockpit pan is being assembled:
The putty is sanded first with a flat stick and then with sanding sponge, to allow for the restitution of some subtle scalloping:
A bit of structure is added inside the fuselage sides:
As explained above, this gifted kit was missing the vertical tail. Looking around I found a third kit that I didn-t remember I had, but instead of cannibalizing that kit I took the part to use as a pattern for a new one made of sheet and stick:
The new vertical tail in progress, lacking engraved separation of fin from rudder, plus horns:
A session with the airbrush is being prepared for the multiple builds:
Primer and some colors are airbrushed:
The exit point of the rudder control cables is drilled:
Almost ready to go:
The Yahu instrument panels are glued after some thinning of their locations (the fuselage walls are too thick for them to fit comfortably otherwise):
This is for me the most fastidious stage, priming, sanding, puttying, sanding, oh the inexhaustible layers, akin to political coverup. Darn!
The flying surfaces look nice now:
The fuselage halves are united:
A noticeable detail not seen in any kit is a prominent exposed tank located under the fuselage on the left hand side. The section is thus cut out to make one according to photographs:
The control surfaces are separated and the horns form the photo-etched fret are glued in place. The scratched tank can be seen to the left:
I added a cylinder behind the air intake, but notice that the kit sort of provides one on the locating block of the nose tip -where the arrow is pointing) which I erased since I didn't need it anymore.
The fact that nose tip and nose base with exhausts and cylinder are so cleverly provided by this old kit makes you wonder why contemporary manufacturers don't adopt such clever solutions to avoid seams where you don't want them, and help with detail:
Fuselage ready for the first primer coat:
Some priming of fuselage and tail, and some base color (white) for the wing:
More airbrushing ensues. The wing is painted aluminium, while the fuselage and vertical tail are still in the gloss white base stage:
The photoetched set provides a couple of control levers that very prominently are located at the fuselage sides and handle the elevator cables. The kit provides them too, but of course the P.E. are more to scale. They are given axles made of discarded drill bits, always useful to have in the spares bin:
The landing gear is glued on, as well as the photoetched assembly that replaces the kit's tailskid:
The cabane struts are added. the remaining four short struts that connect fuselage with wing are going to be made of airfoiled brass, replacing in turn the kit ones that won't do (the kit's long wing V struts will be utilized, though):
Since my gifted kit was missing the windscreens, a couple are made from clear plastic, first carving the curve at the bottom:
I am concocting a fueling dolly:
Fuselage is given its aluminium color:
Masking and painting of the red color on fuselage and ancillaries follows:
The home-made fuel trolley is given some base colors:
Masks off:
The aftermarket decals have arrived, they look nice and they seem well-produced, with interesting support material:
The List has arrived. Small details are starting to be dealt with: painting the leather coaming, the exhausts, the control horns, etc. The fuel trolley is now completed as per one image from the Net, I believe from the Polish NAC:
Wing and four additional cabane struts on:
The aftermarket decals are excellent and gave no problem. Her they are just applied and still wet (it's raining heavily):
Still to do: insertion of fuselage control levers, six control cables that run on the exterior, prop, windshields,wheels, stab struts and rigging, aileron cables on wing cut out, etc.
All the other parts are in place now, but the weather is not good for photography. When conditions improve, photos of the completed model will be posted:
To be continued...


No comments:
Post a Comment