(The completed model is here):
Not long ago the market didn't provide many options (for
civil vehicles, that is), but then slowly but surely they started to pop.
The predecessors of these more modern and better detailed
kits are the Keil Kraft releases in 1/72nd, of which I bought and build a small
number. They are a source of nostalgia and fit the bill if you are not to
demanding. Some were simpler than others.
Among them was this very London Type B bus that I posted
here some time ago:
My experience with Roden buses was in general good:
Si I got the London Bus.
It came without instructions, decals or clear window film,
which apparently slid off while packaging the goods, and the vendor is sending
them separately -after he was made aware of the situation. But the vendor is
Eastern Europe, and that means at least a month-long journey (at the very
least) in the mail, so I went online and found photos (not really good, though)
of the instruction sheet, and will be using that as a guide.
I am thrilled that this visually-appealing and historically
meaningful piece of mechanical history was released, and shout a cheers! to
Roden.
The offering is inline with similar of their products:
overall good detail, a fit that is good enough but many times not the sharpest,
instructions that occasionally will have you scratching your head, and
ultimately the potential for a good model to be obtained from the kit.
All the areas are covered here: the fully detailed chassis,
the passenger seats for the two tiers, driver office with some gizmos, even
including a horn.
You get a large number of parts, with nice detail and a tiny
bit of flash in almost every part, so individual cleanup of the parts is
mandatory. Some of those parts will need special attention, because they are
half-clogged with flash, like parts 35b and 36 b (the guard-rails on the
sides).
Continuing with one of the silliest traditions in the
industry, very small parts and assemblies are represent by equally minute
drawings, since the terms "blow-up drawing" and "zoom
image" are many times not part of the common modeling lexicon.
Needless to say the location of some parts is vague and
fuzzy, and in occasionally you will be mislead (for example, the engine cowl
assemble does not go over the ridge
marked on the firewall, but inside it,
a fact I only discovered after liberally pouring cement in the wrong place,
since that was where the "glue here" arrow pointed.
As said above you get window material, but no clear lenses
for the lights. You may use MV lenses or make your own to enhance the kit's
plastic parts, as I do.
I started to build sub-assemblies related to the chassis,
transmission and suspension.
The name of the game here seems to be painting strategy,
trying to group areas that are the same color, and avoiding as much as much
possible convoluted masking or painting conundrums. Summarizing: planning is
the key.
Separating, cleaning, manipulating all those minute parts, given
their tendency to flee in all directions (never the one you expect, though),
will provide the necessary exercise that some modelers shun (by some modelers I
mean me).
I already crouched so many times and did so many push-ups
looking for parts on the floor with this model, that my thighs and biceps are
those of Charles Atlas, and no bully will ridicule me in front of my girlfriend
at the beach anymore. Not to mention my lethal dexterity with tweezers and the
sanding stick, disciplines I cultivated extensively during my training at the Shaolin Modeling
Monastery.
Great care has to be used to detach the parts from the sprues. A Xuron tool will only do occasionally, and most frequently you will need a very sharp X-Acto. Most of the times I am using a razor blade (kids, don't try this at home).
Once separated each part will need a cleanup, invariably, being it a mold line or flash, varying from minimal to abundant:
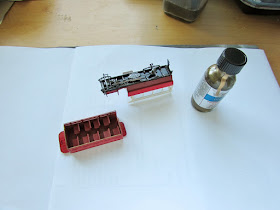
The lower deck is assembled, without interior. Again, the idea is to airbrush the interior color, then add the painted seats, then stuff the interior and paint the exterior, then add the clear material from inside (all this masking the lower area, that shall be painted black before):
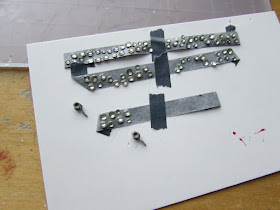
About 45 minutes into the task of cleaning the flash from the side guardrails it's obvious that there is still plenty more work ahead.
This is an ideal candidate for a photo-etched part (as well as a few other iterms in this kit)
Anybody listening?
Parts 2C (driver and accompanying gumby seats) do not have the pips shown in the instructions that are supposed to lock them in place, but a butt-joint (in this case almost literally) will suffice.
Parts 5C have three attachment gates that will make cleanup a challenge, but they are not really visible in the final model (which is good, because the chances of damaging that thin disk at the end are ten in five).
Only the mysterious gods of modeling know exactly where parts 12B and 13B should be glued to the chassis.
I think they may go here on these little dimples:
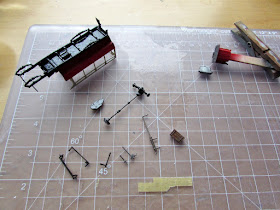
And at this point we are as we were in the beginning, having to start to paint and not being able for the moment to do so. Most parts separated and cleaned-up, and all that could be built already built (considering assemblies that are the same color or can be managed during paint easily for masking):
Eight years ago on a fleeting visit to the London Transport Museum I took these very poor photos with a very bad camera (one that I wouldn't have minded stolen or lost during the trip) as I had no more than a passing interest at the time in roadable types:
Fortunately, the Internet has plenty of images of now and then of this bus, but I was surprised in finding these photos today browsing our trip to England album, as to how much my modeling interests have shifted in some ways, broaden in others, and narrowed (focused) in some fields.
Managed to do a very quick -and well protected- session with the airbrush. The first coat of primer is laid on some of the assemblies:
A word of caution: Those side rails have attachment points that curve 90 degrees and go into the chassis (in those holes that the instructions ask you to drill, they are marked in the plastic).
Problem is, the side rails are attached to the sprue via gates that are fused with said curvy bits, rendering them the poorest technical solution in this kit. Besides the flash and chunkiness of these parts already mentioned above.
Separating them from the sprue is a challenge, and the attachment points will require cleaning, sanding, shaping, etc., but alas, they are very small and weak, and crap will most certainly ensue.
You are warned.
Some small bits are glued at this time as they don't hinder painting:
The last small parts are removed from the sprues. These are really cute, and you can tell the master-maker has put some good care here. Still, the plastic used makes then somewhat crumbly, and their mechanical resistance is nihil, like bad resin parts. I don't think I am a clumsy modeler, yet a few just broke in my fingers as I was trying to clean the ever-present mold lines and little flash. I re-glued the affected parts, but I guess clean up will not go much further.
Many times I just discard these parts and make my own, but I am a bit lazy due to the passing illness, so they will have to do, as well as the side rails (photos show some buses without them, so they may go to the trash can, but I have to do more research):
I will do well here with my home-made lights:
A quick and well-protected session with the airbrush to apply a base color (parts to the right unrelated):
The headlamp housings are drilled deeper to better accept the home-made clear lenses.
I did the same with the open end of the blow-horn:
Parts being prepared for an ulterior airbrushing session. Many different colors, so they are grouped.
The little buggers...
Base colors applied to the parts:
Possibly due to contamination, being that dust, skin oil or stubborn mold release agent, as I was airbrushing this particular group of parts, the paint showed a tendency to congregate, leaving lighter areas.
Because certain lessons have to be learned over and over again, I kept insisting with more paint (unfortunately Alclad gloss black lacquer base, another lesson I didn't learn yet in spite of having bad results many times before). It did not go well, as anybody could have foreseen (but me at that moment), and eventually the paint had to be removed. Because I used lacquer and piled it up, the surface suffered, especially on the radiator front, which has (or better said "had") very fine detail. I definitely have to trash that flask of Alclad gloss black base, for some reason I keep hoping that it will behave well. It's the only Alclad product that systematically and repeatedly gives me head aches (I use their other products all the time, and am happy), if in this occasion of course I am partially to blame. In most cases there is a never-drying issue, or the paint applied on top of it crackles. I have seen similar comments on this specific product several times on various places on the Net.
Anyways... It's not really bad, but it is annoying when everything else is going well.
Back to primer and a more cautious approach with gloss black enamel:
The horn and lamps are being painted:
Another airbrushing session, for the parts that needed masking and application of other colors, and for those which can't be done on both sides at the same time. I still have to mask that red to apply two more colors on the upper and lower bodies:
345,456th airbrushing session.
I still have to do one more session:
And thus the last parts are painted in what I hope is the last airbrushing session.
We can now proceed to assembly and detailing.
I am still waiting form the seller the missing material in the kit (instructions, clear film for the windows, and decals) which was mailed already:
Now the parts are prepared. The seats for the upper tier are already in place:
A number of parts will go under the chassis. Some hue variation is provided to break up the monotony.
Roden did a very good job indeed with this little fella:
The instructions indicate the wrong anchoring hole for part Part 25B in the chassis. That hole is where part 20B goes. Besides, it can't reach that hole, falling short.
Part 25B fits instead in a little protrusion from the chassis that has a dimple already marked for it.
The underparts (don't get me wrong) are crammed in. The handrails on stair and top tier are painted brass:
A dry fit of the top. Looking spiffy.
As mentioned above, I am waiting for the missing decals, instructions and transparencies from the seller.
I have to add the windows on the bottom tier, then the seats there, then glue the top and continue with the aft platform, stairways to heaven, decals and the many remaining small and large details:
As I wait (and wait...) for the missing parts to arrive, I started to add details, in order to make things more exciting, since now it's almost impossible to manipulate the model without knocking something off (which I already did, thrice). Steering wheel and levers, lights, mudguards, stirrup, etc. :
After more than a month, I got tired of waiting for the decals and clear parts that the vendor forgot to include in the box. I cut the windows from my own clear material after some measurements were taken.
Once the clear parts were in place, I could add the seats on the lower tier, and then glue the upper tier.
I will still have to wait for those decals, and therefore left the back of the bus and some details off for the moment, to facilitate decaling:
After one month and half the missing elements of the kit arrived:
I already used my own clear film, so that is separated:
It puzzles me that only a few graphic elements come as decals, the small sheet with the blue background:
This is a thin paper print from what you are supposed to cut the individual images? really? wth?
And then these signs printed on thicker stock, which, I am again guessing, you have to cut and apply as panels?
Hum...
So it is back to first grade to cut the pretty figures from paper, but not with the sight of a child, but the worn out one of an adult. Oh, Roden, what have you done...
Yeah...gluing pieces of paper on a surface with relief, that will work...
It can be done, but I think this is not the best solution.
Now Roden may have have found issues trying to produce decals in register for all those complex and minute graphics, and took the easy way out, understandable to a degree...but really?
Oh, the joys of paper cutting, those minuscule things that need to be placed precisely. Glue everywhere but where it is needed.
"Teacher, teacher, Robbie has the glue and doesn't want to share it!"
Application ensues, some times with white glue, some times using a glue stick.
Awkward, and only partially convincing for some of the signage.
I am not satisfied with the solution Roden provided. Such a wonderful kit, and not so wonderful graphics:
The decals go on well, but have excessive carrier that needs trimming back:
Done now but will wait until tomorrow to do the photo session in better natural light.
Whilst the thin and thick paper prints work for some things (the big signs that were possibly boards anyway in the original), they are frankly lacking and very disappointing for other things, like small placards that would have been no problem to present as decals (one color over white).
Not very happy with Roden's laziness on this matter.
I mean, you have an excellent kit, and then you fall short on the decals? pft!
As said, big signs may pass muster, small ones are like comedic thick cakes plastered on a delicate, beautiful face.
Ts, ts, Roden.
To be continued...


Looking forward to more, thanks for such an informative build log.
ReplyDeleteCheers,
Mark
Thank you Mark for your kindness.
DeleteThis one I hope id close to completion (if the missing items sent by the vendor after a claim do arrive)