
http://wingsofintent.blogspot.com/2013/04/michel-detroyat-ms230-conversion.html
Call me Francophile. I have a soft spot for Heller kits, which were a big part of my modeling endeavors during my childhood and beyond in Argentina. Subtler than the contemporary Airfix, more refined and not has heavily handed. I have built a good number of them, and still find them charming. Their fit is far superior than many contemporary kits of the short-run type and some of the normal injected type.
To add to that, I feel a mischievous pleasure in
transforming a war machine to a civil one, so I got this kit from my usual
supplier, who we’ll call Xtmos from Malabamba in order not to reveal his true
modeling Super-Hero identity.
For those interested there is Smer re-pop that even has (here sounds of trumpets...) a civil livery! so you do not have to modify anything.
As soon as I opened the vintage box I noticed a strange, although somehow familiar deformed object with a green hue....yes! that mini-bottle of glue! DANGER, WILL ROBINSON! By now, the substance had mutated into some glow-in-the-dark, kryptonite-like scary thing! I called my Hazmat team, which is composed of the minute Preiser figures that were sent to me by the Evil Genius S.H., who lives inside his Volkano lair. Once the Preiser figures, under the stern command of Helga, cleared the kit box of any hazards, I started to study the parts for the conversion. As you will see in the photos, the ailerons follow the French secret technology of “now you see’em, now you don’t”, so you have to engrave their separation line on the underside of the bottom half of the wing.
The wing's central area has to be "filled-up", since the aerobatic machine did not have the same cut-out as the series plane. The stab has a different outline at the tips and
the control surfaces are dynamically balanced. There is a headrest and a different windshield, plus
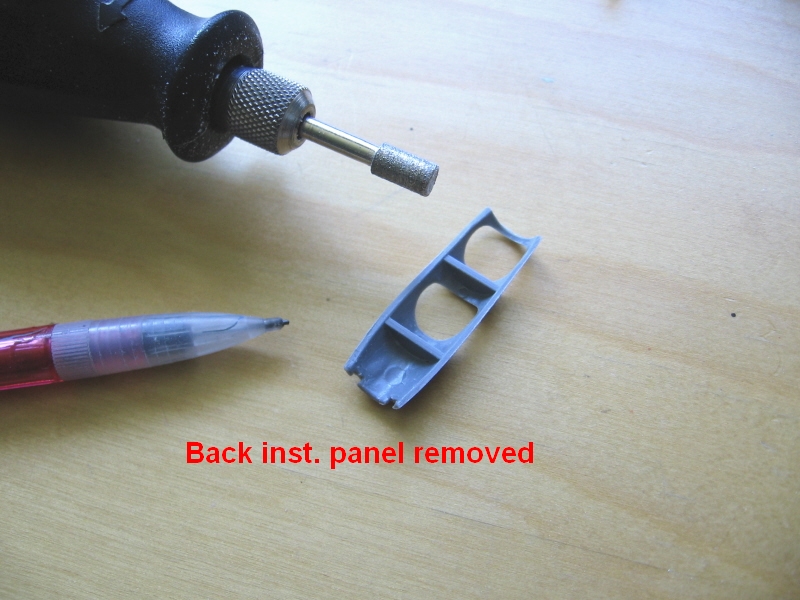
two windows where the fore position used to be, and no instruments’
protuberances -as depicted in the kit- on the upper deck. I found an article advising to correct the rudder profile
(which may be too small in the kit) and will have to provide, in order to
replicate my subject, a new cowl, LG legs, modified upper fuselage deck,
home-made decals and some other minor details; among them the removal of a sort
of tab/footrest on the mid left fuselage side.
My intended subject is the aerobatic Michel Detroyat MS-230
in its flashy red/white/black livery. There are many potential civil subjects
for the Heller M.S.-230 kit, but most would imply designing and printing white
decals which I can’t, since I do not posses and ALPS printer.
F-AJTP, my subject, appears in photos -depending on the time they were taken- in slightly different schemes. I counted five so far. Check your photos carefully. The wheels have pants on most of them, but not all.
Heller’s instructions on my vintage kit have some spots where
the usual “Instruction Sh...t” stupidity clearly shows. The most glaring area
is the depiction of the cabane struts’ positions. Why, my dear fellow modeler,
manufacturers represent small areas with even smaller drawings? Why the exact
location of the parts is as mysterious as the location of the Holy Grail?F-AJTP, my subject, appears in photos -depending on the time they were taken- in slightly different schemes. I counted five so far. Check your photos carefully. The wheels have pants on most of them, but not all.


Besides adding the lower ailerons' separation line, the center section has to be redone to follow the intended subject wing.


Parts off the sprue:

General tidying-up. Some of these parts won't be used:


Separation lines on the tail feathers engraved and vacuformed cowl:


Re-carving of the top deck:

Detroyat's plane had a teardrop fairing where the oleo strut connects the wing struts, so accordingly some parts from the spares' box were modified for use, bombs in this case. Did I tell you how much I enjoy using this kind of bits for better purposes? I think I did:


A little bit more of work on the interior:

The fuselage break-down is intelligently designed, so its closing went uneventfully.
There are only a few fine gaps to fill.
Here a panoramic view of the involved sub-assemblies and miscellanea.
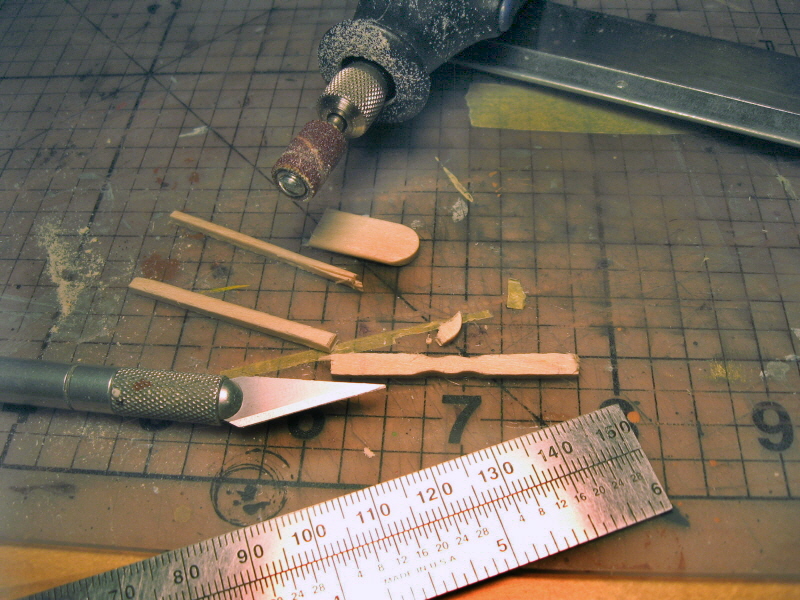
The headrest fairing still needs to be made:

And always the little details: the holes for the rigging, the metal control horn for the rudder, the cushion for the headrest, etc.:

One important thing: the aerobatic version of the 230 had a different engine, and its propeller -most likely a Chauviere- turned the other way -anti-clockwise standing in front of the plane- so I hand-carved one in wood.


The vacuformed cowl happened to be1mm too short in diameter, so I am making one with the same method I used many times before, a laminated body and a wood front you can contour:


Now that painting is approaching, it is wise to have a very good look at your references.
A keen observer will notice that the red/black scheme is reversed in both, the wing and stab surfaces. That is to say that on the wing upper side black is the front (leading edge area) and red at the back (trailing edge area) and this arrangement is reversed on the bottom surfaces, red ahead and black following.
Several elements are painted aluminum, like some of the wing struts, all cabane struts and wheel centers.


The white color was masked to reserve the white areas, then the red was applied. Again it was masked to reserve the red areas and black was airbrushed:


More masking and more spraying since all areas can't be done at the same time. Sigh.
As said before, the red/black pattern is reversed on the undersides of stab and wing:

And the little details that seem to have no end. In this case an aluminum tube section spacer needed to accommodate the new cowl+engine:


