

(Photo from ETH-Bibliothek, Zürich, Switzerland)
(This is the step-by-step building article, for the completed mode please go to this post here in this same blog:
The mind behind this innovative use of metal (in a way different than Hugo Junkers) was Dipl. Ing. Adolph Rohrbach, later of flying boat fame.
In a way, it followed the steps of an unlikely (and unrecognized) grandfather, the Sikorsky Russky Vityaz and its successor the Illya Mourometz ( from 1913!!!!!!), very big, efficient and innovative four-engine machines used in part as commercial passenger planes.
So the Zeppelin-Staaken of 1919 was not really new or revolutionary in that regard, but it was a much modern design that took advantage of the advances in technology developed during WW1, being an all-metal, almost total cantilever monoplane. For the skeptics: it did fly, and flew well enough.
Many years would pass until such an achievement would be recognized or even copied, or re-invented, and DECADES would pass until a conceptually similar plane was designed, built and flown.
Now, the bad news: the kit:
Don't look a gift horse in the mouth.
At least not before saying thank you.
Fellow modeler Alex Bigey had the generosity and kindness to
gift this kit to me, knowing I had been looking for it for years, for which I
am truly grateful.
What can I say...careful what you wish for :-)
Now, when is a kit so bad that you just realize is worthless
or impossible?
As an example, I would say that dangerously nearing or actually tapping the "useless" frontier is where the vacuformed Dornier DO-X from Combat Models belongs. It has been lying in my garage since I bought it, time ago. And I can tell you that I have dealt with some modeling drakens, but that vac DO-X kit is so disheartening that serves now as insulation.
As an example, I would say that dangerously nearing or actually tapping the "useless" frontier is where the vacuformed Dornier DO-X from Combat Models belongs. It has been lying in my garage since I bought it, time ago. And I can tell you that I have dealt with some modeling drakens, but that vac DO-X kit is so disheartening that serves now as insulation.
The Zepp is just a notch above it. See, as soon as I opened the intact bag the Lalo Schifrin
theme started to sound in the depths of my mind...Lalo Schifrin, the Argentinean
great composer of the "Mission: Impossible" music. Sigh....
The photos show clearly how bad this kit is. The surface is
a disaster, the plastic has dirt inclusions, the edges are ill-defined, the
"panel lines" have been -unevenly- traced with a banana, some of the
wheels are oval...I mean, pal, how hard is to make a circle?
But I am not being totally fair, this kit is not just bad: it is horrid.
But I am not being totally fair, this kit is not just bad: it is horrid.
True, where else can you get a Zeppelin Staaken E4/20? Do
you think Revell is going to come to the rescue? Exactly.
So we are stuck with this Frankenkit until 3D printers can
be bought for twenty dollars and you can produce your own.
I have seen some built on the Net, with more or less
fortune, valiant endeavors that I shall not dare to criticize, or point at
their inaccuracies. These brave souls did enough, whatever the results.
Classic Plane from Germany was the perpetrator of
this...thing, many moons ago. You get your quasi-formed (the term vacu-formed
would be too optimistic) plastic of decent gauge, some clear material for the windows, a 1/72 plan that does
not coincide with some parts (i.e. fuselage length, span), a page of dubious clarity
with some notes. Hope and Faith are not included, and you have to provide your
own.
There are redeeming qualities: the plastic has a good gauge, cuts and sands easily, glues well, and its surface admits finer sanding.
Some construction notes will be jotted down as I advance, captioning the related photos.
There were some changes on the plane that can be seen in contemporary photos, most noticeably: the addition of a canopy above the cockpit. The presence in some images of a nose wheel -to prevent nose over-. Some probes that appear in some photos over the nose area. Changes in the fairings of the wheel struts/shock absorbers. The door opens sideways in most photos but in other photo is shown opening downwards (associated with the canopy). A couple photos show the legend "Staaken" painted and crossed over.The wheels are seen with visible spokes or fabric-covered. There were two sort of tripods on the wings towards the wingtips.


The parts are traced around with a fine Sharpie, a pass or two with a new Xacto, bend back and forth, and voilá:

The wings follow. The other bits, do yourself a favor and replace them or scratch them. If you can replace the wheels too. The engine nacelle noses/radiators are shape-indifferent and too soft in detail. Most likely I'll be redoing them or just make them from 0:

The parts are sanded flat, carefully and constantly monitoring the results. Special attention should by given to thin those trailing edges, the bane of vac models not correctly built. The wings have some kind of built-in very subtle gull dihedral, and both upper and lower halves curve down at the triangular fillet aft of the root, so watch out:


The upper and lower wing halves are glued together, aligning them at the engine gondolas and leading edges. This will leave other areas misaligned, and you will have to sand and contour them to refine the finishing:


Keep doing dry-runs to be sure everything is going well, regarding fit and alignment:


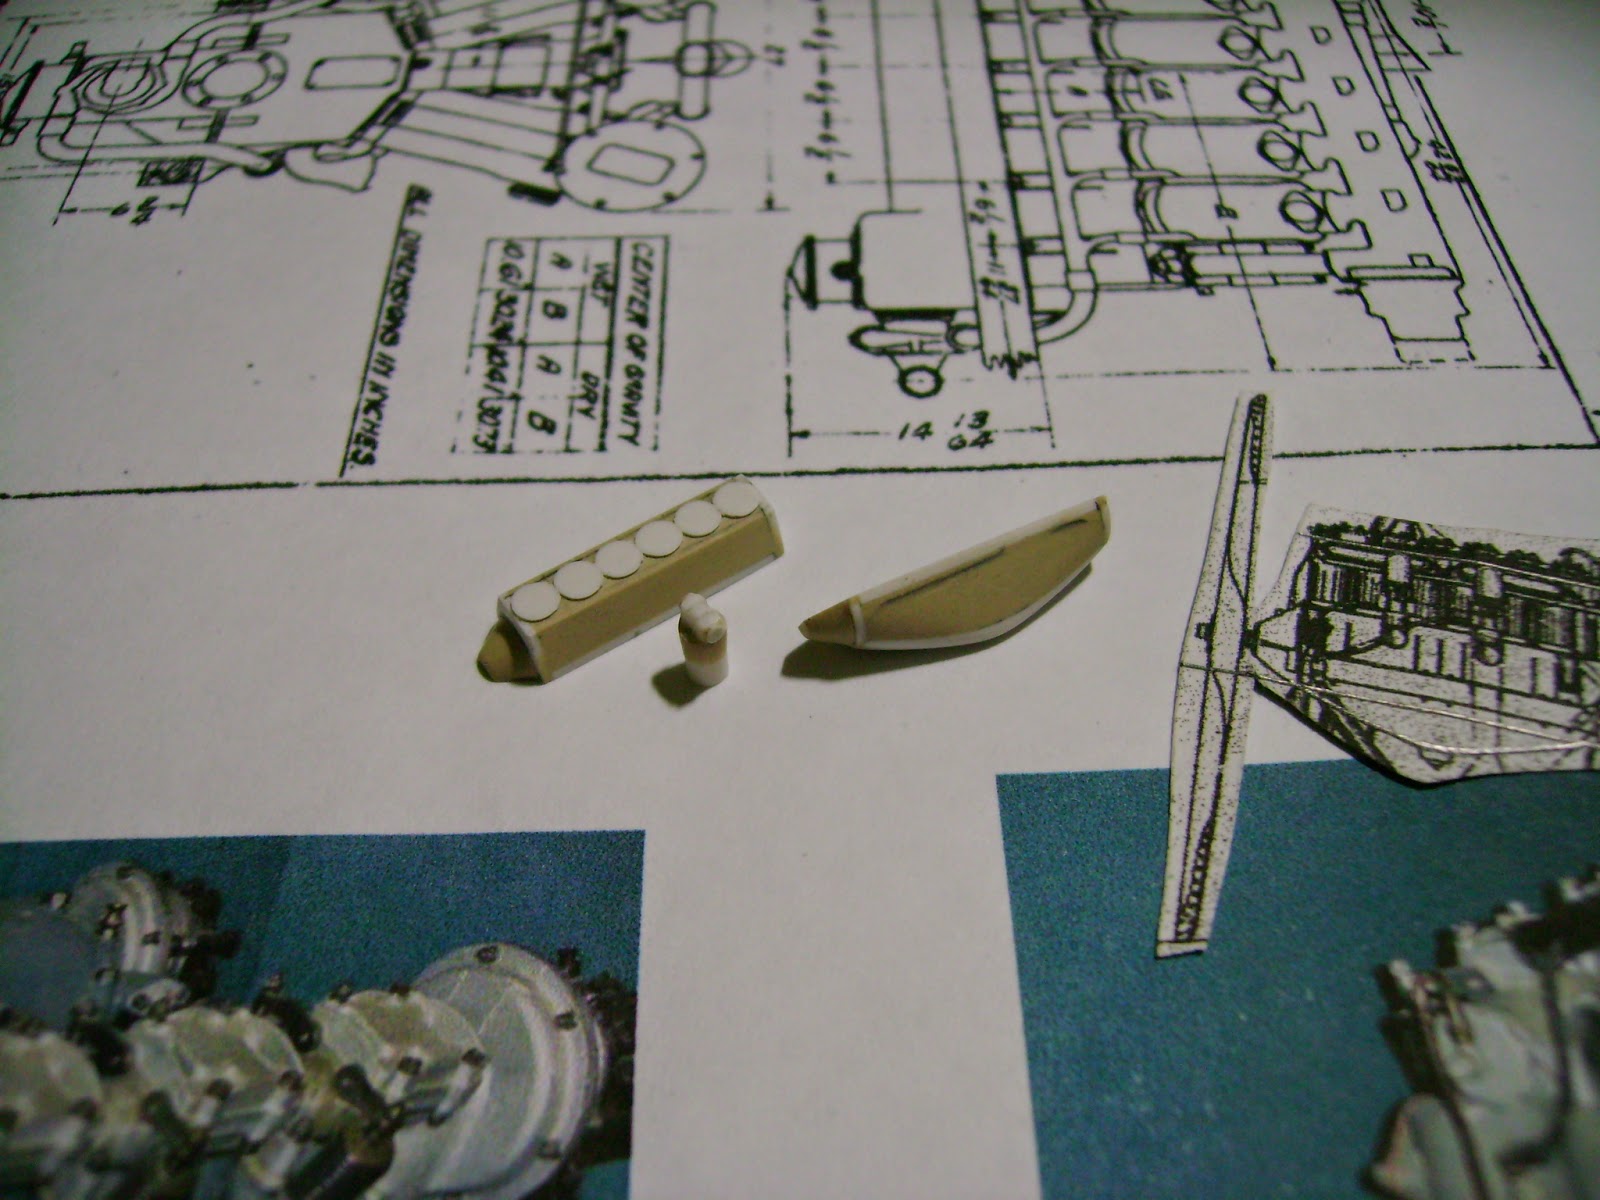
A NOTE ON MATIAS HAGEN SUPERB ENGINES:
Matias Hagen is a master modeler of unbelievable talent that lives in Argentina. Due to the exchange policy it is at the moment very difficult to acquire imports and even to buy imported supplies locally.
What we modelers in most countries take for granted, that you can buy what you need at a reasonable price, is not the case for Matias. He makes up for that with excruciating patience, unmatched ability, painstaking dedication and nothing less than brilliant results. Matias is no doubt one of the best modelers I have ever seen, and I have seen his creation with my own eyes when I visited Argentina. What he does is something that sometimes defies understanding, because mind you: very limited access to materials and tools, no CAD or 3D printer here, extremely limited resources to spend on the hobby. How can he pull these wonders off defies reason.
Here are some of his casts, in this case a Hall-Scott and a Mercedes IV (Matias' photos of his workbench):


A link to Matias' page can be found on the right of the main page of the blog with other links.
Worth a visit. Write to him if you like what you see. I definitely do.
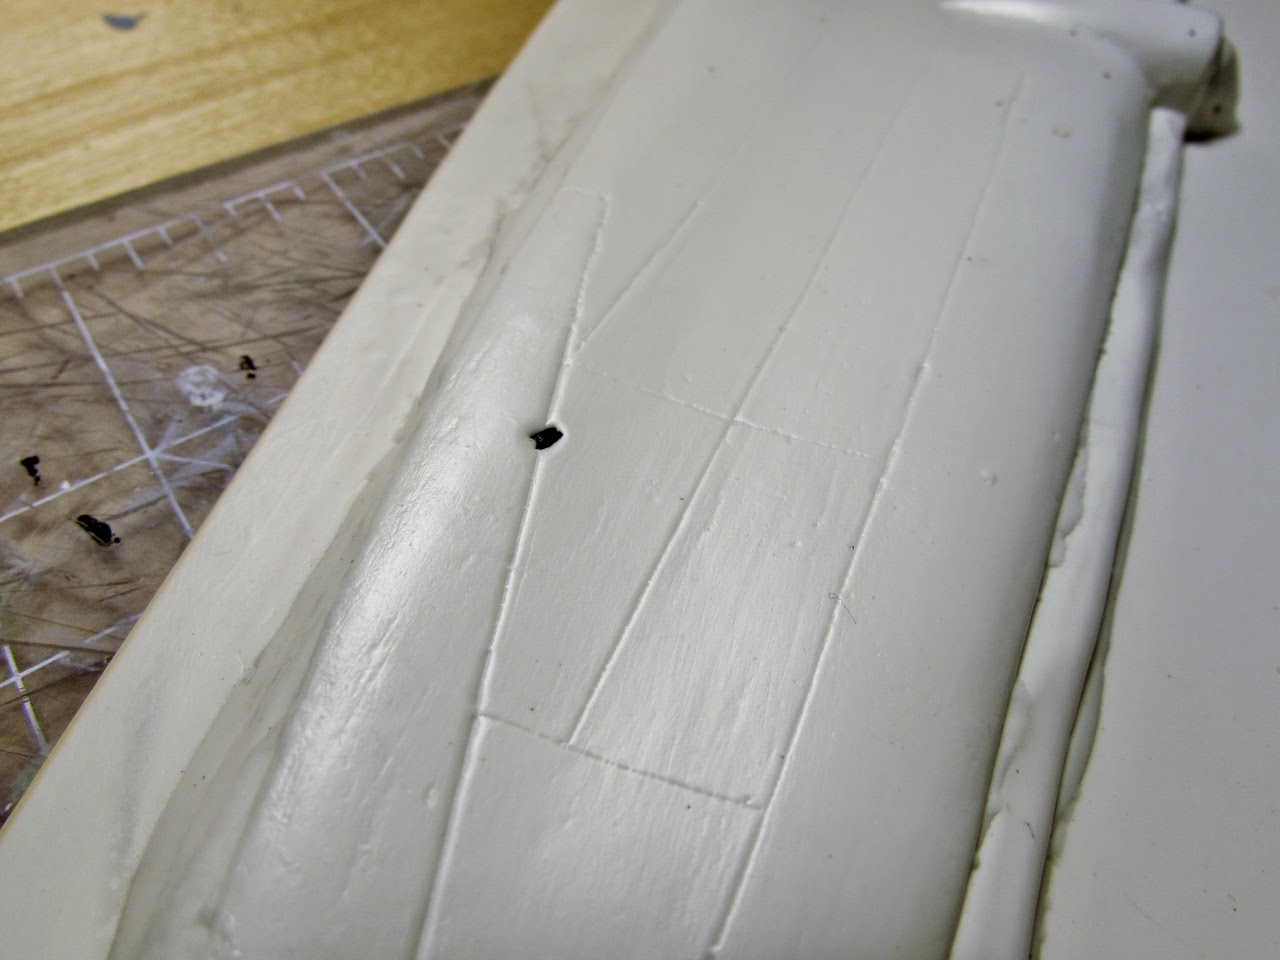
There is another inaccuracy that has to be dealt with in the kit. The engine was very slightly displaced from the gondola symmetry axis to one side. This shift was symmetrical, meaning all engines were "outwards" from where there should have normally been. The kit has this feature incorporated...but the displacement is to the wrong side (see attached photos showing the kit's engraved position for the cut). Whilst the kit has the engine moved towards the fuselage, the reality (and good plans) shows them moved towards the wingtip. Furthermore, the kit's shift is too pronounced, of about 1.5 millimeters, when it should be of about 0.5 millimeters:


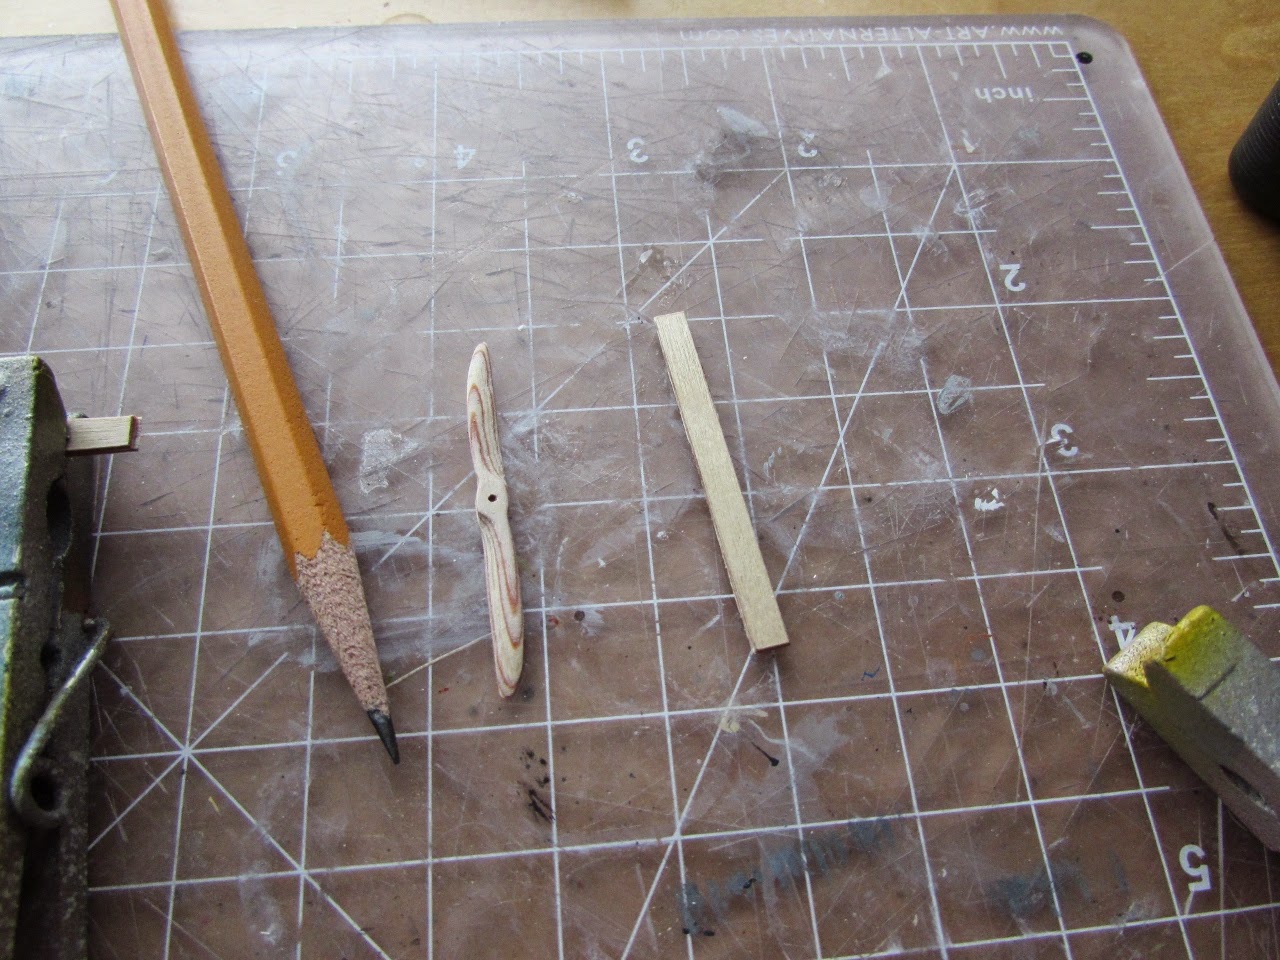
My model will not have one (not in photos on this particular configuration) but anyway here is one of the many ways of making one:


"Hi. I have been reliably informed that this machine was
scrapped by that little known government department which monitors style and
fashion, anything that shape needs to be discouraged.
It was actually their idea to use the camouflage skinning so
it might go unnoticed on airport dispersal areas. This only accentuated the
"interesting" appearance of this carbuncle with wings.
The natural history section of government felt the shape was
in fact prejudicial to whales and would result in increased whaling. A little
known fact is that the head of this section was related to the Pankhurst family
and she was concerned that this would lead to a further proliferation of
whalebone corsets.
Seaside
town councils discovered the deckchair plan which caused great fear that people
would choose to sit on deckchairs inside this flying whale instead and tying
knots in the corners of hankies which
were then worn as hats and rolling up ones trouser legs to expose a
gentleman's ankles. This threat would empty beaches and seriously jeopardize
the seaside retirement plans.
There are other reasons which have yet to be revealed due to
the hundred year rule and Fox (Mulder, not Fox News) expects massive reductions
to those files unless, of course, they were lost in the flood of '51. Flood actually not related to wet weather:
just MI 6 ' s tea urn leaking.
Therefore M'lud i conclude there it is therefore obvious,
considering the above that this "aircraft" never survived.
Signed
An informed but secret friend
Andrew Nickeas, Dragon-slayer (by appointment to her Majesty the Queen
)
A photoetched ladder is prepared:


Incidentally, the model at this stage looks like an unauthorized clone of the Zepp Staaken plane (this is, by the way, an uncorroborated apocryphal story) used by Evil Geniuz Zoenke, supposedly called "Ze Unfarben Gerat" or "Schwartz Helga"
It was used by Zoenke as a transport for his army of zekretarien:


Printing the lozenge decals was not an easy task, there were several failed attempts trying to coordinate my computer screen rendition of the colors and my printer interpretation of them, plus minor changes induced by the addition of the clear varnish (I use an inkjet printer), so the final results are not that close to what my Farben Konsultant, Herr Söenke, recommended, but such is modeling life:


The completed model is here in this same blog:
http://wingsofintent.blogspot.com/2015/07/zeppelin-staaken-e420-completed.html