

(This is the step-by-step building article, the completed model is in this post:
http://wingsofintent.blogspot.com/2018/01/boeing-247-national-parks-airways.html
Boeing, one of the most recognizable names in aviation*.
This was one of the earlier "modern" planes designed with passenger
transport in mind.
But let's not forget that, for example, Rohrbach in Germany built an all-metal, four-engined, streamlined cantilever passenger monoplane in 1920:
http://wingsofintent.blogspot.com/2015/07/zeppelin-staaken-e420-completed.html
So Boeing did not invent the wheel, but drew from all previous development in the field.
But alas, almost immediately, this new plane from Boeing will be left in the dust by the DC-2 and DC-3 from competitor Douglas.
The 247 (which did not have a name attached to it as it was with other manufacturers planes and would be customary in the future) could carry 10 passengers, pilot, copilot and flight
attendant (the latter on a foldable seat). The cabin was not ample, but offered
some comforts, only hindered by the two wing spars that had to be "jumped
over" as you transited the aisle. It had a simple
restroom and a minimal galley, although interiors varied. Many 247s were built, and came in two flavors: 247
and 247D, with different engines and engine nacelles, changes on the tail
surfaces hinge lines, props, antennas and other details. Some airframes had
other modifications as trial features. A large number of aviation companies,
small and large, used them. I had a great time researching many of them. Some
machines went to foreign countries, and some apparently were even converted to
cropdusters. Our brothers and sisters in Mexico used them
(planes fly over walls) in significant numbers.
There is a reason for that choice:
This is a time when ignorant, vulgar, unqualified people are
in office wielding power enough to try (among other despicable things) to sell National Parks estate and
property, and cut the funds they need to survive, against public opinion and
decades of governments that created, maintained, increased and funded them for
the benefit of all people.
The parks we all love, appreciate and care for, for us and
our posterity, now endangered by a band of incompetents that only understand
short term profit and egotistic power.
These dumbheads will come to pass, in shame, as the worst
government this country ever had, but the Parks will stay, their beauty,
magnificence and dignity protected, for all people. If we care enough to stand
for them.
And speaking of old and venerable, enter the Williams
Brothers Boeing 247D kit in 1/72.
The approach to the 247, as with the company's Northrop
Gamma, is a multi-subject one, providing parts for different versions. This was
a smart choice that allowed the manufacturer to milk the molds for a longer
time yet keeping interest. I wonder if ever an aftermarket company will release a
photoetched set, more decals and parts for the earlier 247 with the different
engine nacelles/props and rudder.
Most of us are familiar with this kit that has been released
many times in different liveries. I have one and a half kits. the
"one" I got from good friend and Master Unmodeller Mr. C.P. of Florida, the
"half" from Ebil Genius but also good friend Sönke. He sent just half
a kit due to his ebilness, furthermore, the half kit was partially glued and
painted. Now it became a spare parts donor for this project. No, not Sönke, the
kit.
Many (but not all) of the kits circulating are old,
therefore their decals could be compromised. Both decal sheets on my kits look
ok, so I'll keep them close to my chest since I plan to build more of these Ole
Boings. The decals for this version, though, are by Arctic Decals.
The kit is a mix of nice features (especially for the time
when it was first released) and early kit industry vestigial ones: it has a
nice interior, but raised panel lines, odd wing parts break-up,
"half" antenna and tail wheel (that we all know it is going to break
during puttying and sanding or before and will complicate painting) attached to
the fuselage halves, pin-and-hole locking devices, flash, some gaps, cabin door
to be posed open if desired, two styles of windshield, nice decal sheet (if it
is still usable), choice of rubber or conventional wheels, a box that doesn't
collapse under the weight of uncertainty, instructions that are, as usual, half
ok and half guess, and a very nice subject choice.
Let us remember that was Williams Brothers the manufacturer
that gave us (and it's still giving us) a break from the deluge of bomb loads and
machine guns that other manufacturers (and modelers) seem to be hypnotized
with.
The kit I have is injected in white styrene, that, as any
model-builder knows (and every manufacturer ignores) is a very poor choice,
since it makes it very difficult to see details and gather a good sense of depth
and such. I know, it's a good base for light colors, but please give me light
gray anytime, so I am not annoyed during the whole building project trying to
see the model joints/details.
* Also a company whose fame is occasionally sprinkled
-according to the news- by shameful financial misconduct, or plain violations
of law for which it has been many times fined:
It reminds me of the unfortunately common typical Corporate
business, with a "happy face" to the public side and a somewhat dirty behind to reality.
I like to believe (may be I am too naive) that Boeing had
better times, times for example when the Boeing 247 was created.
So, let's begin:
The plastic:


The wing spars that traversed the cabin space had some hollowed-out not present in the kit moldings, so first they are drilled:
 Then filed to shape:
 The steps, molded in the kit, are dimpled, so covers are fabricated:
 These four covers will be painted a rubber color and placed on top of the steps (as per photos) after the cabin floor is painted:
 As said in the header, the kit has some very good detail and some things that make you scratch your head.
Here are parts that are better than many similar ones produced much more recently. The door and its detail, the cowls with thinned lips, detailed bulkhead:
 And yet, instead of molding the seats perhaps flat on a "v" position in the sprue, it was chosen to mold them sideways, leaving a horrible and mismatched mold line. In the photo I started to correct them:
 And yet again, the nice detail of the side frames for the seats is nicely molded with no flash and good detail. Go figure:
 I use as always the coffee mesh filter to wash the small parts:
 Then I carefully put them on a paper towel to let them dry. Once again it's evident why white plastic is a bummer:
 Even the engines, for a kit this old, look ok and far better than more contemporary despicable efforts. The painted one is from Sönke (I'll use his', so he can be a 1% stockholder on the model):
 I decided to go for a full interior, so the doors of both, fore and aft cabin bulkheads were opened. For that I used Sönke's parts again, so if the cut went wrong no terrible consequences would ensue:
 The back of the flight attendant seat had was hollowed to avoid creating a sink hole in the mold, so it is filled with a piece of sprue rod matching the size:
 Once dry it will be cut flush:
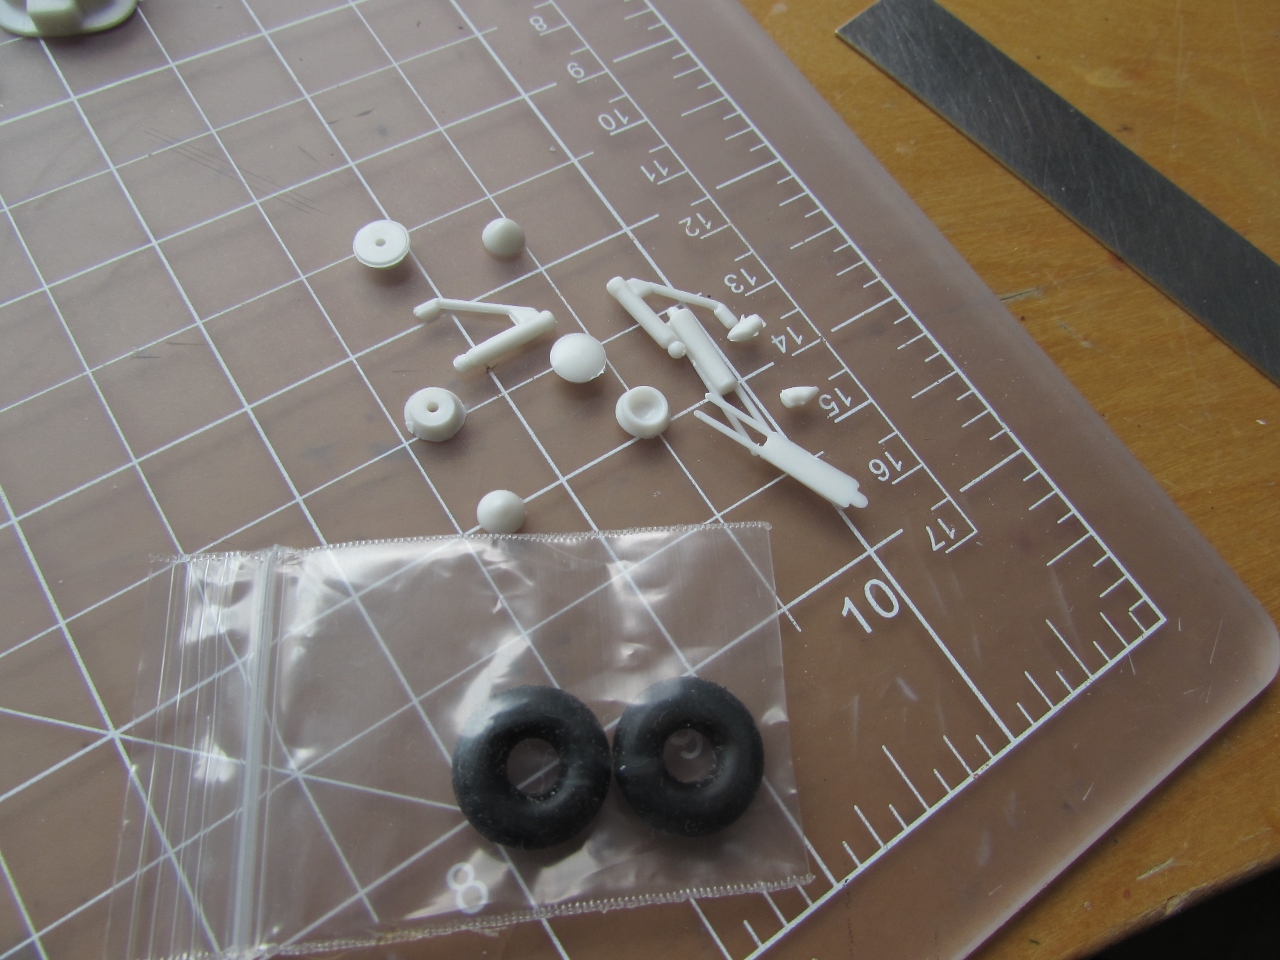
 Many pieces not needed for this version are stored away. The rubber wheels, that many modelers dread because of the fear of rubber degradation, were in perfect condition after many years. I have 17 year old models with O ring wheels that are in impeccable state. May be varnish or paint is the culprit in some cases, but I am using the plastic ones anyway:
 A general view of the smaller parts. Some of the halves have been glued together:
 Now you can adjust the fit of the horizontal stabilizers, which is a bit off:
 I will have the nose opened, and the hatch and the fore cargo compartment detailed. The horrid white plastic is marked with a pencil, to be able to %$&#$6t6 see where I have to cut:
 Nose separated:
 A "corrugated" bulkhead is traced using the contour gauge, and cut:
 And then staggered as
per original. The upper recess and shelf contained the radio. The nose hatch is there, but perhaps a vac copy will be
made. It will need some structure, as seen in photos. We'll see:
And then staggered as
per original. The upper recess and shelf contained the radio. The nose hatch is there, but perhaps a vac copy will be
made. It will need some structure, as seen in photos. We'll see:
 And now for something completely different:
I took this photo yesterday at sunset from our backyard:
 I finally went for the vacuum-formed nose hatch:
 Thus obtaining a more credible, thinner shell:
 The monarchs meanwhile enjoy our milkweed garden, especially created for them. Take that, Monsanto! and since we are at it, get the heck out of Kauai, Hawaii, you basterds!:
 The kit's control columns are replaced with slightly better Aeroclub items (by the way, why nobody does this useful aftermarket parts anymore?, with the current technology it should be better and cheaper):
 The nose hatch is given some detail. The emergency engine crank was stored there tied to those bars:
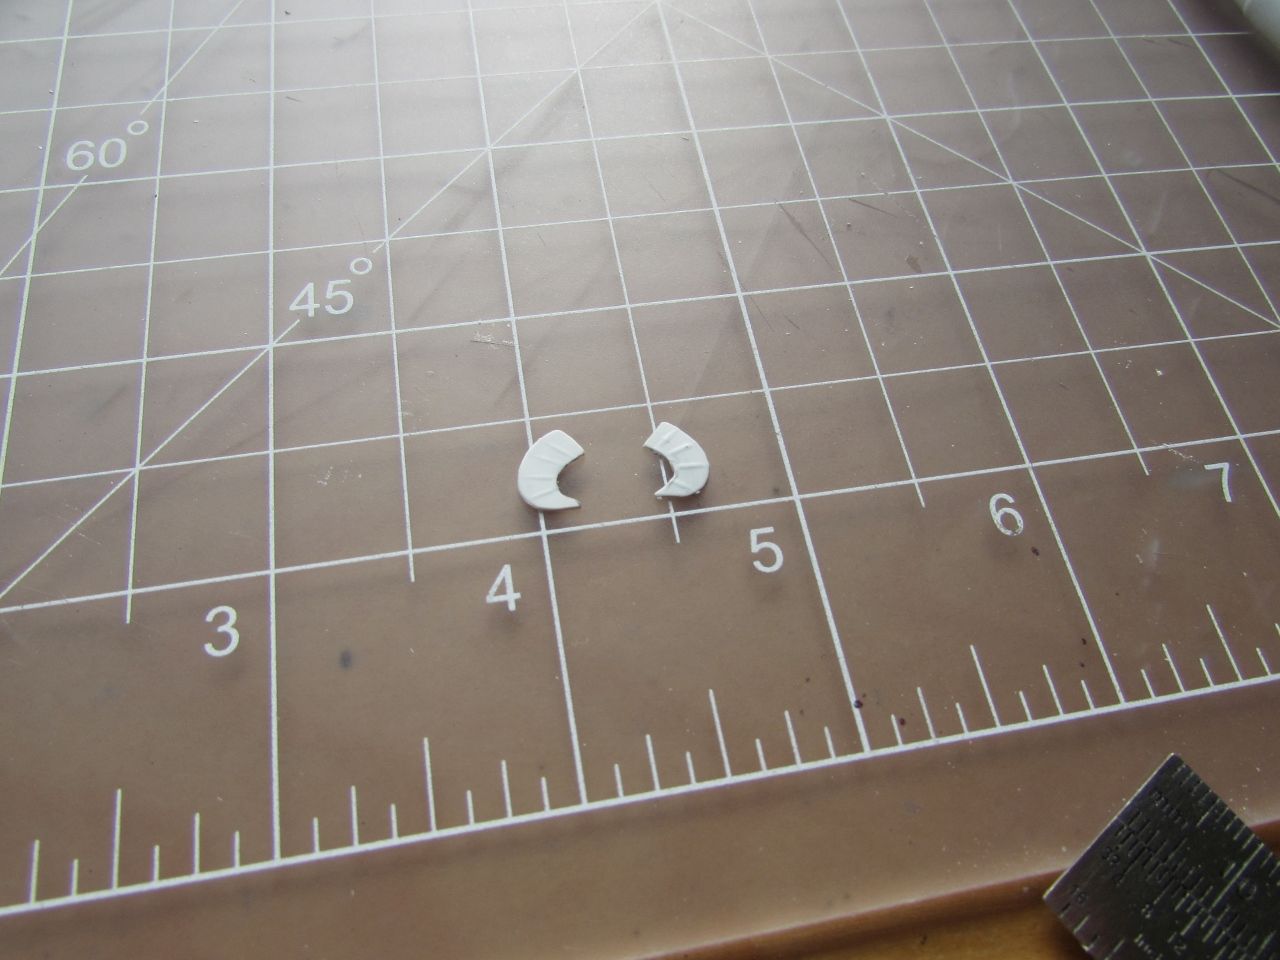
 The anti-glare shields for the wing lights. Not all 247 had them:
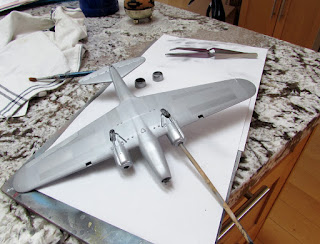
 The wing parts' fit is one of the kit's weakest points. I used the upper wing halves as a bed to glue first just the three lower panels together (as you see them) and get a good, even seam (but not gluing them t the upper wing parts, just taping them). The three parts of the lower wing have butt joints with no guides or self-alignment. This sub-assembly will eventually be glued to the other two upper parts. Not a good fit and perhaps not the best engineering -in this area-:
 The visible wheel well area is marked:
 and the structure is simulated by a piece of "corrugated" styrene that will be painted black and dry-brushed before gluing the upper wing parts:
 After occluding the landing light areas and painting the bays, the upper halves are glued and secured:
 Since the nacelles are a fiddly fit I taped and clamped them to secure alignment of upper an lower halves:
 The wing-to-fuselage fit seems ok. Some bathroom elements are readied:
 The toilet was one of comforts the 247 offered to its passengers. A
French-Canadian passenger, Alain Bourret, was said to be fascinated by
it and remained in the restroom for most of the flight:
The toilet was one of comforts the 247 offered to its passengers. A
French-Canadian passenger, Alain Bourret, was said to be fascinated by
it and remained in the restroom for most of the flight:
 Some of the bulkheads are glued in place whilst a modicum of structural detail is added. The hatch for the opened cargo door is fashioned:
 These are the small gaps that need filling with Milliput or similar:

 The kit's exhaust pipes have the side closest to the cowls a tad short, so I cut them off and inserted metal ones a bit longer to make them go into the cowls, to match photos
 Work on the fuselage sides continues:
 The seats are composed of three parts, the body and the sides. The sides have minute pips that go into minute dimples on the body, giving the right position. Another nice feature of the kit:
 Kit parts and scratched add-ons so far. The black elements clamped on the tiny cloth-pins (for doll houses) are brass screen sections painted black to simulate the luggage nets:
 The console gets a bit of generic detail, as it will not be really visible:
 An airbrushing session with many changes of color, in order that assembly can proceed.
Some detail will be picked up by hand:

 Cabin and cockpit assembled. The cabin spar steps were given their rubber covers:
 More work is done on the fuselage interior:
 Cockpit and bathroom doors are added, toilet and foldable sink in place, luggage nets in place:
 The transparencies are good, with very little flash:
 The landing lights already have molded the glare shields:
 The windows have a lip that matches the fuselage. This is a wonderful feature absent nowadays from so many -much modern- kits:
 The fit of the windows is perfect, and I carefully pressed them in place with the rubber tip of a pencil. Again, contemporary kits seldom fit so well:
 After a coat of primer all blemishes are treated with liquid microfiller:
 Look at the details on the mold, from decades ago. I repeat once more: you wish you have this leverl of detail on some contemporary kits:
 The canopy comes in two parts you have to glue together. The fit is fair, but watch out for those little triangular indentations on the sides at the front, you will have to trim the parts carefully and play a little to get the transparency to get to fit ok:
 Oops! almost forgot the toilet paper!:
 The printed curtains are folded and glued over themselves, since they are going to be seen from both sides:
 Then the curtains are cut and glued to the two-rail arrangement on the fuselage:
 Cabin and cockpit in place. The canopy was assembled, and a custom cut at the top made to represent the emergency exit hatch, which will be posed open in the finished model:
 The fuselage halves are united:
 The airliner door was lined, and did not show the structure as the kit door does, so another one is fashioned:


 If you are careful, the canopy will be a good fit:
 The wing is glued and held in place. Once again, careful dry-fitting and some filing will ensure a happy marriage:
 Horizontal tail on:
 The seams are puttied and sanded. This actions, as we all now -and hate so much- will have to be repeated a few more times:

 The props, through a complex set of masks, are given the black backs and the tri-colored tips, phew!
Six masks per blade, 36 total:


 The masked canopy goes on:
 Some putty to work the seam:
 Light coat of white primer:
 Other ancillary parts are being pre-painted:

 Now is the time to for blemishes and correct them:
 The exhausts have been slightly modified to get them a bit closer to reality:
 The black coat in preparation for the metal paint is applied:
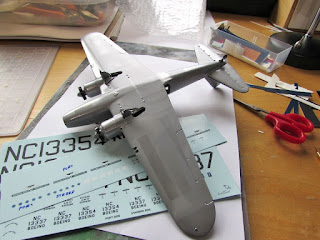
 Since the original plane had a somewhat patchy look due the anodized grey treatment of the aluminium, a home-brewed metallic grey is airbrushed as a base:
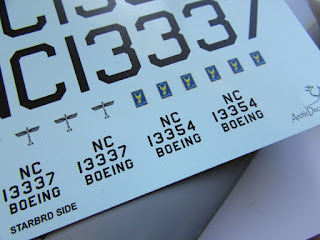
 The superb decal sheet arrived from Arctic Decals in Finland:


 The 247 shows in photos different finishes that were utilized at
different times. The machine I am reproducing, in National Parks Airways
livery, had an anodized finish that was anything but consistent. Many
very different hues due to the anodizing process used at the time are
shown, making the plane skin look like patchwork. The anodized aluminum
is not the usual shiny metal seen in more modern finishes, but somewhat
dulled and greyed. I used a metalized grey as a base, and I am now
airbrushing aluminum hues that will be later on toned down with an
overall coat.
The 247 shows in photos different finishes that were utilized at
different times. The machine I am reproducing, in National Parks Airways
livery, had an anodized finish that was anything but consistent. Many
very different hues due to the anodizing process used at the time are
shown, making the plane skin look like patchwork. The anodized aluminum
is not the usual shiny metal seen in more modern finishes, but somewhat
dulled and greyed. I used a metalized grey as a base, and I am now
airbrushing aluminum hues that will be later on toned down with an
overall coat.
The slow and unexciting process of masking areas to airbrush different hues of paint begins.
 Base and three hues so far. Three more hues will be used.
 A final mist is applied to subdue the differences (but just a bit, photos show a real patchwork):

 After the anti-glare panel on the nose is painted, a clear coat will be applied to provide a base for the decals.
 Masks off:


Here are parts that are better than many similar ones produced much more recently. The door and its detail, the cowls with thinned lips, detailed bulkhead:


I took this photo yesterday at sunset from our backyard:


Some detail will be picked up by hand:

Details painted, seat belts added to all seats, inst. panel decal in place:


Six masks per blade, 36 total:


The slow and unexciting process of masking areas to airbrush different hues of paint begins.


Landing gear, engines, landing lights in place:
 More parts are gradually added, and some of the decals are placed:

 The quality is very high. This type of decal requires that you cut and trim each subject separately:

 The kit´s landing lights are a bit chunky, so I separated the anti-glare
shields for later use and prepared my own lenses and clear covers:
The kit´s landing lights are a bit chunky, so I separated the anti-glare
shields for later use and prepared my own lenses and clear covers:

 Cargo door prepared:
 Nice printing quality:
 The crack appears in photos to be attached to the nose hatch:


 More decals and details are added, like the antennas, the nose insulator, the anti-glare shields, props, trim tab actuators (four of them), etc.:
 A little step ladder is made to help passengers board as per contemporary images:

To be continued.....


To be continued.....