

(The complete model is here):
https://wingsofintent.blogspot.com/2021/08/boeing-40b-4-universalrobertson.html
The former universal "brand" image, before addition of Robertson:

(Another photo can be seen here:
https://www.aahs-online.org/journals/jrnl_image.php?jrnl=v60n4&image=4
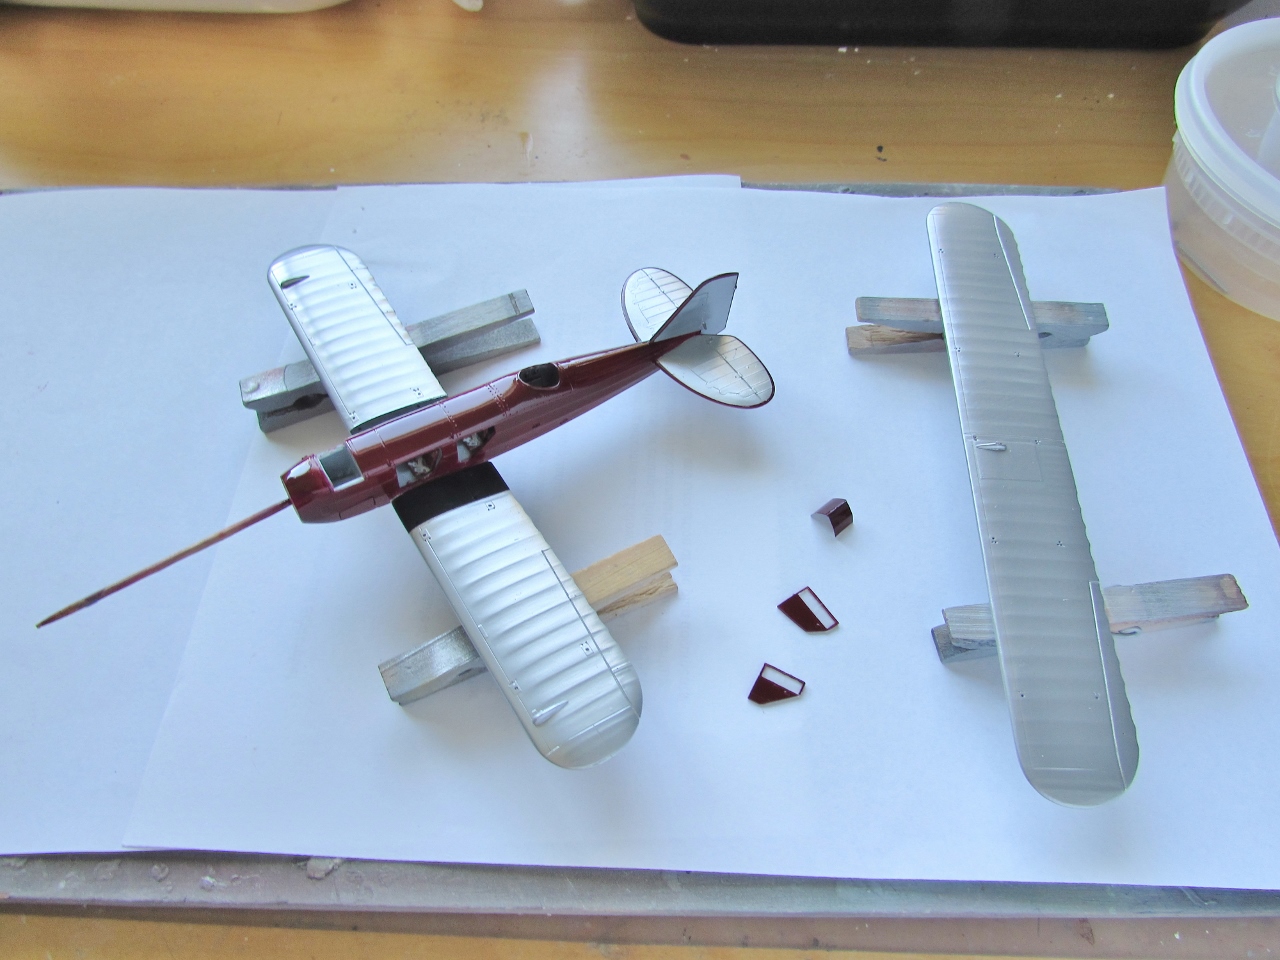
Here is the start of the second Boeing 40 mailplane. It became the plane you see here after very convoluted and quite sneaky corporate maneuvers (surprise!), the child of the marriage of Universal Air Lines System with Robertson Aircraft Corporation. It began life as a 40C but was converted to 40B-4 by upgrading to a P&W Hornet:

Once again the CMR kit is used as a base for the model, and the construction path will follow -more or less- that of the United Airlines model started shortly ago:
https://wingsofintent.blogspot.com/2021/04/boeing-model-40b-4-cmr-172nd-resin.html
I have chosen this particular subject because it is not included on the kit's decal sheet and for being the paint scheme so very appealing: a deep burgundy (not quite maroon as stated on the AAHS photo), silver, and in addition the customary high-vis orange top wing can be appreciated on the photo -but not mentioned in the caption.
The assembly starts yet again carefully separating the parts from their casting blocks, and sanding and rinsing them under running water to avoid the dust. The parts not needed for this particular plane (both engines are incorrect, as explained in the other build) like the headrest fairing, the sole wing light (inaccurate), the long section of the exhaust under the fuselage (this plane kept the "C" dual arrangement), the prop (too "thin) and miscellaneous replaceable odds and ends:

The interior pan floor came broken (the missing bit not to be found) but the manufacturer noticed this and included another one... missing a bulkhead. Still, in this case two wrongs will make a right, with the help of some transplanted bulkhead:

Still mightily impressed by the level and quality of the detail present, quite exceptional, honestly.
The spare interior pan was also an imperfect poor, and the blemish would have impeded the wing slot to get in place:


The parts are given a coat of primer:

The transparencies, as the ones in the previous build, were not really clear. They were bathed in the customary acrylic floor polish to some improvement:


The upper wing in both kits was the only problematic area. As with the first kit, the leading edge has to be fixed:


This plane requires a double exhaust (the "C" version of this kit had it), thus the ring has to be modified, and the long exhausts fabricated with alu tube:


As you can see I have also assembled the kit's engine (to the right), just because, and perhaps to use it later on another model as a Wasp, a size that is closer to it.The little tweezers provided didn't do it for me, as parts kept flying to the Ping and Twang dimensions (you get some spares, but not enough if you keep botching), never to be found again in this realm. I just switched to good quality metal jewelry tweezers. Now comes the dreaded moment of adding the pushrods, something I fear due to my not so good sight and lack of depth sense (right eye not working properly):

And we start with the pushrods...


All the pushrods are in. On the background, seats are being given their belts and doors the wooden color with oils:

A propeller is scratch-built to substitute the kit's too thin rendition. The engine is ready, and the doors are ready to have their external side painted together with the rest of the model:

And some painting and re-priming of the top wing that had the leading issues:

My initial impression that the interior will fit comfortably was mistaken. The pan had to be carefully sanded in order to let the fuselage halves close properly. The only remaining elements to be added are the ceiling lights:


The lower wings are given their light recesses. The plafond for the cabin is readied:

Fuselage closed and tail feathers on. Prop, step, mail hold cover and wheel covers painted :

The lower wings are added. They are not "plug and play", you have to align them and work a bit the tongue, the slot and the contact surfaces to get a good fit, same as the horizontal tail. You can see the extra parts that oppose the landing lights on the upper surface of the lower wings:


What I hope is the last coat of primer for everything:

The black of the walkways is airbrushed, as well as a white base on top of the upper wing for the orange. This plane had no orange on the bottom surface of the lower wing:

Some postal packages and mail bags are created to be stored in the opened mail hold of both models:

With the black walkways masked, the rest of the model is painted white, as well as the other side of the upper wing. Aluminium color will then be applied, the tail feathers and lower wing masked, and the burgundy color of the fuselage and orange on the top of the upper wing will follow. Even at this stage, when the model seems almost complete, it's still a long way to Tipperary:

The kit comes with two vacuformed windshields, they are ok, but just a little crude, so I made a couple and masked them:


Silver is airbrushed on the tail feathers and lower wing, and masked for the application of the burgundy color. Once again the application of the kit's masks was a laborious task that required a few tries to obtain an even margin around the surfaces:

The next color is applied, as well as others to other parts taking advantage of the session:


Some progress was made:


All the tail-related elements (rigging, control cables, struts) are added, as well as the wing landing lights and the structure of the landing gear. I replaced the kit's tail struts, which were a bit wider than reality and had length issues, with metal airfoiled material:


The cabin doors are added:

I wanted to find the possible reasons for the kit's struts seemingly not being the right size. A small flier included in the kit is the only front view from where measures could be taken, but it's somewhat smaller than the kit's parts, whilst the plans included in the instructions are somewhat larger. So no help there. Nonetheless, the front view seems to support the assessment that the out-most struts are a bit longer than they should be, and the cabane ones shorter. So, as with the other model of the Boeing 40 I am building, I am replacing most of the kit's resin struts (which are not rigid enough to my liking anyway) with metal airfoiled struts:


And the top wing is on with some of the struts installed for alignment:

All struts in, and some rigging:

All rigging is in place, as well as engine, windscreen, aileron cables and mail hold cover. Still to go are exhausts, wheels, prop, the foldable step, and that thing that I am surely forgetting about until after the completed model photos are taken:

The home-made twin long exhausts are added, as well as the wheels. The foldable step recess can be seen, with the crank and a structural tube. The step will be added at the end, together with the prop, to avoid breakage during manipulation for the decaling and further addition of details:


Last additions are the twin flare tubes underneath the fuselage:

The beautiful Arctic Decals set arrived, so I can proceed now with the build:

Decals' application begins:

To be continued....