
(This is the step-by-step construction article. For the completed model please go here:
https://wingsofintent.blogspot.com/2018/07/lockheed-electra-10e-amelia-earhart.html
https://wingsofintent.blogspot.com/2018/07/lockheed-electra-10e-amelia-earhart.html
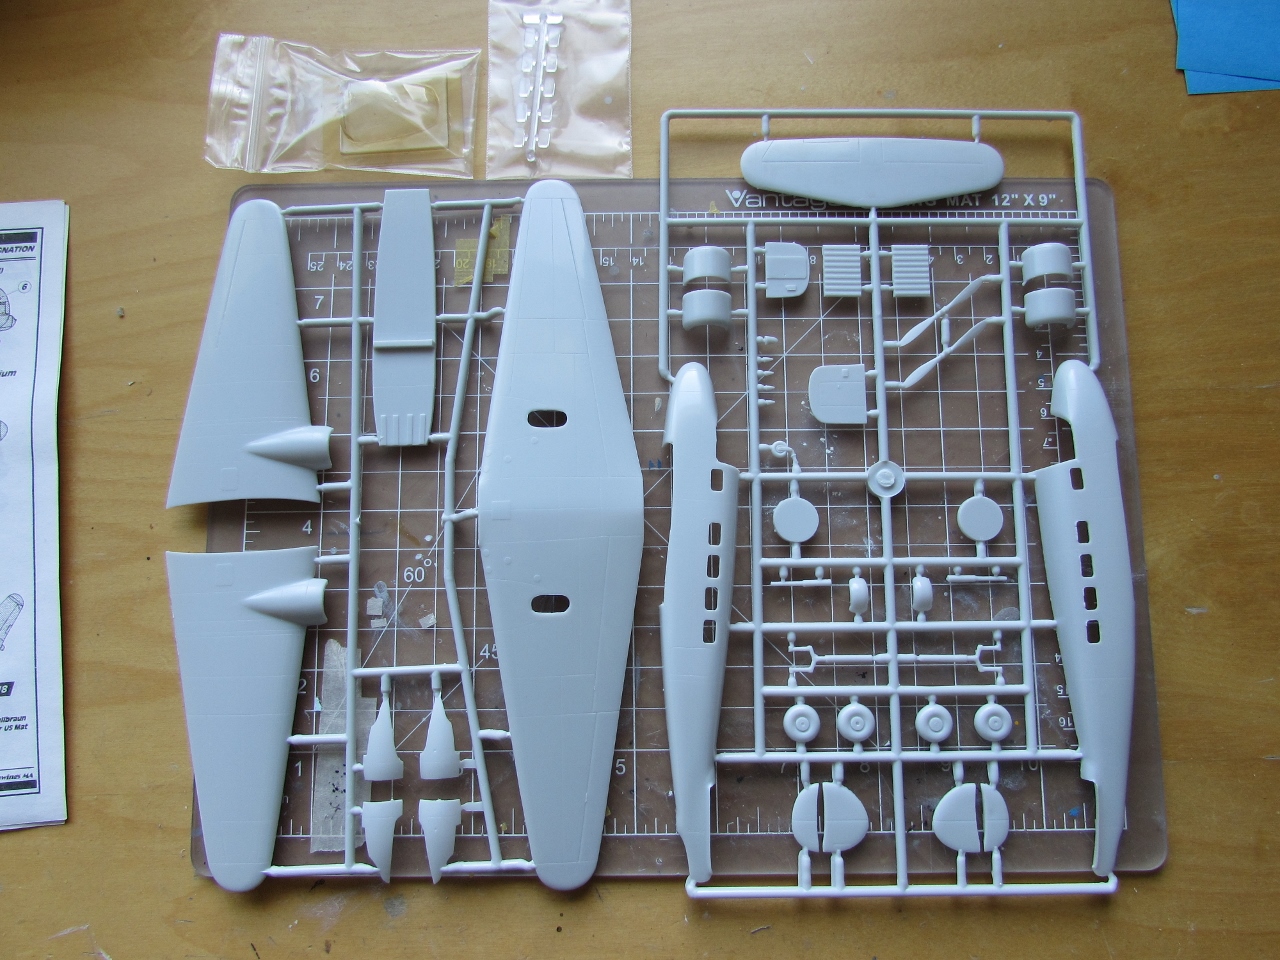
Early releases from Special Hobby belong to that kit category that could be
best described as "I am glad they kitted it, I am glad it does exists and
I can buy it and build it, I only wish it would have been a little bit better".
Hey, I am grateful for some of their releases, I have built a few. But they sometimes
present some issues:
- Instruction of the type of "This part goes somewhere
in this area, you figure it out" (as in this kit's landing gear).
- Sprue gates that are often located in places that
compromise fine detail (as in this kit's props, for example).
- Wishful thinking (as in this model, where drawings -more
like sketches- of Earhart's plane are presented, but you have no alternate
parts (fuel tanks for the interior, nose lights, antenna loop, different LG
mechanism, for example), nor details or instructions good enough to serve as a
guide for the adaptation.
- Resin bits that, if welcome, present occasionally fit problems.
- Oversize small parts (in this case the dorsal fuselage
vents)
- Vacuum-formed canopies difficult to trim and blend with
the surroundings.
- No masks whatsoever, even if this canopy needs it, nor
templates to make yours.
- Inaccurate color calls or details (Earhart plane had
International Orange painted areas).
- The fit is not the best on some parts.
- No locating devices per se, but there are marks for some
parts.
- Ejector towers and the occasional sink marks are present.
Not difficult to overcome, but annoying.
Yes, I know, they are short
run technology. But somehow they give you a long run.
Now, this was released I think in 1999, so it
is not a newly released kit. They have improved a lot since then.
In any case, the two other Electra kits I know of (Execuform
and Dekno's) would require quite a bit of effort themselves.
The model came to me with no resin bits, so some cheeky
monkey at some point sold it second hand -to the friend that finally got it for
me- without them. Thanks very much, you despicable rat. Not terrible, since the
engines are very common (P&W R985 Wasp Junior) and can be ordered from
different manufacturers of your choice if need be. The best, by far, are the
Small Stuff (72113) ones. White metal "Vintage" Aeroclub (E012) and
resin Engines & Things (72021) are options too. The instrument panel can be
made; the seats, control column, etc., can be sourced from the spares bin or
manufactured. The Earhart particular bits (mainly long range fuel tanks,
navigator station and miscellaneous details) will have to be fabricated.
We'll see if this one has better luck than its full size homologous and manages to arrive to its more discrete destination, the boxes where I keep all completed models.
After a very large number of hours on the Net and studying photographs -lots and lots of photographs-, one can see that this same plane went through a large number of small modifications during its life.Window arrangement: window pane present or not on door. Additional large window aft fuselage right side or not.
Landing gear: Retracting hydraulic jack or circular (likely electrical) retraction gear.
Wire antenna: connecting wire to fuselage from mast to side or later from one of the wires midspan.
Loop antenna: First faired directional finder, then small thick loop.
Cowls: painted in Purdue University colors for Bendix race.
Color trim: Like above, or no color anywhere: just aluminium airframe overall; or -likely- International Orange on L.E. (above and bellow) and upper surface of stabilizer, bordered with very thin pinstripe, likely black.
Props with and without spinners.
At one point at the beginning of its life the plane's pilot's hatch opened (quite stupidly) to the other side (hinge on the left instead of on the spine).
And a large number of other details.
Study your references and chose according to place in timeline represented!
Fuselage long range tanks, first console, parts to make the LG accurate:


Lenses for the nose, navigator station accoutrements, miscellaneous bits:

All parts have to be individually cleaned up to get rid of sprue gates, small flash and rough edges:


 The nose tip is cut to later represent the hatch:
 The plastic is thick, so some thinning is necessary:
 Shaving little amounts at a time:
 The nose tip halves are glued. A vacuum-formed, thinner part will be later produced from it:
 Bulkheads for the nose compartment and the back of the restroom are fashioned:

 Only two of the windows remained in Amelia's plane, plus the one at the door and a larger one added at the back where the restroom was on the right side (that are not present at certain stages, earlier -door window- and later aft-most added window). So the blanked windows are pressed-in and secured form inside and out with cyano glue. I will leave the "clear" windows for later addition:

 Drawings describe a canister for the physiological needs of the occupants, so one is made from metal:
 In consideration of the lady pilot, a wood seat is provided:
 Long trips require ample supply of...commodities. Here the toilet roll is being made from tissue paper:


 My test pilot, Alain Gilbert, approves of the installations with a sigh of relief:


 The left rudder was the one with the trim tab, so don't misplace it:
 The cap for the nacelle is too large...
 ...and the walls of the cowl too thick:
 The cowls' trailing edges are thinned down:
 Now those caps fit in, but I think I will make other arrangements:
 The lower wing halves are glued on. Their chord is slightly shorter than on the upper wing half:
 A pass with the sanding stick takes care of the difference:
 The lower halves of the nacelle are glued at their spine:
 And positioned on the wing to set at the right angle:
 Elevators are separated. This is not easy at all, the plastic is very hard, and the stab quite thick:

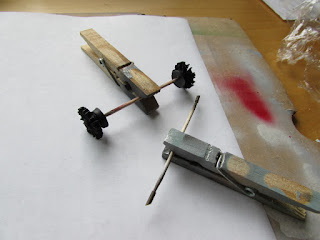
 The legs are drilled to be able to accept an axle:


 Nose hatch ready with the holes for the lights:
 Other details are added, like bulkheads, radio, a small strip of instruments close to the navigator's window, etc.:


 Sand the pointy tail of the teardrop:
 Cut it off:
 Sand the round head of the teardrop:
 Cut it off:
 Glued head and tail together:
 Get a piece of leftover strut material or sand one to shape, cut as desired:
 Glue to teardrop at the desired angle:
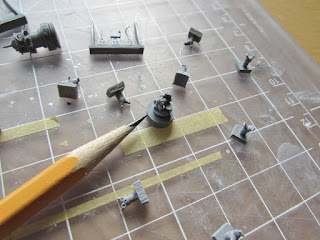
 The "gears" of the legs are represented with a suitable piece of leftover photo-etched material:

 More detail added to legs:
 Some detail on the nacelles:


 Navigator table with the chronometers:
 Fire extinguisher and raft:


 Logos on the props:
 More progress:


 Oopsy-poopsy! kit's cowls a bit small (as noted by other modelers assembling this kit before:
 The difference is not really big, so you either "shave" the rocker covers or you make new cowls...

 Not fortunate enough to find suitable cowls in the spares bin? do not despair!
The Mattel Psychedelic machine will produce vac copies slightly bigger, enough to fit the engine inside:
 There you go!
 Problem solved.

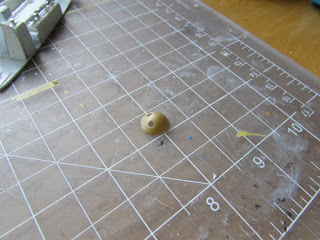
 Glue a round piece of basswood, sand to shape:
 And another way to make a cowl:

 Intake tubes in place. This was easy.
You get one spare cylinder, one spare intake, and some spares for really difficult (spark plug cable, pushrods) or small parts. As said, I won't be using some of them:

 Here is how they are positioned to measure the cut:
 After a lot of mistakes I managed to do all spark plugs and leads, if in a sort of sloppy way. The pushrods also gave my eyes a lot of trouble. I do not have the sight for this kind of work anymore, even with magnification, so I am doing a very so-so job.
Younger modelers or the ones with good sight may not have such issues:

 Lead:
Lead:
 Finished engine with black base coat:
 Ahem...
After finishing the first engine, I realized I was using the wrong one. The correct one for the 10E version used by Amelia was the Pratt & Whitney R-1340 Wasp.
Small stuff also has that one, so take not if you are interested.
Radial Engines and Wheels and Engines & Things from Canada also sell those.
Oh my oh my.
Anyways, let's finish this one before changing engines. Sigh....
 Ole venerable Aeroclub's
 Radial Engines and Wheels:
 New cowls in process:
 There:
 Presto!:
 Voilà:

 Lack of locating devices and mold mismatches required a bit of persuasion...:


 Wing on:
 Tail on:

 The plastic itself became brittle, and is being dealt with carefully.
The windows and edges are very poorly, faintly defined:
 Trimming little by little the fit is somehow improved, but the canopy seems more to want to go over the edges, as in wrapping around the fuselage, that to to match edge against edge:


 The fit issues mentioned above required a solution involving a supplement of styrene stick glued inside the canopy to pack the thickness a bit and act as reinforcement:
 Once glued, the overlapping bit will be sanded and blended-in as well as possible:


 Whilst looking at photos, I noticed a tie-down in the vicinity, so one was made too:


 Canopies, when they are not good, are a veritable pain in the singularity:


 Locations for those parts are drilled:
 Even the lead wire connection to the "V" antenna location is drilled close to the window:
 The exhaust stacks are made from brass:
 A dry run:

 Once they have been carved, you may separate them from the sprue and cut them a bit shorter:
 The forward-facing aft vent is not roundish, but somehow squatted, so one is carved:


 Parts in place. The exhaust vents are displaced to the right, not in the centerline:
 Antenna and Pitots in place. Again, the last flight had the port row removed. Notice the stem in the middle to secure the wire antenna midway:

 Ready for the paint session:


 Example of an area treated:
 Another section:


 Some I had already prepared but forgot to add, so now they are on:
 The hatch I vaguely recall throwing it away thinking that was a leftover piece of plastic. Well done, me.
Another one is fashioned:

 Walkways prepared. Will not be applied until the very end, to preserve the mat finish (anti-skid):
 The fuel cap covers are added as decals. The one in the middle wasn't one, but there is piece of metal anyway there in photos:
 Some covers seen in photos close to the Pitots are punched and applied:
 The black lines are applied as decal strips:


Knock-knock.
Who is it?
Fred Noonan.
Come in.
There is no door.
Oh, ask the modeller to open one:

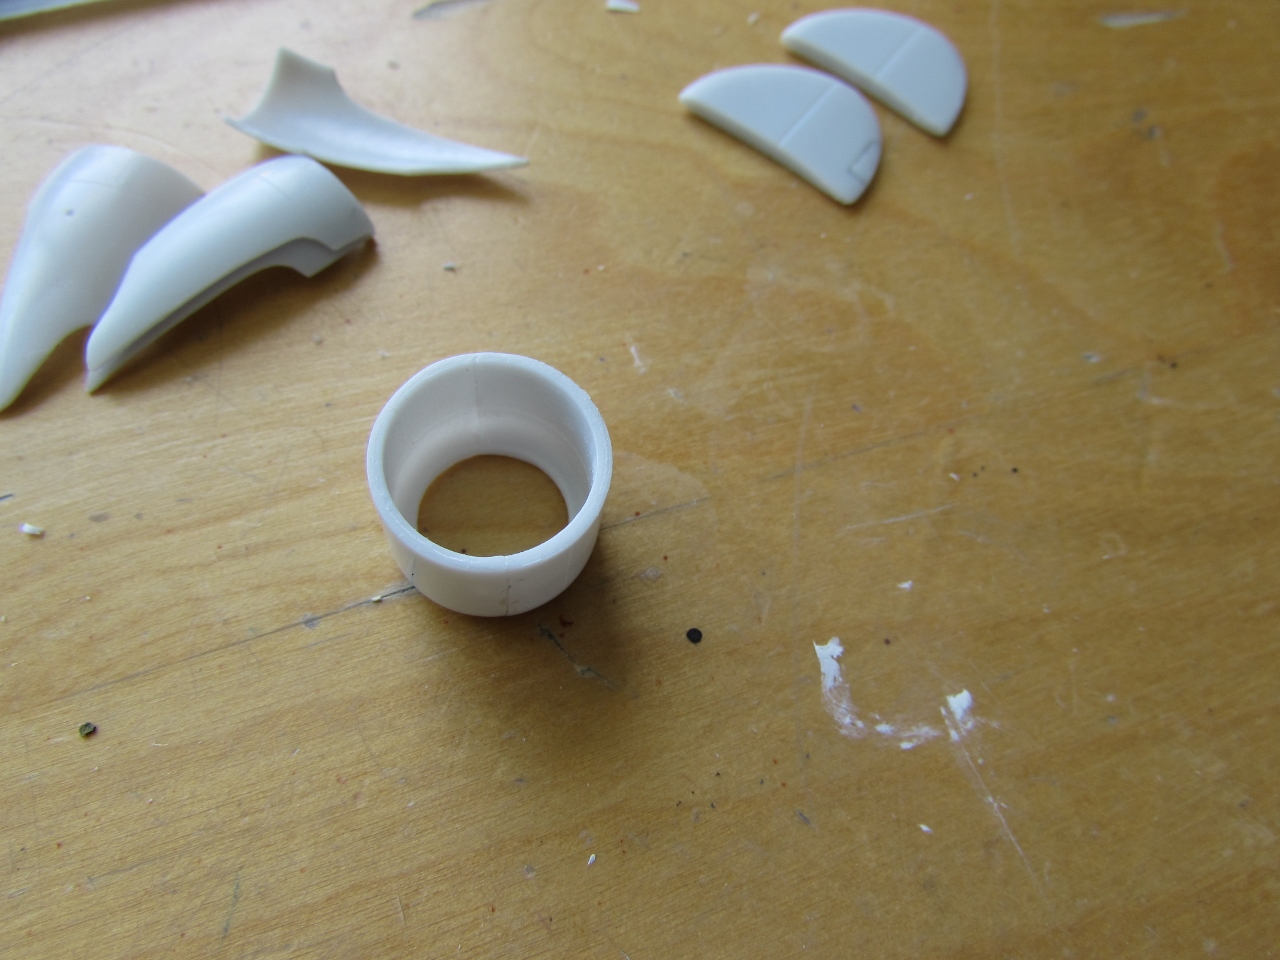
An incomplete molding of one of the cowl lips will be easily corrected:

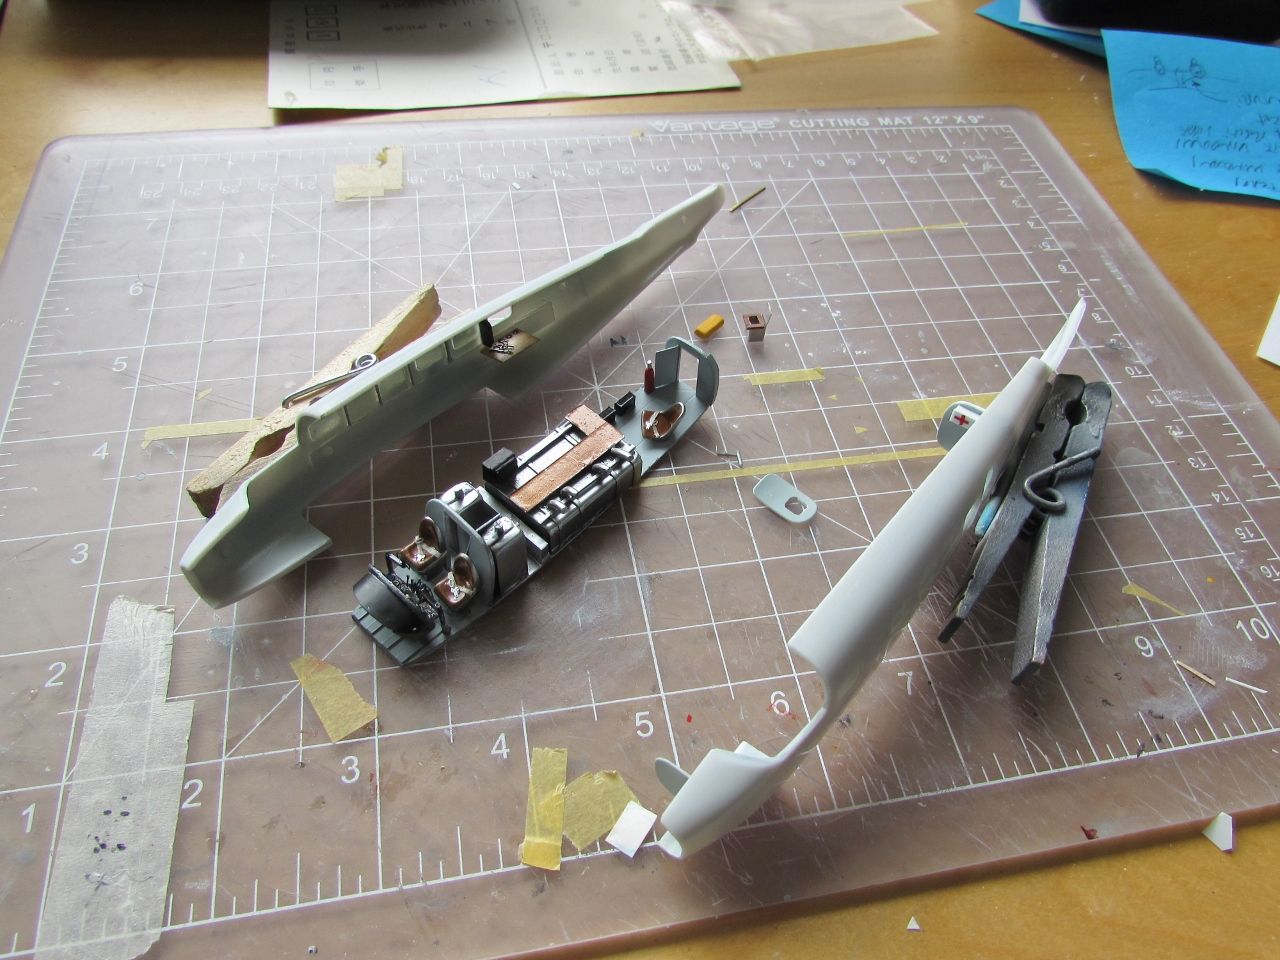
Some elements of the interior are assembled:


The kit's windows are clear, but the sprue gates are rather thick. They have converging sides, not only facilitating de-molding for the manufacturer, but also helping with press-fit:


The windows are covered with putty and sanded flush. A new door is made with its window opened:


Little by little more details are added. Door for the aft compartment, some plumbing, and the pelorus -a navigation instrument- (seen in the foreground):

The parts that represent structure on the well are glued:


A smaller, more accurate pelorus is made:


The retracting mechanism seen in photos of Amelia's plane is added. Two lateral small parts still need to be put in place::

The Mattel Psychedelic Machine is used to pull a copy of the nose hatch. To take advantage of these extremely scarce sheets I included some other parts:


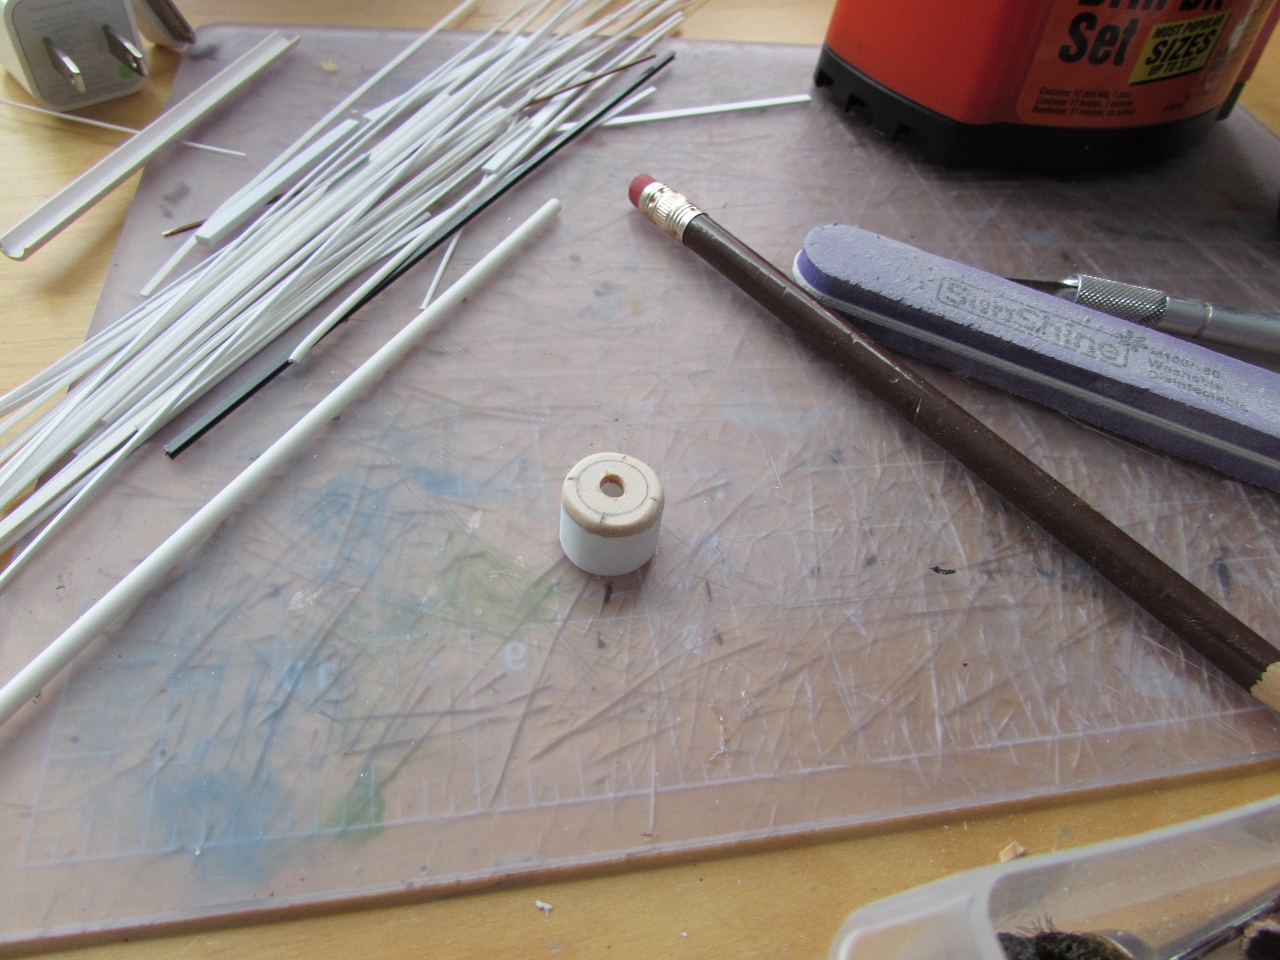
The elevators had teardrop counterbalances. These are also fabricated:

This is how you make those counterweights:
Take a styrene rod or stretched sprue:


Notes for the patterns of the international orange patch on stab and the leading edge of fins:


Miscellaneous bits to be painted:

Lower nacelle halves in place, mudguards added to LG:

The vertical stabilizers are glued in position. The fit is poor, to say the least:

Elevators glued deflected in place, holes for the exhausts drilled:

Working on some details. The nose hatch:


More parts are being painted:

More painting ensues:


More detailing:


Work on the interior continues:


I like the way the window light falls on Noonan's navigator desk:

Holes were drilled for the landing gear legs, which are too long to just seat on the wing as they are.
The arrangement works:

The Small Stuff engines arrived. They are beautiful kits on themselves. For what you get the price is incredibly fair. You even get tools to help with the assembly!
The level of detail is amazing, and the casting is out-of-this-world precise.
I will simplify their build greatly, since most of the detail would remain hidden, but what these engines deserve is to have one of them fully built in an open nacelle "in maintenance", or "in repairs" on a support at the side of the model. I leave that to the next modeler using them.


In less than 10 minutes the main elements (cylinders and oil pan) where in place.
The tweezers provided were not comfortable for me, so I used mine (use a good one, parts slipping here to the Great Beyond are unlikely to ever reappear):


But what is a modeler if not a very resourceful person? Looking in the spares bin I found two cowls that were perfect. Notice, by the way, how a cowl should look if you were a kit maker that cares about it. Unfortunately I have no idea where these came from:

The Mattel Psychedelic machine will produce vac copies slightly bigger, enough to fit the engine inside:


Do not have spares bin or Mattel Psychedelic machine?
No problem either. There is always a way:
A metal tube is used as a pattern to form a tube with two offset layers of
plastic sheet glued one on top of the other, thus forming a cylinder from which once truly set you cut the cowls:


Spark plugs in. You have spares, and you will need them, they are very small and tricky to glue in place:

You get one spare cylinder, one spare intake, and some spares for really difficult (spark plug cable, pushrods) or small parts. As said, I won't be using some of them:

The engine includes three different gages to measure the length of some parts. Be sure to apply the right one. Their sprue has the numbers, but unfortunately the gages themselves don't, so don't mix them up:


Younger modelers or the ones with good sight may not have such issues:

Spark plug:


After finishing the first engine, I realized I was using the wrong one. The correct one for the 10E version used by Amelia was the Pratt & Whitney R-1340 Wasp.
Small stuff also has that one, so take not if you are interested.
Radial Engines and Wheels and Engines & Things from Canada also sell those.
Oh my oh my.
Anyways, let's finish this one before changing engines. Sigh....
So lack of attention caused a bit of a engine detour:
The Radial Engines and Wheels:


Bye-bye, interior!:


And since we are at it, here some of the inaccuracies and omissions on the SH kit instructions.
There are very many other details, but these are the more obvious:

Fuselage:


The vacuum-formed canopy has yellowed:

The windows and edges are very poorly, faintly defined:


I am replacing the kit's solid dorsal vents with home-made ones. A hollowed styrene rod cut in angle does the trick:


The canopy hatch is cut open:


And just in case you find yourself in the same predicament, normal styrene glue will not work.
Sigh...

Amelia's tailwheel had a tarp or leather dust cover, absent on the kit's part, so one is fabricated:


First application of putty on the seams and preliminary sanding:


A first coat of primer revealed that the intended fix for the bad canopy fit didn't work really well.
I decided to rip it off, which wasn't easy since it was pretty well secured. More fiddling with the plastic around it on the fuselage and the canopy itself improved things. So it was glued back, hopefully this time for good.


As the slow process of removing blemishes from the frame goes on, details are being made:
Earhart plane had several changes of the loops, masts and antennas.
For the last flight one of the lengthwise wire antennas on the belly was removed, if the two Pitots remained. Brass stems for those parts are made:


If you don't want to do the tube trick for the vents, you may carefully grind the kit's:


Gloss black base coat for the Alclad.
Even as I airbrushed I noticed a few dust particles and fibers. Most likely additional touch-ups are on the way. Sigh..:

A substitute, more accurate decal sheet arrived from Arctic Decals. Yeepee!:

Engines and exhausts base colors:

Base tone airbrushed on the airframe:

The task of masking individual panels and airbrush a different metal hue begins.
This is a somewhat slow process and the hues should be not terribly contrasting.
Mask several areas, airbrush, remove masks, let dry, start all over again with the next hue:


And repeat:


And yet more masking and airbrushing:


Let's see, what am I forgetting... oh, that's right, landing gear legs and wheels, engine firewalls, elevator counterbalances, tail tie-down, and hatch:


Another one is fashioned:

I have a stash of pre-painted decal paper. The mat grey will be used for the walkways, the black for a couple lines seen in photos on the wing, the metal hue one for inspection panels, hatches and such:


Engines on. Black boots on tail leading edges added. International Orange on stab. Fuel and oil caps on top fuselage and nacelles added:

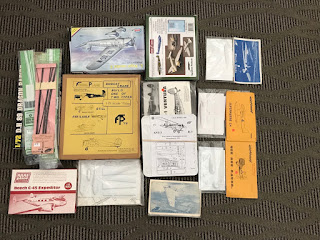
(Small hiatus as we went to the desert, where much heat was endured, but gave me the chance to go to Rare Plane Detective in Cathedral City and get some goodies. Thanks Jeff and Liz!):


All these and more for a fair deal:


Masking for the last color (international orange) is in progress:


Clear gloss is applied in preparation for decaling:

The completed model is here:
https://wingsofintent.blogspot.com/2018/07/lockheed-electra-10e-amelia-earhart.html
https://wingsofintent.blogspot.com/2018/07/lockheed-electra-10e-amelia-earhart.html