SZD-9 Bocian
https://en.wikipedia.org/wiki/SZD-9_Bocian
(Completed model here):
https://wingsofintent.blogspot.com/2017/03/szd-9-1d-bocian-completed-172nd-scale.html
Among the oldies but goldies kits that I purchased on a trip to the Palm Springs desert, there is this Polish glider, a kit, OOP now of course, that nevertheless is frankly quite good.
The kit had many incarnations, and it is relatively easy to find.
This Polish kit of very good molding depicts the 1D variant, SP-1862, so if you want other liveries just be sure you get the variant right, since many were created with changes in the airframe, some subtle, some very evident.
The kit came with a mysterious little container seen in the photo. The contents, whatever may have been, have long ago dried out (my contact in the modeling underworld from Volkania, Sönke, tells me that the container used to be filled with plastic cement, but I can imagine more creative contents).
The surfaces, where applicable, are highly polished (well, this is a Polish kit after all) or show a fabric effect.
The meaning of the text on the box and in the instructions remains hidden to me, but there are clear enough schematics to guide you.
Decals
seem fine, instructions are simple and in a size that doesn't require a
microscope to interpret them, the transparency is quite ok and even a display
base is included.
All
in a plastic sleeve and in a sturdy, Russian era, two-component
cardboard box, than more than anything else, elicits sympathy for the
Polish people, who with scarce resources, hardly any capital, and a small market, managed to create a very good kit that some contemporary (circa 1980) US mainstream kits (backed by capital, resources and a huge market) would have liked to have.
I
am not really that much into gliders (I have scratchbuilt three so far, IIRC) but I am anxious
to build this one, simple and good and appealing and well engineered.


 Parts are separated from the sprue and cleaned up (they were sharp and crisp already, unlike many other manufacturers'):
 Some parts are fabricated for the interior, which only has two seats provided. If you plan to use the kit's canopy closed (the canopy is fairly clear, but not crystal), no need to add detail. I still do not know, I may vac a copy from the kit's canopy, cut it in sections to display it opened, not sure, so just in case:
 The interior is glued to one fuselage side:
 The detail on this kit is really good:
 The cockpit is given some more detail and painted, and the fuselage halves are ready to be joined:
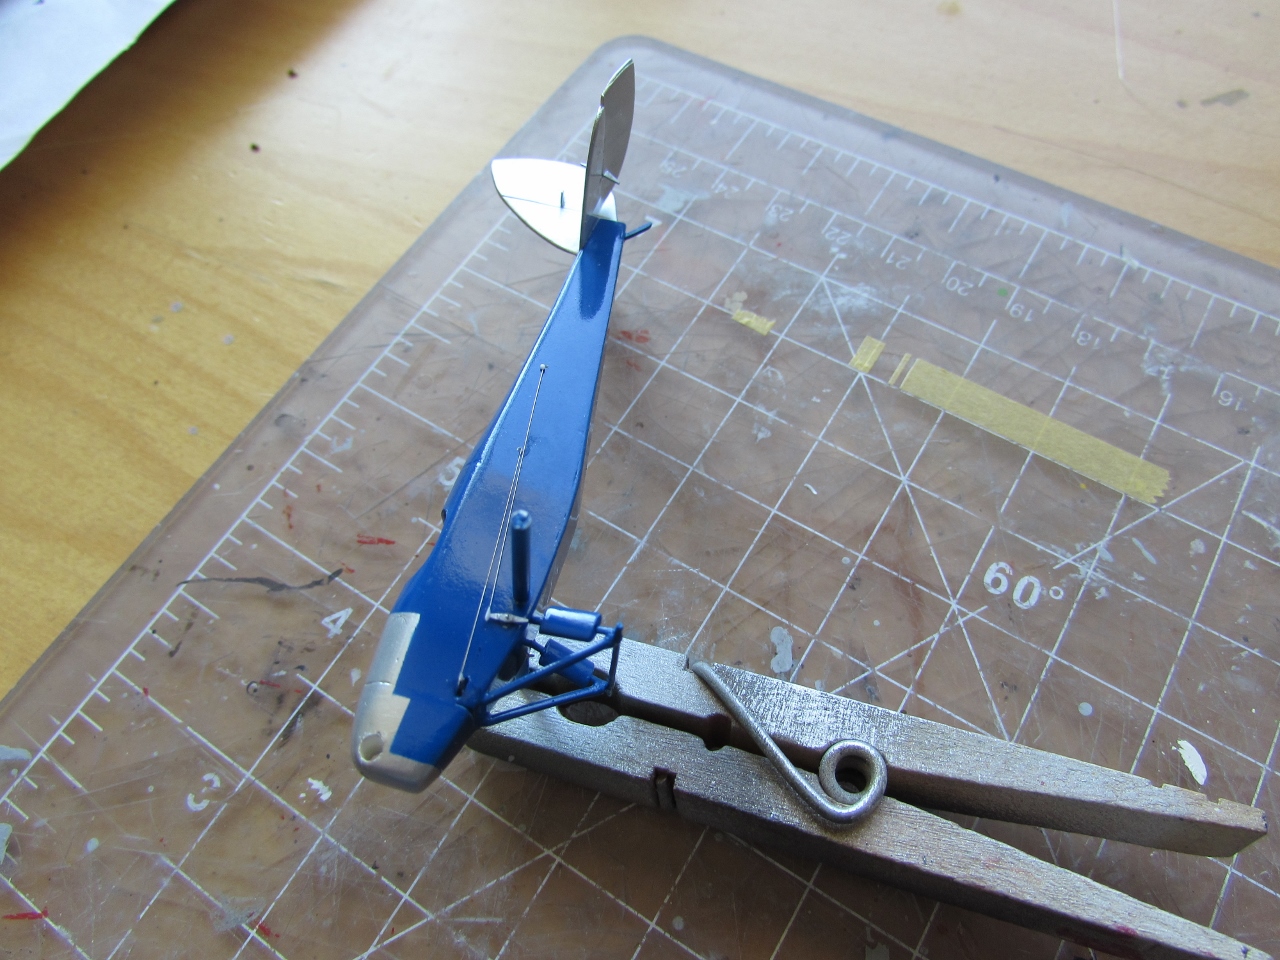
 The fuselage is joined and clamped. A hole for the pedestal, a reminiscence of a bygone era, is plugged:
 An instrument console is fashioned, later to be detailed:
 All the interior elements in place:
 The canopy is filled with epoxy and glued to a wood base, in order to later obtain a male master for the vac copy. A few spots on the fuselage are puttied to fill seams:
 The master is ready for the Mattel Psychedelic Converter (with improvements made by Volkania A.G.):
 The copies are pulled. One is trimmed to fit, the other is kept as a reserve:
 To cut the canopy on its sections to pose it open, or not to open the canopy...a Hamletian dilemma:
 Dry-fit of the components. Such a nice kit, and so elegant...:
 Getting closer to painting stage:
 The vac canopy after bathing it in floor polish:
 The canopy is glued on, masked, and white primer is airbrushed:
 And happy Valentine's day:

 You can compare the color against the white background:

 The frames will be cut from the airbrushed decal paper seen in the background:


A cream color is applied:


The canopy mask is removed:


The decals have arrived today from Arctic Decals!.
As usual, perfectly printed, with excellent detail and sharp:


Decaling in progress:

To be continued....