

(this is the building article, for the finished model go here:
http://wingsofintent.blogspot.com/2017/02/de-havilland-dh53-humming-bird-lympne.html
The lightplane concept was visited on the post of the
Parnall Pixie:
The De Havilland D.H.53 Humming-bird is one of such
machines. It was contemporary to the Pixie and a small number of them were sold
to particulars and the RAF. Power plants varied, and the first model had a Douglas of 750cc. According to information found on the
Net, one plane ended up in Chile, two in Australia and one in Canada.
Choroszy released a resin kit of this plane, although, alas
(surprise-surprise) in military guise.
The plane had a span of 30"1' (9.17 meters) with almost
constant chord, but differential airfoil, which varied in thickness along the
span.
The usual scratchbuilding techniques you may have seen on
this blog were employed, to ensure a satisfying measure of accuracy and a
bonafide reproduction. A resin prop cast by Matías Hagen (thanks Matías!) from Argentina was
used, with resin wheels from the spares bin and adapted resin cylinders again
from Matías. Care must be exercised in replicating the particular change in
airfoil section, thin at the root and wingtip and thick in the middle, a detail
often obviated by modelers.
A model of the Parnall Pixie, a plane -as said above-
designed under the same concept and flown contemporarily to the D.H.53, is
being built in parallel. Originally it even had the same Douglas
750cc engine.
A number of different decorations can be seen in photos,
many of them most likely in aluminium dope, sometimes with the fuselage in a
darker color, and in some photos it's shown with what seems wings of clear doped
linen, with certain translucency.
I selected a subject (G-EBHZ) based on a very good photo I
found on the Net, that had the same scheme as the restored machine that used to
fly in England (G-EBHX), until unfortunately had a fatal crash in 2012. The machine chosen, G-EBHZ, changed schemes, and I was fortunate enough to find on the Net photos of them. One is an all-aluminium scheme with the logo of the Seven Aeroplane Club, an AC with seven feathers (thanks, Sönke). Another is blue and silver, like as said the machine restored.
Be sure that you get the position of the inverted wing
struts and the ailerons right. The ailerons started inside of where the struts attach (i.e. closer to the wing root). Also pay attention to the wing struts, configured as a V, and wrongly depicted in some plans as the aft member being parallel to the TE, when in reality both struts converge at an angle (look at photos on the Net, easily found).
Bibliography: DeHavilland Aircraft since 1909 (A.J. Jackson)
N.A.C.A. Technical Memorandum No. 261
The Light Plane since 1909 - J. Underwood
The Light Plane Meeting at Lympne, Flight Magazine, Oct 18th 1923


Some reinforcement elements are added and a section of the deck prepared:
 Details are added to the diverse parts. metal horns for all control surfaces, skid for the wingtips, holes for the rigging are drilled, etc.:
 A general view of the parts so far:
 The wing struts:
 Decided to discard the seat from the spares bin and fabricate a wicker seat with a photoetched back. Once the interior is painted, the rest of the deck is going to be glued on:
 Tailskid added, holes for LG and spar drilled:
 The seat and inst. panel ready top go in:
 The props and potential engines for both the DH53 and the Pixie are readied:
 Milliput is used for the nose:
 The interior in place:
 Last piece of decking in place. All the components ready:
 The fuselages of the DH53 and Pixie:
 Landing gear in position:
 More details are added to the fuselage:
 Primer application:
 Basic color airbrushed:
 The fuselage is masked and painted, together with the Pixie's:
 Masks are removed:
 Ready for decaling, rigging and final assembly:
 The tail is glued to the fuselage. The metal control horns for the rudder and elevators are prepared:
 All in place:
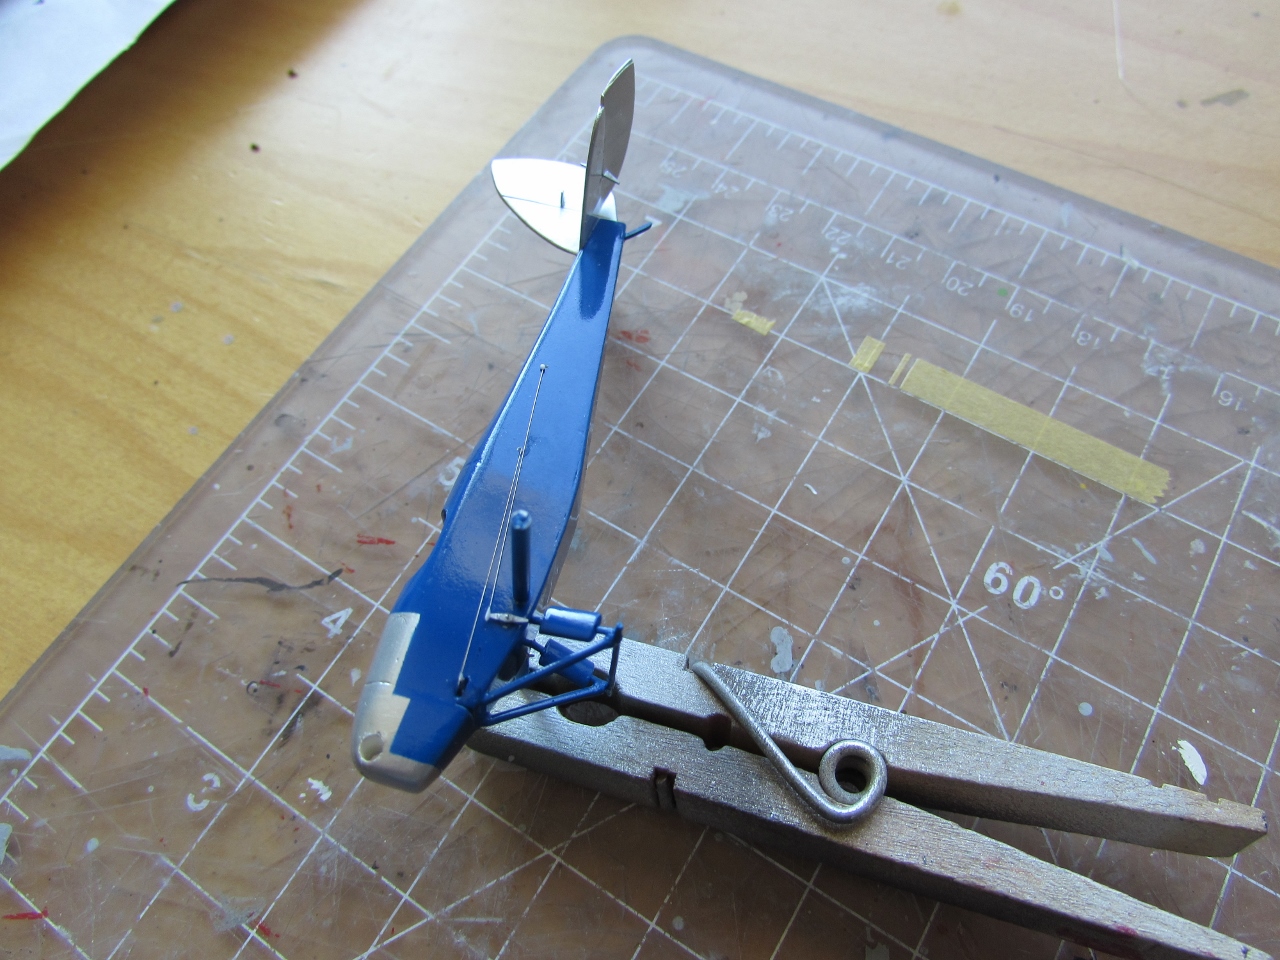
 Very thin wire is used to rig the control cables:
 The rest of the cables will have to wait until after the decals are placed:
 Wings and wheels in place:
 Underneath: wingtip skids, aileron linkages and the disks that move them, cross-rigging of the LG:
 Windshield, engine cylinders, fuel caps, exhausts, prop and wing struts in place:
 Pitot added, and just waiting now for the decals to install the remaining rigging:
 With its adventures' companion, the Parnall Pixie:
 The decal sets just arrived from Finland!:


No comments:
Post a Comment