Styrene

Styrene

Monday, June 21, 2021

Stout Skycar - Avis 1/72nd injected kit


 (The completed model is posted here:

https://wingsofintent.blogspot.com/2021/07/stout-skycar-172nd-avis.html


As I seem to be invariable drawn to the arcane, bizarre and exotic, I was very pleased when I saw that Avis released the Sotut Skycar and got one. I had a good idea of Avis' philosophy and approach, having built many of their very appealing civil releases: Bristol Racer, Bristol M1D, Short Cockle, Lee-Richards annular wing, Short Satellite, Mig Utka, American Gyro Crusader and De Havilland DH60 (all posted in this blog). As you can see, I really do like the civil releases by Avis, although their quality varies a little. Some are crisp and clean and easy to build, and some others require more work, having thicker gates, flash and minor fit issues. So their quality is not even, but is in general fair, as short-run kits goes.

What makes them very desirable for me is their fascinating off-the-beaten-path subjects paired with a "reasonably reasonable" price. 

The sprues:

Unlike the Azur kit of the Monospar that I am building in parallel, Avis provides plenty of locating devices, which makes the modelers' life much easier:
As you can see here, the lower wing halves are a partial insert to the upper ones, allowing for a thinner trailing edge:
Clear injected transparencies, although a bit thick:
Reasonable instructions, but not entirely flawless:


Flash is present throughout:

The 4 wheels were slightly mold-mismatched and required even and judicious sanding:
Some pesky little sink holes on the landing gear legs:

The surface -and general- detail is quite good, notice the nav lights and rudder corrugations:
The amount of flash and the noticeable gates makes the approach used by some modelers of painting  parts in the sprue not viable. Here below all the parts are already separated and cleaned up. This task requires a careful hand, as many parts are very tiny and fragile, and not always easy to hold whilst removing the flash and light-sanding them. At various points I dropped many, which lead to extensive practice of the Modeling Olympics discipline of "Where the heck that darn part went", with plenty of genuflections and contortions under the building table. You can see here that the interior has been built. I replaced the difficult to clean and very thin and fragile control columns with bent metal items:
Do yourself a favor and throw away parts 19 (exhausts) and replace them with solder:

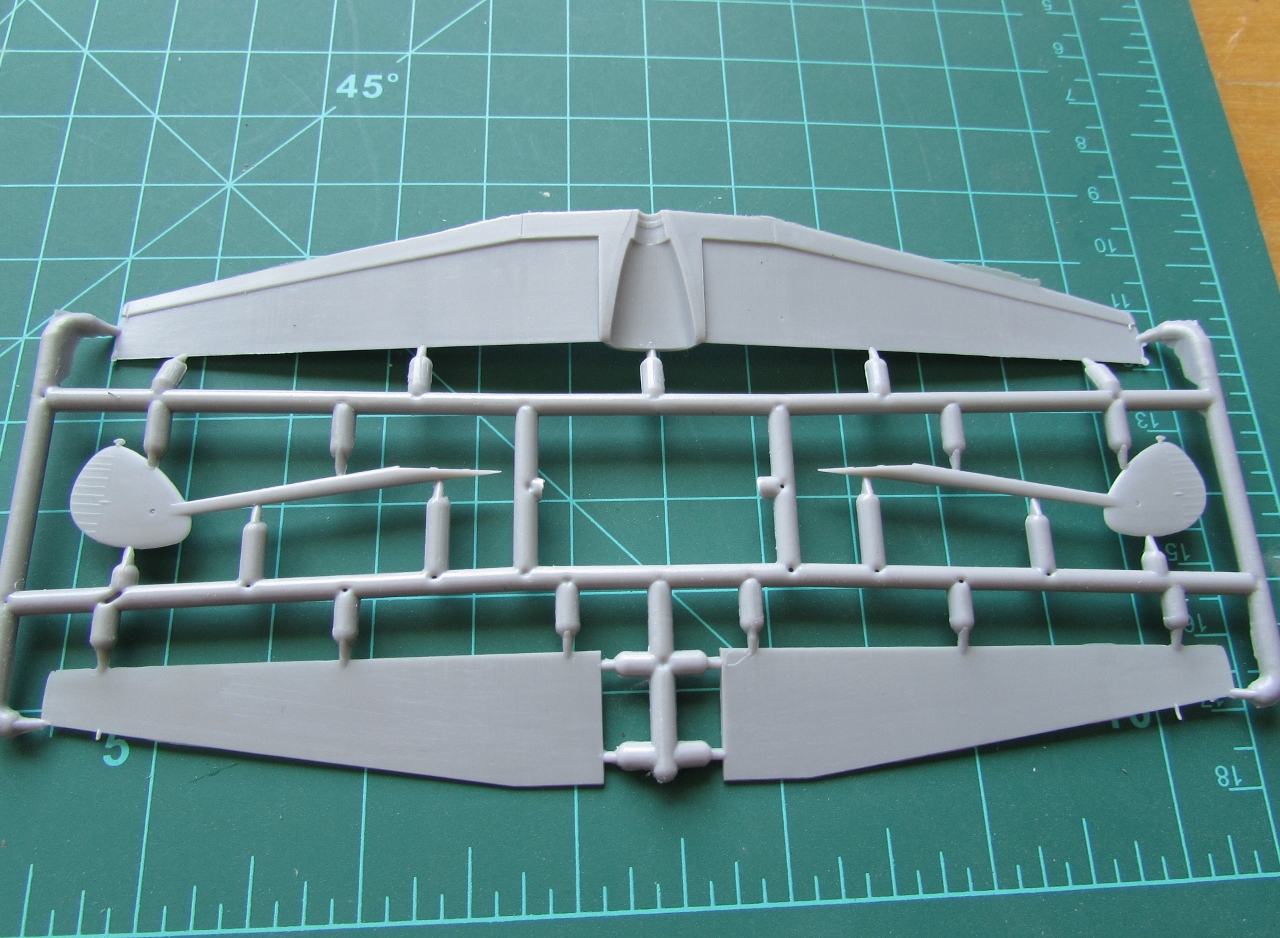
Part 4 ( a very tiny wind-driven generator) was in my sample incompletely molded and will need replacement with scratched part.
 

In my sample the spinner was deformed, possibly a short pour:


The wing parts are glued together. The high aspect ratio wing is nicely molded, and even has washout:

In order for the locating pips to be inserted, I had to enlarge a bit their holes. Do not drill through to the other side of the parts!:

In this way, you have a snug and nice fit (dry-run):
Same for the wheel hubs, the hole had to be slightly enlarged (here being prepared to be painted):

The wing had either the aileron divided in two sections, or flaps, thus the division of the surfaces is engraved on top and bottom. Notice the Pitot (for the photo just a length of wire only to show the location, that is different from what is shown on the box art, being in reality further out):

These seams underneath will be puttied. The wingtip nav lights come molded, but of course sanding after gluing the wing halves obliterated them, and they will have to be recreated:
The sinkholes on the landing gear legs were filled:

I have an archive with folders on the many types of planes I like, so it is highly unlikely that I would buy a kit and not have at least some general references. In this case, the folder was quite thin, and further searches rendered almost nothing else. I couldn't find anything on the interior, thus I will follow the basics provided in the kit with the addition of some generic instruments:

The wingtip nav lights obliterated while gluing and sanding the wing halves are restored making a small notch...

...and gluing a short length of stretched sprue. After painting, a very small colored CMK lens will be added:

Clear coat on the transparencies:

If you feel confident, the lips of the air intakes may be sharpened a bit:

After adding the side windows, which were a good (but not perfect) fit, I glued the fuselage halves together, and then added the wing, so I can work most of the seams at this stage, before adding the tailbooms and stab. The fit again was good for this type of kit:
Elegant shape, something that is not fully appreciated in photos of the real thing:

Aircoops on, another good fit:

As mentioned before, the kit includes a very tiny wind-driven generator that was a short pour in my sample. Looking at the few photos I could gather of this plane, I don't see conclusive evidence of it. There are some details in the photos that can be background objects, or just seams that may be have produced the illusion of such device, so until proof that it was really there in a sharp and detailed photo, I am not adding it.

The seams are treated:

The landing gear legs are added (be careful to locate them in the right positions and watch their alignment), and the tail parts are meanwhile glued together, treated as a sub-assembly:
The tail unit is added, again carefully watching alignment. All these parts fit properly, provided you did a good cleanup previously. So far quite satisfied with the overall fit:

Now, what everyone is thinking: will this one be a tail sitter? See the answer in the next episode of "The Adventurous Life of a Modeler, Beyond Shake 'n Bake".

...And not a tail sitter!:


 The kit as explained doesn't provide masks. In this time and age of computer design, it couldn't be difficult to obtain patterns and masks from the same software used to design the kit. There are no aftermarket masks to date. So out with some masking material, a very new and sharp Xacto and bags of patience. You little cheeky imp:

First coat of primer:


A mist of aluminium revealed some blemishes that had escaped me, so back to the building board it is:

A cycle few modelers ever escape: filling, sanding, priming; vividly portrayed in the films "The Groundhog Day" and "Live, Die, Repeat":

Still, as Galadriel said: "Yet hope remains while putty and sanding sticks are true." Model now with a gloss grey coat in preparation to re-do the aluminium:

And a new coat of aluminium, this time no problems:

A clear coat will follow, and then hopefully the decals:

The canopy masks are removed after the application of the clear coat. Wheels, prop and spinner, Pitot and exhausts were added, plus the nav lights minute lenses. Decaling followed. 

The kit's instructions would like you to apply the wing regs starting outside the tail boom. That's not accurate and photos show that the Ns are inside the boom. 

Decals are very good and apply easily, but are thin, so they need care and enough water to slide in position:


The completed model is here:

https://wingsofintent.blogspot.com/2021/07/stout-skycar-172nd-avis.html

Saturday, June 19, 2021

From the archives: FMA Ae. MB2 Bombi cropduster version - 1/72 Luis Santos o.o.p. vac


 (Note: this article is from the archives, the model was built in 2009)

This modeling endeavor is the result of a gift: this 1/72nd scale Ae. M.B.2 vac kit was sent to me by fellow modeler Luis Santos, who produced the parts time ago as a “divertimento”.

The moldings were simple, just the basic shapes, in a way a bit like an Execuform product. The exterior and interior detail to be added. No doubt the arcane subject made my eyebrows raise, being a plane designed and built in Argentina in the 30's. The prototype was engineered as a light bomber, but eventually found another, more peaceful uses as a transport and even as a crop-duster, which is the subject of this article.

The lines of the plane were simple and probably the most remarkable features of the design were the high-aspect ratio wing and its generous size. A limited number of machines that explored some variations on the theme were produced, with minor changes in the landing gear, window arrangement, rudder shape, wing-to-fuselage fairings, fuselage covering and the fuselage top. The lines and proportions were, as said, simple but somehow pleasant. The design didn’t live long, but surely provided with some experience to designers, builders and pilots in Argentina.

After separating the parts I dealt with the areas that needed either filling or sanding. Based on references I added surface detail. A master was made for the canopy and a clear vac molded on and a cockpit was scratch-built. Once the fuselage was closed the dorsal area of the fuselage was "filled" (the back in the kit was chopped-down for the military version). Building proceeded to a point where I really needed to have a look at the photos of the crop-dusting version I was going for. In spite of the help of a few friends the images didn’t surface, so I half-guessed, based on written accounts, that area. I glued the involved parts sparingly, so if at certain point I can actually see some photos, I’ll be able to address the possible changes. Some external details were scratched, like a wind-driven generator on the left wing, the carburetor intake, engine exhausts, Pitot –under the left wing-, Venturi –left side of the cockpit, oil cooler and navigation and landing lights. The latter equipped with MV lenses. Aeroclub aftermarket parts were used for the engine and the wheels. I painted the model as per its production companions, light grey, but no markings were added, again, waiting for photos to appear. One of the references states that three machines were adapted for cropdusting with two drums containing the product inside the fuselage.

With a bit of work I have now the clunky but rather charming shape of this model boasting its old refrigerator-like lines.

Thanks to Luis Santos and the long list of fellow modelers that intended to help with the particular cropdusting version.