(This is the building article, for the completed model please go here:
https://wingsofintent.blogspot.com/2018/08/fiat-br20a-istres-damascus-paris-racer.html
I was aware for the first time of the Fiat BR.20A racer
modification while reading Paolo Miana's "SIAI Lost archives Vol.I: Sorci
Verdi", a wonderful book about the SM.79s that participated on the
Istres-Damascus-Paris race.
A short clip of the BR.20A.
It comes seconds after the SM79s:
https://www.youtube.com/watch?v=igq6OzzPDeE
For those interested in references concerning the three civil derivatives of the Fiat BR.20, you can consult:
-Ali d'Italia #23, Fiat Br20
-Fiat BR.20, by Pawel Babinski
-Lost Archives Chapter I, Sorci Verdi, by Paolo Miana
-Air International 1982 Vol 22 No 6 has only the briefest of the mentions, and just a blip about this versions.
-Flight Magazine during 1937, the year of the race, published small blurbs.
-Putnam Aeronautical Review 1989 01 has yet again small mentions and few images.
The profiles that appear in some of these publications have mistakes,
so once more, and as I always say: look at them, but study photos, go to
the source.
Since I am a product of the sixties and seventies and a good education, to be
able to transform bombs into flowers sounds to me like a rewarding endeavor.
Three civil Fiat BR-20s can be obtained modifying the Italeri
kit:
-I-FIAT "Santo Francesco" -St. Francis- (variant BR-20L)
with its sleek figure and pointy nose.
-And two Istres-Damascus race competitors (variant BR-20A)
that flew under the race numbers I-8 and I-10 (I-GAQU and I-ROBO).
The conversion in all cases involves a somewhat extensive
surgery, but it's not really difficult if you have chopped a kit or two already
to produce some modified variant or substitute kit sections for resin parts.
But I won't lie to you, and -as friend Lars Opland says- a weekender this is
not.
The most conspicuous areas that need excising and replacing
are the nose and belly. Other important details need addressing too: new
interior, deletion of turret and windows, relocation of doors, and many other
details.
Since I have already models from the Istres-Damascus race,
there is an extra incentive for building the racers: the possibility of
photographing them together (I don't say "display" because I don't
have a model display case, I put them in boxes to sleep):
I-FIAT has its own set of modifications, and it differs
noticeably from the racers, but I won't abound here on details since that isn't
the variant I will be building.
The Italeri kit is quite dated, so much so that some boxings
still read "Italaerei".
Like some other kits of the time, it's still somehow holding,
and can be made into a fair representation with some love.
As we all know, we start by looking at those nice drawings
and profiles...only to dismiss them for
being inaccurate in some detail or another an turn to photographs of the real
thing for bona fide clues. Notepad in hand, we shall make notes of all details
that need addressing.
I have all I need (almost) regarding documentation, and it
was provided by the ever-giving Internet, so as with all research projects, the
more butt hours on that computer chair, the more you will learn. Don't be lazy.
What we get with this "Italaerei" kit is aligned
with the zeitgeist of contemporary kitmakers: rivet galore (although not nearly
as annoying as Arfix's or Matchbox, as much as I also nostalgically love them),
raised panel lines and general clunkiness. Separated control surfaces,
exaggerated ribbing and fabric effect, very thick transparencies... the works.
But you can operate some alchemy on that beast and turn it
into a nice, fair replica, chopping and filing and filling and sanding without
remorse or thinking that you may be obliterating some precious detail.
Summarizing: the result can hardly be worse than the thing you had at the
beginning, so you are liberated to exercise creativity, inventiveness, daring
engineering and have fun for a modicum price.
Contents of the kit box. Transparencies' sprue included: "Rattle, rattle, toil and trouble":
Rivet-counter paradise:
The dreaded Homunculi, the modelling golems:
And it seems I caught unawares the one that should have been posed in the plane's relief facilities.
Awfully sorry for the interruption, old chap:
Sections that need excising and deleting:
This is big even in 1/72:
The provided engines, if not delicate, at least have the two cylinder rows and some detail, and are certainly better that some I have seen in much more modern releases:
As we know surface detail is not particularly subtle, but can easily be toned down:
Parts presented against plans allow for a modicum of optimism;
The transparencies that are designed to be glued from the interior have that thick wall
protruding. I am not sure I will do something on the interior, but just
in case, I discarded them and used styrene sheet cut to shape to fill
the window openings, not present in this version:
The lower part of the fuselage is cut off, to allow shaping it to the proper contour for this version:
The turret will be occluded with a styrene disk cut to9 size and bent to match the fuselage top curvature:
A support piece is glued to hold the disk in place:
The wheels have their axles trapped between their halves, and ingenious solution for ma time were movement was desirable:
Whatever comes in halves is glued together:
Exhausts are hollowed for realism:
All parts are separated from the sprues and given a clean up, refining certain aspects of them:
The struts that brace the fins are a tad chunky, most likely they will be replaced:
The interior is prepared, but of course the racer had extensive modifications, so if I decide to build the interior and open the doors to show some of it as usual, things will change:
The fit in general is pretty good, so things are advancing smoothly, but
in my kit the engine nacelles -that are part of the wing halves- were
not a perfect fit, so they had to be double-clamped, to be sure that the
halves were pressed against each other whilst at the same time making
sure there were no side-to-side movements:
Being this an old kit, some detail solutions are not the best. Here the
engine nacelle flaps are depicted in a not very subtle way, and the
louvers of the original are rendered as slots.
I am not sure I would like to modify this, since it can be easily
obscured with some light grime and sooth, and there are other more
important areas that need attention:
The civil versions had landing gear doors, so those are fabricated. They will help to hide more efficiently the relative void of the bay:
The windows, doors and other details are covered now with putty, since they are not present in this version.
The BR.20As had an all-metal fuselage, thus those stringers
have to go. This is very clear in photos, and yet many drawings of the
BR.20As depict those stringers:
All that rivet galore is wet-sanded down, on all surfaces:
Since no mold is perfect the root ribs and nacelles fronts are trued. Good contact surfaces make for less puttying and sanding:
One of the two new doors that need emplacement in different locations is
located in an area shared by the canopy and fuselage (the "A" version
had less window panes). So the canopy has to be very carefully cut:
The doors are cut on the fuselage side too:
Alignment must be checked as you go:
The firewall and aft bulkhead are fabricated now that the access is easy:
The canopy is actually the only transparency that you will need from
the kit, so you can consign the rest of the clear parts to the bin where
after a few eons it could be the fuel used by a new civilization* (that
is, if you do not want to use the snazzy "Italaerei posing base").
*At this rate let's hope that there would be any at all left, and that it doesn't consist of mumbling, vulgar, whiny orange mutants.:
Base of the new fuselage bottom:
The props have an insinuation of the counterweights:
Those are sanded off and new ones made of punched-out disks of styrene:
The BR.20 kit transformed into a BR.20A kit:
The old doors and detail deleted, and the new ones in place:
A diagram (not to scale) of the modification:
While waiting for that photoetched set to arrive, a few panel lines are
lightly engraved on the wing panels. At this point -as noted above- all
rivets and raised panel lines have been sanded down, and the surface
treated to a light buff, in preparation for the aluminium color that
eventually will go on:
Liquid putty is applied to the seams.
Some details now. The BR.20 had two types of landing gear shock absorption: oleo-pneumatic and oleo-hydraulic.
The kit's four little toblerone-like parts that go on the legs are for the oleo-hydraulic type. But the "A" had the other type, so no chocolate boxes should be added:
The fins were missing one o the holes for the reinforcement struts, so the missing one is measured, marked and drilled:
The kit as mentioned before had some over-simplified
solutions. One was to attach the control wheels to the instrument panel,
which is incorrect. The wheels were paired in a common yoke, so a new part is fabricated.
The mistake of the kit maker most likely originated in known factory photos of the yoke "resting" against the inst. panel, as the elevators went all the way down, a common pose for planes on tarmac.
But if the kit were right, pilot and copilot had to have two yard-long arms, or spaghetti arms.
New, thinner struts are made to replace the kit's, which have the scale size of a thigh:
After start working on those really clunky nacelles, I decided it was far better to remove them to facilitate things, so they were sawed-off.
The horrid representation of the louvers will
be occluded and re-done with printed resin ones, and the terribly
overdone latches and cowl flaps will be drastically toned-down.
I just couldn't live with that sight.
A vertical stopper is used to anchor a firewall:
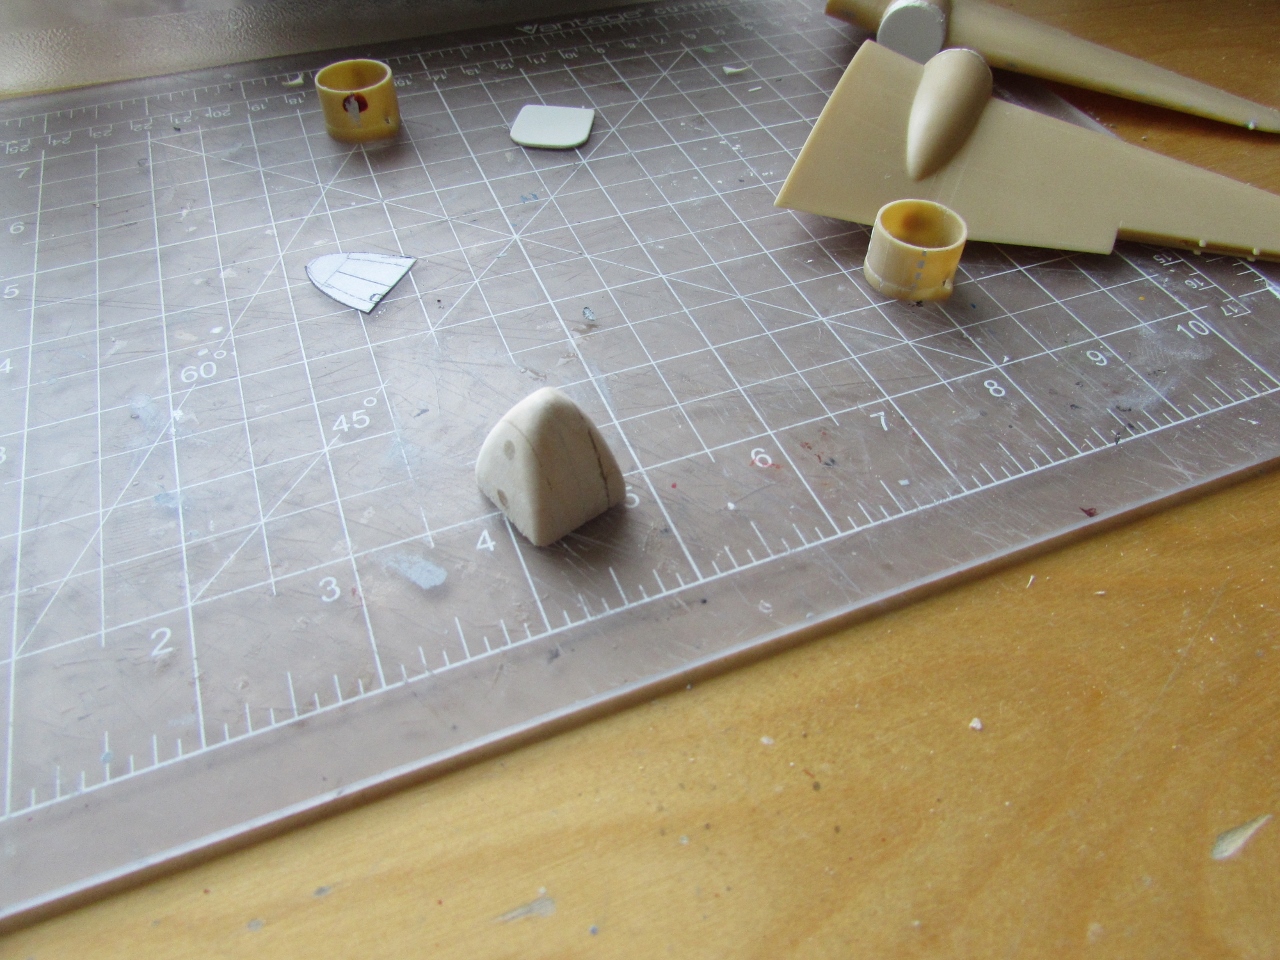
A nose plug is made of laminated basswood:
Once completely shaped and made to fit, it will be used to make vacuformed halves:
Rough shaping of the nose cone begins:
The engine cowls are sanded to tone down the coarse detail:
The unsightly cowl flaps are sanded flat from outside and thinned down from inside with a rotary tool:
The photoetched set arrived, so work on the interior can proceed. As said above, adaptations will be needed to correctly fit on the A variant:
Progress is made:
Checking fit as you go...
The aft part of the cabin is fashioned.
A little bit of speculation was involved, since I could not obtain bona fide references to confirm the interior:
A bit of structure is resembled on the wall opposite to door that will be posed open:
Dry-fitting:
The cowls are given four pins in the guise of engine mount:
They are re-mounted showing a hair of space:
Thus "air can circulate" as it would in the original, eliminating the kit's original coarse and clumsy arrangement:
Base color is applied to interior and some parts:
The engines as they come do not properly align the front and back rows, so the locating tab has to be removed, for the aft cylinders to show as they should, behind the opening of two front cylinders:
More parts are painted:
The bin of the finished parts, waiting for the final stages of the assembly:
Almost ready to close the fuselage:
Last touches...:
And fuselage made whole:
The hole at the aft position is blanked:
A new floor will go on here:
And yet another will be added that will be rounded at the fuselage corners:
This old kit had some "detail", but now the representation of these linkages will be removed to be replaced by the photo-etched items:
The surfaces are restored after eliminating the kit's linkages' relief:
As the kit is engineered, the assembly sequence mandates that the engines be painted and located inside the nacelles before the lip is glued. They will have to be masked before exterior painting begins:
Some events would only accept an explanation of
extraterrestrial origin.
I was trying to pull a small box from the shelf. In the
process, I knocked another box that fell on the small drawer cabinet, where it
kicked a tool that in turn bounced on the model part's box lid, kicking
half of the wood nose master into a little receptacle, where I found it, only
after a long, long search:
The second layer, to be contoured, is added to the fuselage bottom:
With the fuselage sub-assembly now ready, the canopy and nose fit and contour can be revised.
The canopy fit was excellent. The A version had a much succinct canopy window array, so many of those frames will be sanded away (all parts dry fit):
The long process of blending the surgical scars begins...
Two vacuum-formed noses are made from the wood master:
A mist of primer is applied to the reworked area to spot blemishes:
The nose was glued one and the process of blending it in has begun:
Fuselage primed revealing spots that need more work:
Decals have arrived!:
The main elements are glued on:
The replacement thinner struts are dry-fitted, all looks good:
More primer:
Gloss white is airbrushed in preparation for the aluminum paint (yes, all the other -small- parts were airbrushed at this time too):
Aluminium color is applied to the smaller parts. The "fabric covered" ones are given a slightly different hue:
Wheel wells painted:
The base aluminium color is airbrushed:
Same panels are masked and in successive sessions are given different metal hues:
With a variety of oval masks cut in halves and quarters, the red motifs for the nose and cowls are delimited:
More tape and wrap should protect -hopefully- the rest of the plane:
All went well. Ready now for the clear coat before decaling:
Control surfaces and tail bracing on. Canopy masks off:
And this is why I am invariably suspicious of plans and drawings. They
are a great help, no doubt, but almost always contain mistakes. If you
don't see mistakes, you haven't looked hard enough.
Drawings depict the tail wheel as the one on the right, with no
fairing, but photos show the one on the left. Both are provided by the
kit:
Still, a piece of the fairing has to be removed to match photos. It always pays to do a good research:
The part is given a pin to improve anchoring:
The landing light location is drilled and a home-made lens added. A
couple decals and the landing gear legs in place. The kit's landing gear
is wonderfully designed and fits perfectly, how do I wish some
contemporary kit makers would take a note from good ole Italeri.
The decals are provided as layered images. I used two superimposed
white rectangles to obtain color density and on top the black design:
Exhausts in place:
Micro-Mark printed louvers are used to represent the ones present in photos but wrongly described on the kit (they have been filled-in, if you remember):
Application commences:
Things so far going well:
As an alternative to the Micro-Mark printed louvers, Archer also sells a sheets with different sizes of them. In this case the Mikro-Mark ones were the right size, and that's why I used those.
Application of decals and addition of small parts (like aileron mass balances) continues. The color decals have a separate white base that has to be applied first to obtain a brighter color. The long flashes on the sides are cut and applied in sections:
External photoetched parts from the Eduard set are now glued on (12 surface actuators, among them).
The set is useful and well etched. There is one nit-pick: why, oh why, put associated parts that belong to the same sub-assembly or building stage, all scattered around on diverse places that make no sense on two frets? Yes, I know space has to be optimized, but at the cost of the modelers' practicality and accessibility? me thinks not!
Eduard, group the parts together in a reasonable way, convenient to the modeler, not to you! after all, this isn't a bargain! And hey, would it produce an irreparable financial loss to add just a few darn spare parts, especially of the smaller or more fragile ones?
A note on the race numbers:
I-8 and I-10 were the race numbers of the participating Fiat BR20As.
The planes as far as I can see were almost identical. But I-8 had the race number under the left wing inverted (i.e. looking the other way). The one under the right wing is "normal", though. Intersting details you find while researching.
The home-made wheel well doors (the kit has none, since the kit's versions didn't use them) are added, as well as the wheels:
Yet more decals (including the small lettering), and the Venturi added right behind the canopy:
Doors are being given their handles, antenna masts and loop in place, props on, fuel caps in place on wing and fuselage for the long-range tanks. Walkway added (a very matte and slightly grainy decal).
Still to go is the wire antenna and glue the doors on.
To be continued.....