(this is the step-by-step construction article, for the completed model please go here:
https://wingsofintent.blogspot.com/2018/07/supermarine-s-4-schneideer-cup-1925.html
By now most of you may have realized that I have a soft spot for vacuformed kits.
As with any other media, there are very good ones, fair ones, sort of lacking ones, and despicable ones.
This one, a very old mold from Airframe, belongs to yet another category: the "optimistic" one.
The plastic is sort of thin and in some of the backing sheets uneven,
with variations in thickness. There is no surface detail, no interior,
no decals, no detail parts.
Some of the parts (in this case the float legs) are better left in the "smirking" box.
What these kits
do have, is very pleasant and uncommon subjects, and a more than convenient price.
So, let's see what can we do with it.
What you get:
Parts easily separated from backing sheet:
Somewhat soft detail on the radiators:
Better to use them -if at all- showing the other side:
Airframe kits are engineered always with this "keel", intended to
provide rigidity, and a bridging and aligning surface to easily locate
the other fuselage half. On the few I built, I found them imprecise and
somewhat annoying.
The idea is sound, but doesn't translate to reality well:
All parts sanded flat:
Nose cone given a backing plate:
Had to cut a section of the "keel", otherwise, as predicted above, it wouldn't fit:
Stab halves glued together. Float legs leave much to be desired:
No matter what, and how much you shuffle them around, it is impossible
to find real matches. To the "smirking" bin these go too. Sigh...
Given the simplistic nature of this kit, an equally simplified interior
is provided, barely to be seen due to the very small cockpit opening:
A spar is provided for the wing:
Strangely enough, if you glue the legs the wrong way, then they more or
less coincide. The simplest explanation is that the pattern maker got
things scrambled when allotting fairings to struts, reversing them, thus
creating a problem down the lane.
My ebil plan is to cut off the stems, shape the fairings, and add either
plastic airfoiled contrail stock or brass airfoiled Strutz. We'll see.
Floats, wings and horizontal stabilizer halves glued together:
The "corrugated" styrene sheet pieces from Evergreen stock that replace the kit's parts are bent to follow the proper profile of the original radiators:
The succinct cockpit is prepared:
Fuselage halves are united. Notice the notches on the wing root: the fore ones are to clear the cylinder bank fairings, the aft ones as far as I can tell are a mistake, and will have to be filled-up with scrap styrene:
Another good thing this kit provides is a properly scaled plan:
So a photocopy is made to be used as pattern for the trailer:
Adjusting the shape to the bottom contour of the floats and keeping things aligned, the trailer is made from scrap styrene.
It will hopefully be useful while trying to get the legs aligned and attached
to both floats and fuselage, a nightmare in kits -like this one- that
are not keyed, neither provide a jig, nor any advise on how to deal with
this issue.
Oh, the blood runs fast and hot with adventure while putting together this beasties. Who said modeling is a passive activity?:
Floats on:
And now things start to look as if one would have a kit of sorts:
On the "to do" list:
Propeller blades and axle.
Locate and drill the 12 exhaust locations and prepare the little gizmos for the fuselage top.
Make and adjust windshield, set aside on safe place. Forget said place and be forced to make another after painting is done.
Locate and drill spar locations for stab and wing halves,
completely unmarked on fuselage molds; concoct said spars (tube and wire?).
Start to worry about the decals.
Continue to worry about the decals.
Stop worrying about the decals, they are mere light blue number 4s and a tiny British flag after all.
You really have to pay attention to those darn legs now.
No, really, I mean it.
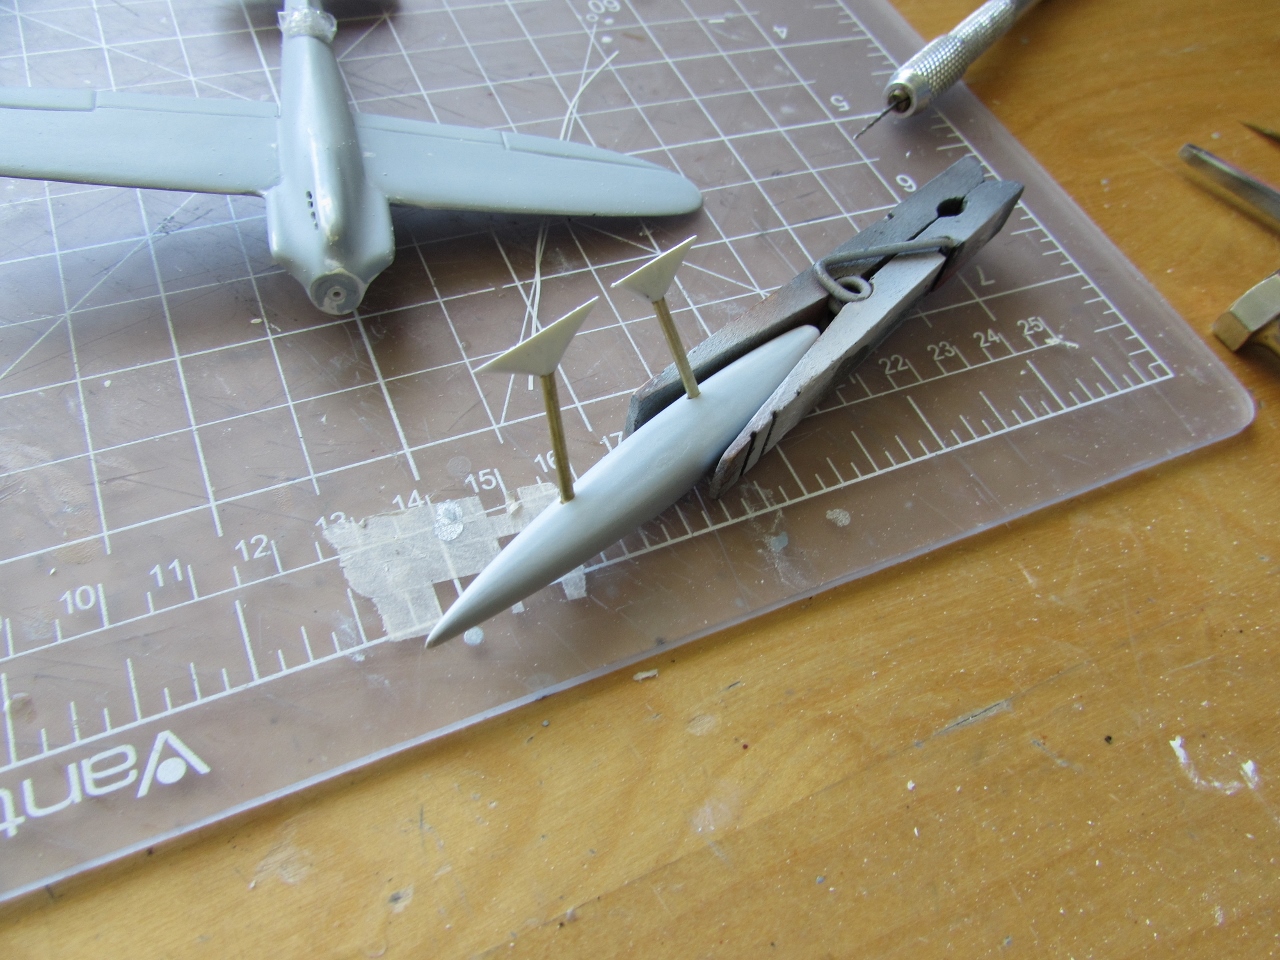
An aluminium "Fairey Reed" prop is made:
The blades are cut and their position on the spinner slotted:
A dry run (the blades will be added once the spinner is painted separately):
The wings are not a good fit to the cylinder bank fairings. Slather the
area with putty could do, but better add some styrene and carve it to
properly meet those areas before the puttying starts.
As said above, those notches on the wing trailing edge roots shouldn't
be there, so filling scraps are added, later to be also contoured to
shape.
The kit may be little, but the work involved isn't.
Work continues on the beaching trolley:
Then left and right stab halves are separated, and holes drilled for the wing and stab spars:
The kit's strut fairings are separated from their unremarkable and reversed legs, and inserts of Contrail airfoiled stock glued-in at the proper angles:
The fairings are filled with thick cyano glue and zapped, then contoured:
Plan B, just in case: styrene fairing profiles of the same thickness of the Strutz brass struts are fashioned. Later a thin styrene veneer will be glued on both sides, and contoured to shape. We'll see how this trick goes:
One sandwich side and then the other are added:
Once the glue is set streamlining can begin:
Primer is applied:
And some parts are painted:
The alternate legs are contoured and made ready:
A couple of small parts start the painting process:
The elevators are deflected downwards:
Flying surfaces are united with the fuselage via spars:
Yet another light coat of primer that revealed more blemishes to correct. The Neverending Story:
The leg fuselage fairings are presented and matched to their contact areas, sanding the angle little by little and checking constantly:
The already drilled strut locations on the floats are slightly and carefully enlarged to match the section of the leg struts snugly:
The legs can now be slid-in, and their height and angle adjusted upon need, between certain limits:
Styrene rod pins are given to the legs to lock on the fuselage sides:
Propeller ready:
The model on its feet. Legs. Floats. Pontoons. Standing, anyway. Floating?:
Just in time, the set commissioned from Arctic Decals arrived, with the superb quality that characterizes them:
What I hope is the last mist of primer, white this time:
The two horizontal members of the "A" frames are glued on, and the white color is airbrushed:
There were three exit holes between the front legs and the wings, those are drilled and their exhausts made from slanted and thinned metal tube:
The white areas are masked and metal color airbrushed:
Then the metal area is partially masked and other hues of metal airbrushed:
Masks off:
To be continued....


Incredible1 Those Airframe kits are not for the faint hearted!
ReplyDeleteYou have to be a certified Shaolin Kit Builder® to tackle one, I'm afraid, Diego.
DeleteMy first vac build was an Airframe Bachem Natter, for a friend. First thing I did was discard the keel; it was not missed. This will be MUCH prettier!
ReplyDeleteOh the sins of our youth! ;-)
DeleteKeep an even keel, dear Lars ;-)
I found my one of these in the stash, goodness me, this looks like a real challenge to build.
ReplyDeleteCongratulations on the finish aircraft
Thanks.
DeleteBut actually any hermit, cast away, or mental patient can do it.