(this is the step-by-step construction article. For the completed model please go here:
After I have built this model, Dekno/Arctic Decals released a multi-media a conversion set:
Using that set I built a second Conqueror Gamma:
Squeezing the modeling juice from an old kit
There is a nostalgic pleasure, as many of you know, found in
old kits that are around and still can hold relatively well, and may be made
into a decent model or converted to a variant not available in the market.
Such a model is Williams Brothers' Northrop Gamma. I had
pulled the very old release to check the park bench ailerons as I was building
the Azur/Frrom Northrop Delta. I have bought this one from Jeff at Rare-Plane
Detective some years ago, thinking of another beautiful but less known variant
I wanted to model (the mystery will remain until I build this other one).
But once the box was out, I remembered the Conqueror-powered
version (2G) commissioned by Jackie Cochran to enter in the 1934 MacRobertson
England-to-Australia race. The Gamma is per se a very appealing design with its
radial, but so is this beautiful two-place in-line racer of polished lines.
There are failures that are a success. In this case an
aesthetic success if nothing else.
The engine kept giving grief, and the plane never entered
the competition, being later re-engined back to radial.
But those lines, oh boy, those lines.
So the conversion started by selecting the parts of the kit
that were still applicable to the build and adjusting the areas that needed
modification (canopies are in this version way far back), modifying parts as
needed. A complete new nose would have to be constructed with its prominent
chin liquid radiator fairing.
My dear friends the Ornithopters came to the rescue (especially
Sönke, the Evil Genius from Volkania) with the graphic material necessary to
make an accurate version, and I had already a folder on this machine with some
images collected along the way, mostly from the Net.
And so it begun.
The original Williams Bros kit. On top the parts that can't be used in this version:
The park bench ailerons, not for this version, but you could use them on the new Azur Northrop Delta for the TWA version -at one point on its life-:
The parts that will actually be used (minus transparencies and turtledeck, which are incorrect for this version):
Wing and trousers halves are glued:
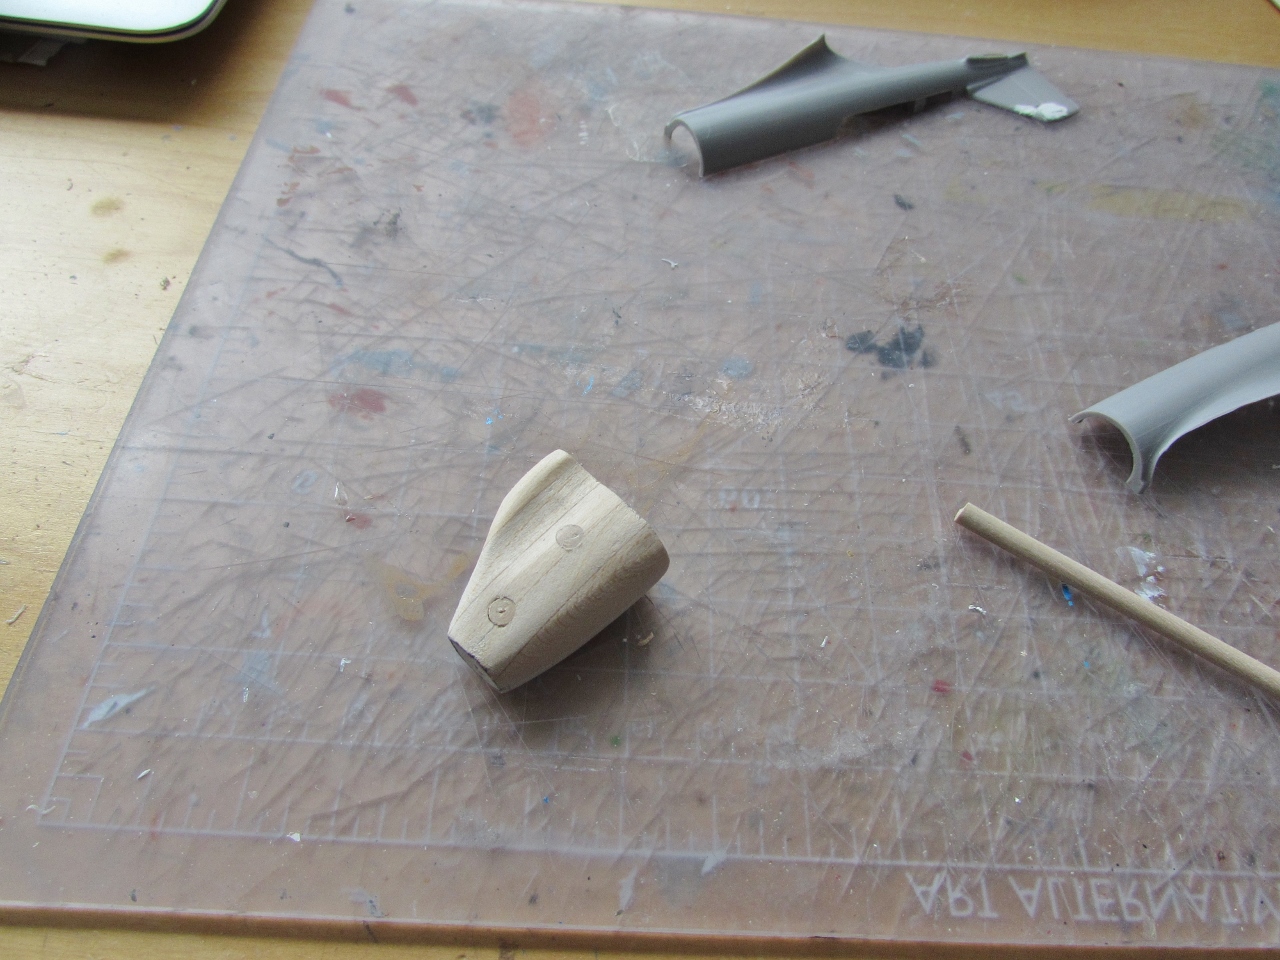
A new spinner needs to be fabricated:
The cockpit openings are very different in this Gama version:
The wood block that will be used to carve the new nose:
The floor has to be adapted to its new, far aft position:
The spine on the wing bottom needs to be erased. This version had two conduits. L.E. Lights are glued in place but only to restore contour, since this version had
different landing lights, under the wing, retractable. The ailerons are
engraved and the new landing lights locations drilled:
The raised panels lines are sanded and engraved:
The rudder in this version was balanced, it has to be modified:
More work on the nose:
More spinner are fabricated, to chose the best:
A section of the aileron ribs has to be erased:
Where the red lines are, lengths of plastic need to be added to conform to photos:
The modified cockpit floor and openings:
Lateral conduit added:
Yet more work on the nose:
The two conduits under the wing center section:
Interior basic color painted:
Some details picked-up:
Always testing the fit of components before committing to apply glue:
A styrene bit is used to occlude the kit's opening:
A sketch showing the nose components and engineering:
Nice kit's tail wheel:
More refinement of the nose:
Priming to reveal blemishes:
New prop is made from a re-worked spare:
Nose is vacuum-formed. The vac canopy was later discarded:
Some structural elements are fabricated:
Contour gauge used to obtain a section:
The "ceiling" of the radiator duct:
The way the duct ceiling is attached to rear bulkhead:
A sliver of space to account for the thickness of the vacuformed parts has to be left around the back former of the nose:
I did not use that vacuformed canopy at the end:
Tabs are added as one should with vac parts for reinforcement and to augment the glued surface:
Be sure to leave space for the formers:
The exhaust stacks are made of solder:
The stacks are sandwiched between styrene strips
A doubler is added to reinforce the area where the exhaust openings will be cut:
The aft bulkhead is opened to allow the installation of the exhaust stacks from the inside once the nose halves are glued together:
Nose assembled:
Position of exhausts is measured and marked:
The necessary space for the exhausts is cut out:
The opening is refined:
Exhausts dry-fitted from the inside:
Lots of dry-fitting:
Antenna loops are made to select the more suitable:
Vac canopy discarded in favor of hand cut and folded separate sections:
Holes for the antenna loop and retractable steps are drilled:
Hole for Venturi is drilled:
The handles for the two hatches are made:
Nose glued to fuselage:
The parts that will be the support of the aft radiator shroud is made:
The part under construction:
The faring for the new canopy arrangement, taller and wider than the kit's version:
Compared to Northrop Delta. Flying surfaces were common to both, with minor differences:
Basically the same size, but the racer carried only two:
Compared to the in-progress Rohrbach Roland. The Gamma was a big plane, if so elegant that is barely noticeable:
Black base for the paint:
Retractable climbing steps:
A nose for a venturous friend:
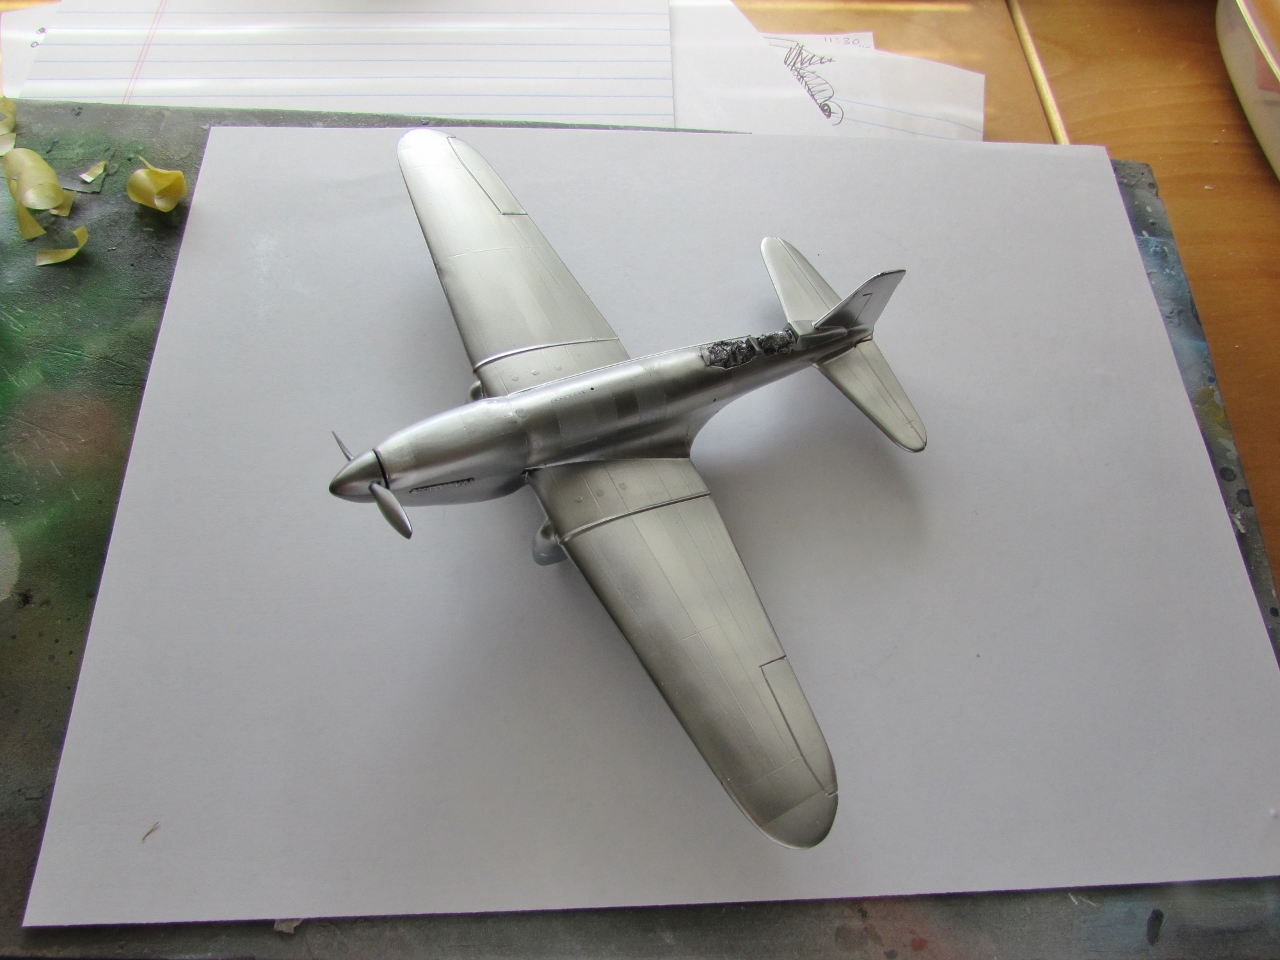
Metal paint in several hues is airbrushed:
The hatches are made of decals:
Landing lights. You can use the wonderful MV lenses, or make your own:
Small airscoops visible in photos are added:
Navigation lights are added:
Venturi and small blister added:
The new canopy:
Masked:
Mika's decals arrived! As usual well documented and nicely printed:
They go on without a hitch: