Styrene

Styrene

Tuesday, December 30, 2014

Macchi C.94 "Corporación Sudamericana de Servicios Aéreos" decals

An Argentinean civil decal set!
Being most of the time forced to make my own decals, which requires research, computer skills, taking measurements, study photographic references and lots of time, I am really happy when I find a decal set that is appropriate for one of my projects. Not to mention that the quality of professionally-designed/printed decals is usually superior.
So here it is this new set that I just purchased from Mika Jernfors of Arctic Decals: the Argentinean Macchi C.94s that operated with Corporación Sudamericana de Servicios Aéreos.
This set is the ideal companion for the Broplan 1/72 scale vacuformed kit.
The set comes in a re-sealable plastic pouch, is well protected, and includes and extensive color-printed reference booklet, a note on magazine references, and some beautiful self-adhesive, pre-cut "metal" window rims The images are very sharp, the printing quality is very good, with separate white background images to use as a base for some of the color ones, which makes register a problem of the past.
There is another set from Arctic Decals that covers the Ala Littoria liveries of the Macchi C.94:
Mika has a wide range of offerings, and he can be reached here:
https://www.arcticdecals.com/
Here some images of the sheet for the Argentinean Macchi decals:
And a link to some images and data:


Monday, December 15, 2014

Polar Lights Robby the Robot

And now -as Monty Python would say- for something completely different!

If the phrases "Fritz Lang's Metropolis" or "Forbidden Planet" say nothing to you, just skip this and continue to the airplanes.
To the fans of vintage science fiction Robby the Robot needs no introduction. To the ones that era not, nothing will make sense anyway.
The foundational "Forbidden Planet" movie featured this mechanical character that later on transited through the years all across the board appearing in other movies and several TV shows. Today is an iconic symbol loved by supporters of the genre.
I finally could get my hands on this kit thanks to the good offices of my dear and trusty Burbank House of Hobbies, who are the nicest, most reliable and fast hobby supplier I have seen in years.
This Polar Lights edition includes the figure of the female character of the original movie, Altaira, whose attention Leslie Nielsen (yes, pal, the same) managed to pick up.
This kit is different from other releases as the legs and arms of the robot are differently posed, and includes a new base with the movie poster background in cardboard, a bit cheesy as it should be with these early examples of the genre.
The model is quite hefty, indifferently molded, quite heavy and the details are coarse, again, in line with what you could expect from a "figure" model. Lots and lots of seam kilometers to scrape, fill, sand and smooth-out. The fit is not bad, though.
The number of parts is not high, even with the added female figure.
You can find on the Net some "upgrades" for this kit: photoetched parts and some electronics that include light and sound effects. Although you could add those to your model with some extra work, it is not my cuppa, preferring personally to leave things as science-fiction nature made them. 
This model is being built for -and dedicated to- my younger son, Mateo, a fan of the genre and computer/programming wizard. 
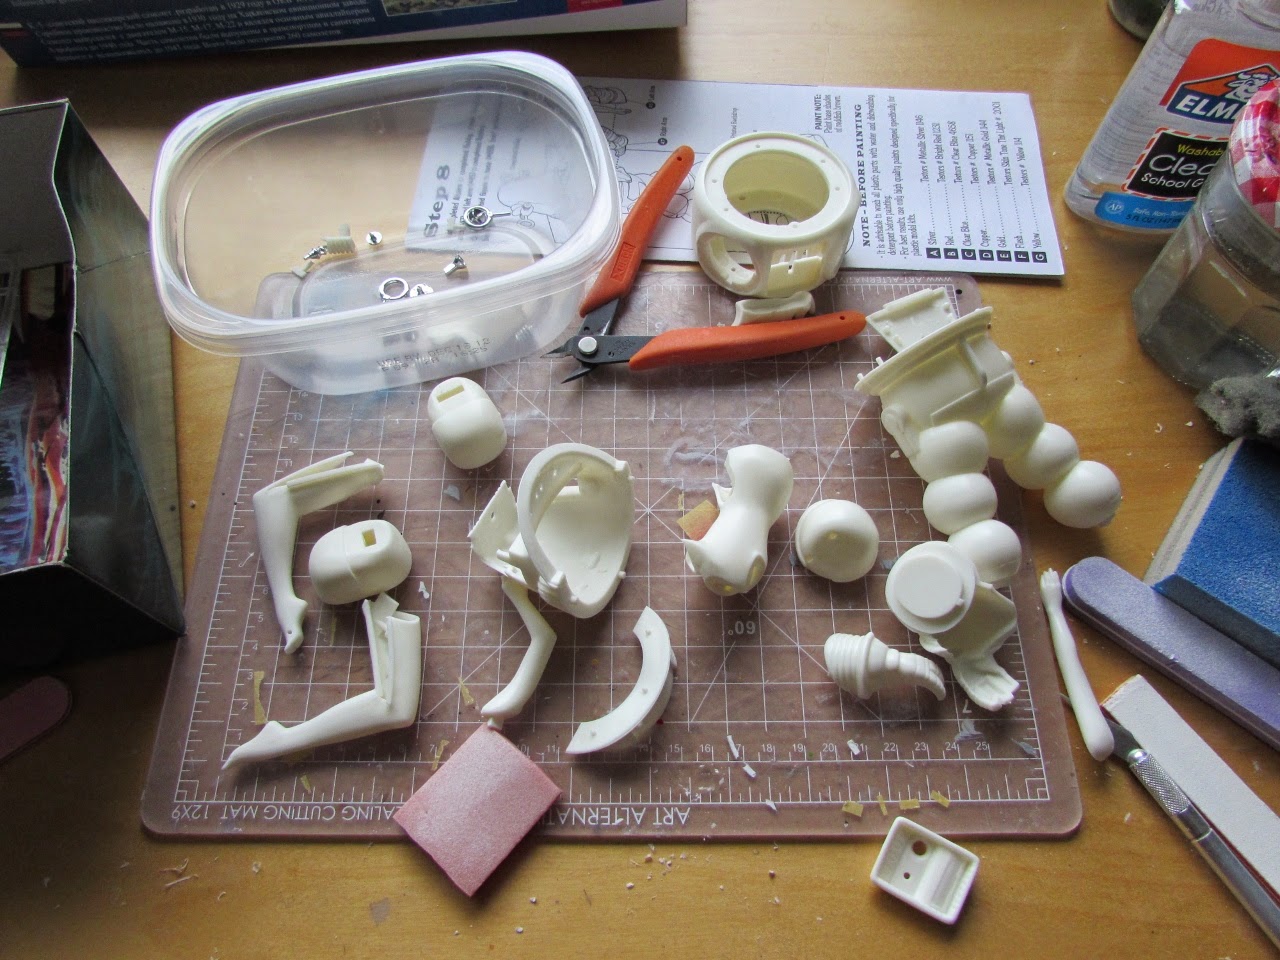
 Contents with sprue trees individually bagged, instructions and....Mini-Poster!:
 A chopped-up woman is included, don't panic, it is not a CSI prop:
 The chunky robot parts with the chromed sprue:
 Some parts released from their sprues:
 Clamp City, the place were robots are assembled. Or at least this one. Clamps are a must to secure the parts while they dry:
 Dry-run of some components and pencil for scale:
Once the parts that were glued together are ready, the real work commences with this model: the treatment of the seams. These were first carefully scrapped with a dull blade, then sanded with sponge sanding stick on the curved parts and hard sanding sticks on the flat parts. As said the fit is not bad, especially for a kit made in China, but surely some filler will be needed. Sanding also extended to parts that stand alone too, since there are some rough edges and mold lines that need attention:
 After sanding, all the parts were washed and allowed dry. Now the filler/putty needs to be applied:
Liquified Tamiya putty is applied to all seams, to be later sanded smooth:
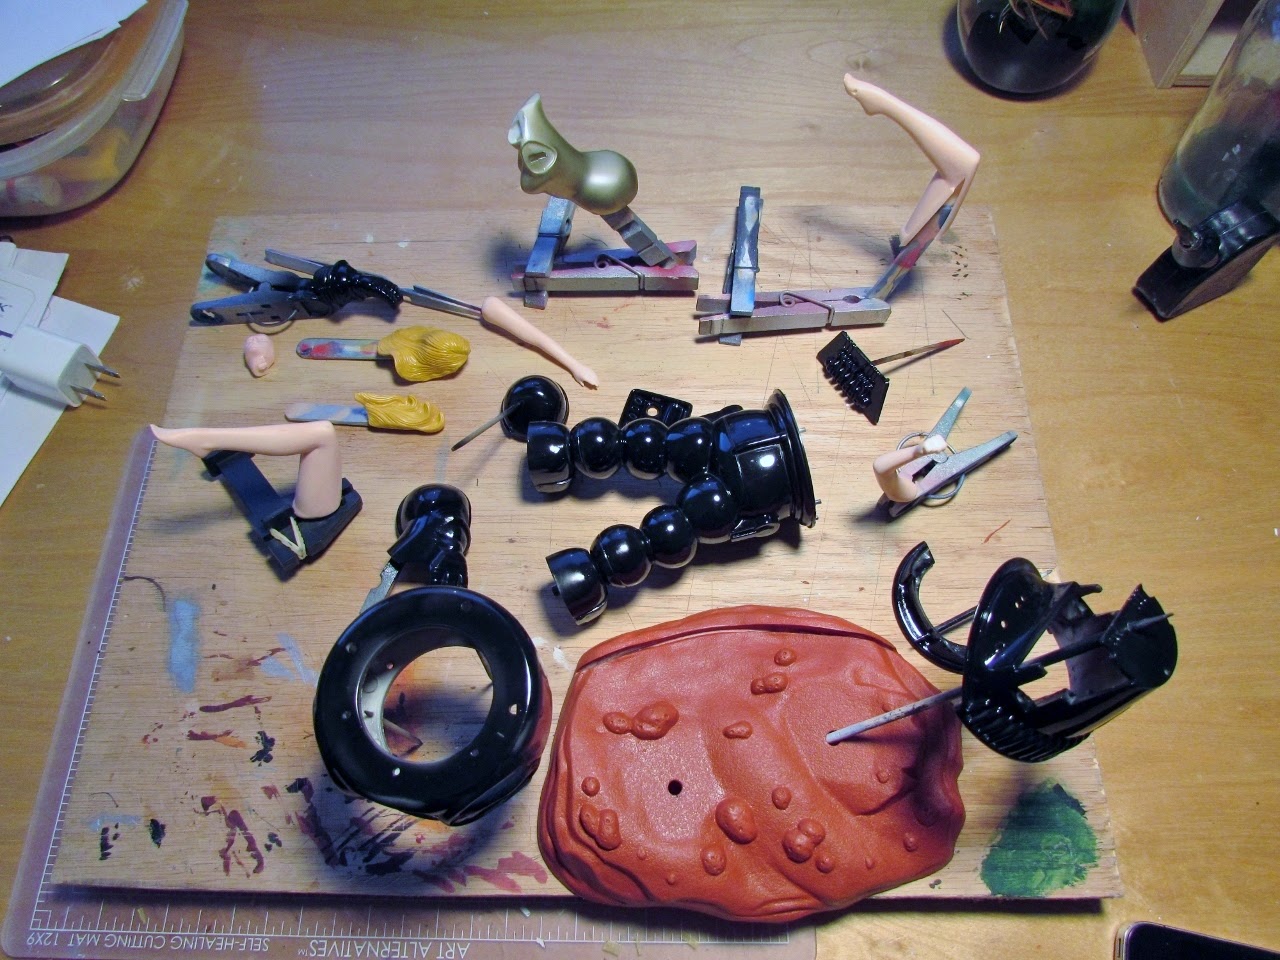
After the customary several sessions of sanding and applying more putty, a final washing and drying and the colors were airbrushed. The "dismembered woman" was airbrushed using a home-made mix that rendered a suitable flesh tone, using artist paint and some acrylic thinner. For the dress I tried a new product, Model Master Blue Clear Flip Flop enamel, that was supposed to change hue varying the angle. IT WAS A TOTAL FLOP, as its name indicates, and did not work at all, leaving only a clear film with almost no color, surely not blue, and did not change. The traditional movie gold was then applied. The hair was also painted in acrylics of two tones. The kit maker made these sub-assemblies to facilitate painting for the modeler, so all components can be given their proper color and then glued, and the seams correspond to natural separations, like dress, hair, etc.
 Gloss black enamel was applied to all robot parts in preparation for the Alclad, which I think will be steel, since it matches very well the movie stills I have. Painting revealed some blemishes, though, so the robot torso will have to be puttied, sanded, smoothed-out and repainted:
 Darling, dear, what is that woman doing on you desk?:
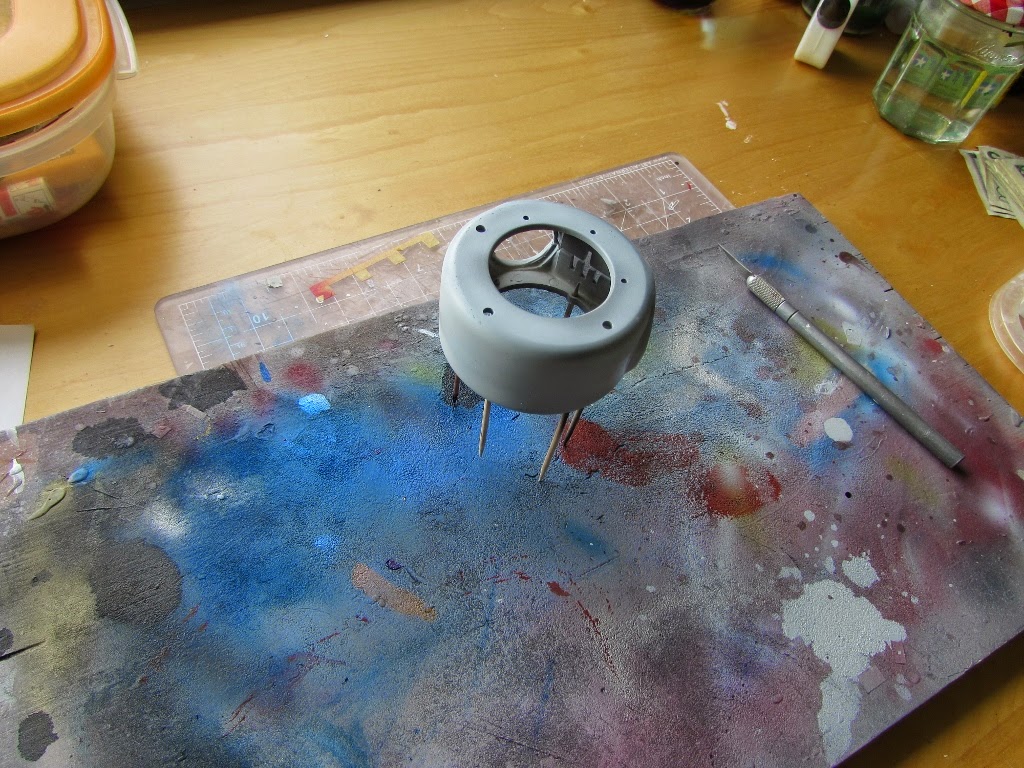
To correct the torso blemishes, it is airbrushed with a product new to me, Alclad gray primer and microfiller. It worked well:
Alclad steel is airbrushed:
The ancillary parts are now colored as per stills of the original movie. It is now when the mediocre quality and production of the kit is most noticeable. The clear parts have flash and excrescences, and they are poorly molded:

 Look at this one half of an "ear": the two bigger towers are flash, the two smaller pips are the locating pins. Man, this is not a bargain kit, the designers and the Chinese factory could have been just a little bit more careful:
 Same here:
 More parts need color application, in this case a chest knob that should be gold, not "silver" plated:
 And these are the worst: the said "ears" which are totally, absolutely awful and do not match reality, and the "transducers", which come as solid plastic and should have been included with the clear parts. The clear circles you see are the ones I am producing to replace the solid parts:
The clear parts are cleaned and given a floor polish bath:
The base is prepared:
 The head is assembled. Watch out because the clear parts that have those little accordions are a very poor fit and are all different, in spite of being all "#15". The shorter ones should go in the middle, the longer ones at the ends:
The modification of the "transducers" start by chopping the fins:
 The "furrows" between them are used to accept the half-circle clear parts previously cut:
 The "ears" needed extensive filling, puttying, sanding, etc., a base of black paint is applied:
 And then steel paint is applied before inserting the half-discs:
The fit problems with the head components continue. This head was a....headache!:
 The torso is joined to the legs and the chest plate with its additional parts is added:
 All head components in place, after much huffing and puffing and shaving and filling and...bloody head!!! :-)
 The clear face plate finally in place:
Do not glue the arms before placing the figure, it won't fit. First position the robot's left arm around the figure and glue it to the torso. Immediately, before the glue sets, add the right hand. All these parts have an excellent fit (contrary to the head's bloody details):
 Let the whole thing rest until the glue dries. Watch out that the robot does not get too fond of Altaira...:
For the photos of the completed robot please go here:
http://wingsofintent.blogspot.com/2015/01/polar-lights-robby-robot-completed.html

Sunday, December 14, 2014

Avis 1/72 Mig-8 Utka

 This is the review/building article, for the completed model please go here:
http://wingsofintent.blogspot.com/2015/04/avis-172nd-mig-8-utka-completed.html

If Mig is a recognizable name in the aviation world, this particular plane, the Utka (duck in Russian) may be not so. Designed along the lines of the canard (again, duck, this time in French) lines of so-(wrongly)-called  tail-first, it joins the multiple planes built by a number of manufacturers using that formula.
I was surprised of finding this plane as a kit, and I am happy Avis, the manufacturer that released it, decided to present this attractive and unusual civil aviation design.
Congratulation Avis on releasing an appealing and unusual civil subject.
At approximately the same time, a resin kit appeared in the market. This other resin kit by Jet & Prop seems to be nice and very refined, but, alas, as usual, with a much bigger tag price.
This resin kit presents a different solution for the transparent parts, presenting the whole area as a clear part, a much better approach than the one taken by this injected kit by Avis, which only has individual panes that are rather thick and not absolutely clear.
The Avis kit though has some degree of detail overall, however it gives a general impression of heaviness (short run technology). The surface detail is fair, and it has interior details too, if again not particularly refined.
No decals are provided, nor photoetched parts or masks. You are on your own to create painting masks for the design, which has a certain degree of complexity.
Some flash and mold lines are present on the parts and all require cleanup. The engine/prop pack is designed to allow the prop to freely rotate.
The price of this kit is very convenient, and you get a nice replica of an unusual plane, so for me it seems not a bad deal overall.
The kit represents one of the many iterations this design went through, so study your photos and references.
It is likely that this one may have a propensity towards tail-sitting, so I think it would be wise to load some weight inside the nose, just in case.
My thanks to Mr. Psarras of Parabailarlabamba, and Deimos and Phobos, his dogs, for facilitating the acquisition of this lil' kit.


 The parts are separated from the sprues. The sprue gates are somewhat intrusive and prominent, so a not small amount of cleaning and refining is needed. As you can see there is a nice number of parts, covering some detail. The seating for five (one pilot two benches for 4 passengers) is most likely inaccurate, since sources state that only two passengers were carried, in staggered seats on each side:
Once the parts were cleaned up of mold seams and a few rough spots, it was evident that due to the short-run nature of this kit the fit was vague, to say the least. Much scrapping and sanding is needed to make the wing upper and lower parts fit without a step, and the trailing edges need to be thinned as well. The parts are a tad chunky and thick, but all this just requires a bit of the ole modeling magic (and patience and no little sanding and dry-fitting):
The transparencies, although not bad,  present -when looked closely- a pitted surface that impairs clarity. I may replace the flat panes:
One of the most likely inaccurate benches is halved to make two individual seats as per all references I have. Metal armrests are added, and the floor seat pedestals trimmed to reflect the changes:
 The door outline is carved from the solid fuselage side and one is made from sheet:
 The kit DOES NOT provide the necessary anhedral (negative dihedral) for the wing -the kit wing is straight horizontally-, so that has to be "bent-in". Much sanding is needed for the lower halves to fit correctly:
 Even when I barely touched the contact surface of the fuselage side to true them, with a mere swipe of the sanding stick, the fuselage width is noticeably smaller than the width of the windshield! good that I checked. A thin strip was added to reach the necessary width. If you don't do this your clear windshield will protrude to the sides:
A weight is added to the nose to prevent tail-sitting. The aft bulkhead is glued in place. "In place" is just an expression, since the instructions provide a vague reference and the part seems not fit conveniently anyway. The wheel pants are seen here, an inelegant design solution that usually complicates painting. The fit is also vague and has to be worked out. Sigh...:
 The wing will need some putting to hide the wingtip gaps created by the particular method of achieving a good mold without sinkholes, reminiscent of old kits where the aileron was part of one half and the other cut around it:
Interior already in place:
 I decided to replace the bigger windows with tailored acrylic pieces:
 The instrument panel can be seen from these angle. The kit also provides rudder pedals and joystick. It is also evident how the pax seats should really be -the kit's are inaccurate-:
The fuselage halves are glued together and ancillary parts added:

 As you probably noticed looking at the photos above, I decided not to enclose the engine in the aft compartment. I discarded the kit's engine which is not bad, but not exceptional either, for cast cylinders made by friend and modeller extraordinaire Matias Hagen. These much better cylinders will be added later on after the model is painted:

 Dry-fit of the main components followed. ALL joints require some degree of adjustment:
Watch out because the vertical stabilizers are sided, not only up-down but also left-right. Once checked (and again sanded to fit) the vertical stabilizers are glued to the wing, so it is easier to deal with the joints without the fuselage interference:
The rudders' counterweights are molded integrally, and are just a tad coarse. You may like to replace them. For that you should cut them off, drill a small hole, insert and bend a wire, and add some white glue to its tip to simulate the weight teardrop shape:


Since we are talking about the wing, pay attention to the fact that the ailerons run all the way through the wing tip as indicated in the instructions' drawings. The box illustration and the kit parts themselves are vague in this regard. You may have to reinforce, as I had, that line on the wing tip (that is to say, it was not an inset aileron at the tip, it run all the way).

Styrene discs are punched out and applied to the interior of the cylinders locating holes, to provide a  base for them:
 All mayor components glued in place and surface ready now for the application of primer:

Photos show some kind of short skirt/shield for the cylinders not present in the kit, so they were added:
Primer is applied:
Color is airbrushed. A piece of decal paper is also painted, in case canopy frames, access panels, etc., needed to be done:
The propeller twin red stripes were made cutting very thin red decals leftovers. It would have been great if the manufacturer would have provided them:
 The very convoluted masking process in place. You have to make drawings of patterns, transfer them to making paper, align them...a real nightmare:
 Again, the manufacturer should have provided masks, very common now in kits, or at least patterns. You will spend a lot of time making up for this manufacturer shortcoming:
 All is more or less done, even prop and pants. Still some touch ups here and there will be necessary:


To be continued...