This is the step-by-step review and building post, for the finished model please go here:
http://wingsofintent.blogspot.com/2017/05/northop-delta-completed-azurfrrom-172nd.html
(I purchased this kit from my usual provider, Burbank House of Hobbies, and I especially want to praise the diligence and kindness of Glen, always helpful and patient with my sometimes esoteric requests. My gratitude also goes to Gilles and Mike)
It is always a great joy to see a civil kit released.
It is even better when it is good.
Until now, the only option you had if you wanted a Delta (not this one, which is 1A/B/C, but the dual cockpit version, 1D), was to combine the Williams Bros. Northrop Gamma kit with a Body Job (Esoteric Models very old conversion) vacuum-formed fuselage that was not precisely a paradigm of perfection. I know, because I have done it:
Build:
http://wingsofintent.blogspot.com/2015/01/northrop-delta-172-scale-williams-bros.html
Finished model:
http://wingsofintent.blogspot.com/2015/01/northrop-delta-172-conversion-completed.html
And as all of you know, once you had created a model you can't find on the market, the chances of a kit of it appearing increase exponentially.
Cheers for that!
So I now have a really nice Delta to play with. This boxing has decals for Sweden, US (TWA) and Mexico.
Los Hermanos Mexicanos will surely be very pleased, and perhaps see through this gesture that most people are interested in the common good, not in building stupid walls like some ignorant, utterly disgusting and vulgar morons in (very temporary) positions of power.
The kit comes in a normal, sturdy box that prevents pre-crushing, and the decals and transparencies are bagged separately, as well as the rest of the sprues. There are even masks to deal with a variation on the door area.
The molding is crisp, the detail is good, the transparencies are clear, and the parts are sound. There are some extra parts that correspond to other versions, either released before or perhaps to be released.
Venturous modelers may adapt (through extensive surgery, though) this kit to portray other machines, since there were many civil users, but I would probably wait to see if Azur/FRROM/Special Hobby releases the 1D version, before nipping and cutting to heavily modify this kit for that purpose).
The chubby, stubby, stocky, unmistakable and cute appearance of the Delta, together with several livery options should make of this a sought-after release.
Meanwhile, I can recommend the reading of the very good and well-illustrated article on
AIR MAGAZINE #24 (French publication)
Box contents:
Masks for the variation at the door area:
Nice instructions, well-printed in good paper with clear diagrams:
The parts out of the bags:
Clear transparencies:
Alternate parts for the spares box:
The are a couple parts that should have had the ejector pins or sprue connectors on the other, not visible side:
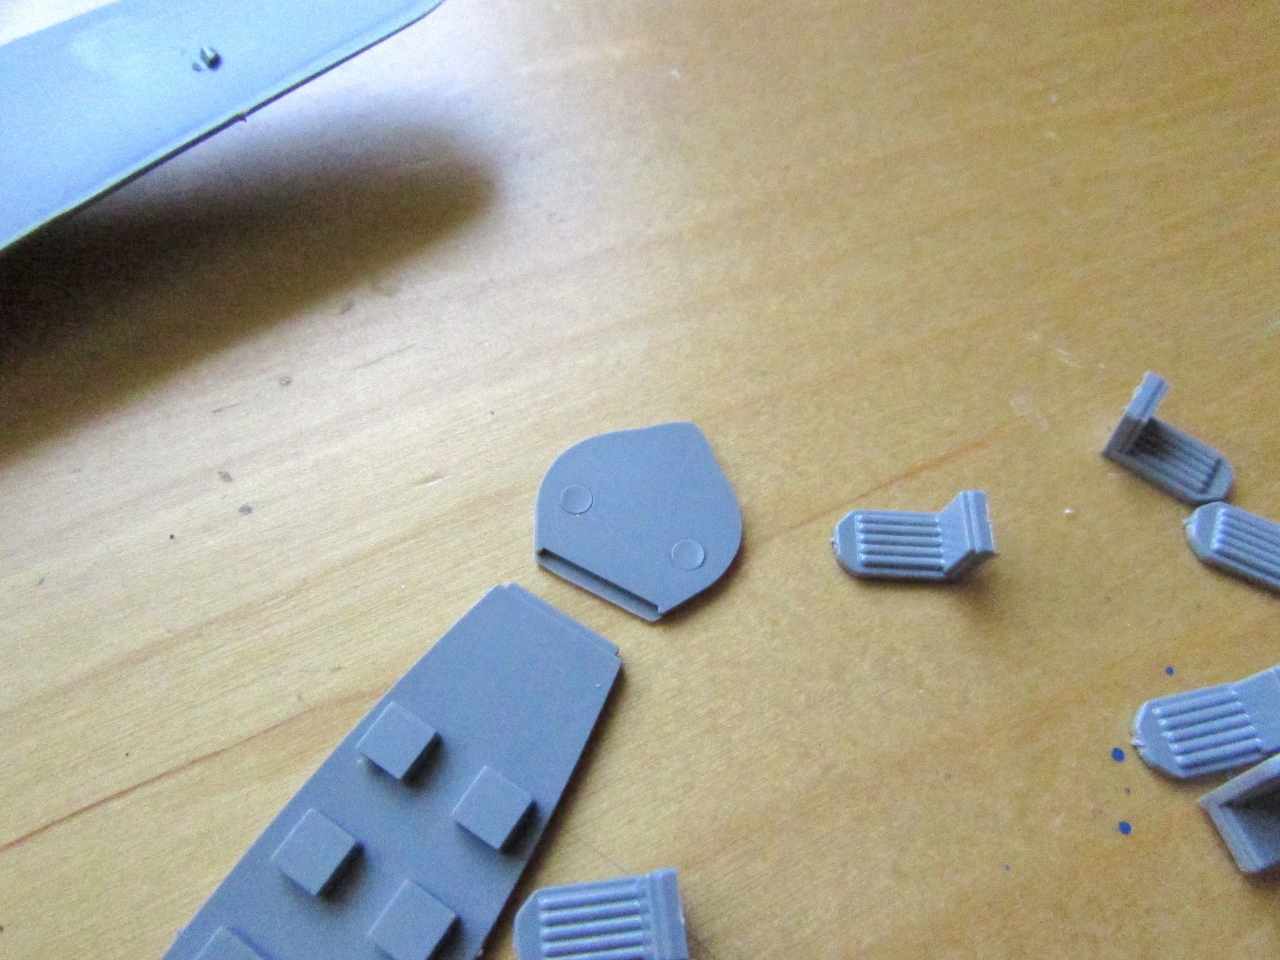
The parts separated from the sprues, and to the right the left-over parts not used in this version:
Another view:
There are only two hinges for the elevators, but there should be four (there were two more on the other side -underneath- of the stab), clearly visible in photos -if you bother to look:
The wheel/pants assembly is clearly geared to cater for several versions, compromising its practicality (you will have to devise a way to anchor that wheel there, the kit suggests drilling holes for the axle, if you do that, do not go all the way, just enough to help the axle set in place):
The stab halves are a tad thick and chunky, I'll sand them a bit to make them more refined, but not too much because then they won't match the fuselage fairings where they go :
The interior and engine undergo some assembly. Use the proper engine case for the version you are building. The pilot's seat has a slightly different back, use the right one, it comes separated on the sprue:
The stab and wing halves are glued together and secured with tape while the glue sets.
I was tempted to lower the split flaps, but I'll do that when Azur/FRROM/Special Hobby releases the late version ;-)
Of course I couldn't resist and had to open that cabin door (what's the point of that interior if you can't see a darn thing through those thick transparencies). A new one will be later scratched and posed open.
Needles to say as it is the case with this type of kits, no locating devices for some of the parts (wing, stab, fuselage halves) and some weak-looking incipient ones to lock the stab halves on the fuselage:
I am going for the Mexican version, just to piss the ferret-wearing, cheeto-faced vulgar inept that we have to endure now (not for long, though).
The kit, following one photo, states that the rudder was white. In that photo the elevator hinges are missing, the rudder is slightly deflected and the normal tailwheel is not present, and we can see a tailskid (unless it is a truly minuscule wheel). All the other photos I have show it as not being white, but more likely a variation of the aluminium paint/anodized finish, and what makes it evident is the white background of the nearby-placed Northrop logo. I really don't believe the rudder was white, as all the other photos show as said normal "metal" colors, unless in that moment in time (no hinges, tailskid, etc.) the rudder was temporarily painted so.
If you use the kit parts (normal tailwheel, elevator external hinges, etc), then the rudder should not be depicted as white disregarding what the instructions say.
I went a bit too far with the grinding tool and had to add a sliver of styrene to make up for the excess of material removed at the door opening. A few ejector marks were erased from the inside:
The kit omitted the five air vents on the top fuselage (four paired in twos, one single at the back) and the navigation lights. All those features could be added by the modeler.
Dry fit of the fuselage/wing. The fit is good, and the gap is in reality much smaller than what you see -if you hold the parts correctly, I couldn't since I was operating the camera-:
An interesting "conversion" would be to add the park bench ailerons that at some point the TWA plane wore. Pity the kit does not include them, but again, easily scratched.
Or if you happen to have the Williams Brothers Gamma kit, the park bench ailerons and their supports are already there:
The pants/wheel assembly. The holes for the axle were drilled on the pant walls. As you can see the wheels in the kit are more like car tires, a bit like a section of a cylinder:
The tire is rounded, for two reasons: to make it look more accurate, and because otherwise it won't clear the pants at the back:
Once rounded the fit at the back is better, but still not perfect....
...so a little material is carefully removed with the Dremel from the pants where the wheel touches:
Now the fit is snug (dry-fit here), as it should be, but you still can close the pant halves comfortably:
Thanks to the good nature of the kit things progress smoothly and quickly:
The elevators -that is control surfaces, not the stabs- will need some sanding, since there needs to be a hair of separation between the fuselage fairings and the movable surfaces. Considering some minor aspects of a number of kits on the market made now with Computer Assisted Design technology, I wish the CAD guys will know a bit more about airplanes:
A solid exhaust won't do at all. Some depth is carefully carved into it:
Let's see, an injected plastic tailwheel with a thin (to scale, though) stem that butt-joins to the fuselage...
I think we can agree this is wishful thinking on part of the kit maker. That tailwheel will most likely break off sooner than later:
What about we remove the plastic stem and insert a metal rod length made of a
discarded drill bit, and then drill a locating hole on the fuselage, and
after gluing adding a smidgen of a collar with white glue?:
The hole for the prop shaft has to be drilled:
My usual method of washing small parts: a coffee machine screen filter and a plastic container:
All is rinsed, nothing is lost:
Parts let to dry:
After all is clean, painting can start:
Interior sub-assemblies are painted:
Inst. panel glued to consoles:
Seat belts are made and applied:
Be sure to remove the ejector marks that are (of all places...) in the line where the cockpit floor needs to be glued, otherwise it will hinder it:
I decided to give the cockpit floor a more stable platform, and added two lengths of styrene section.
I had to trim back the floor and the instrument panel for the sub-assembly to fit properly, and not just a little bit. If you also need to do this, be careful, though, and remove just a small amount of material at the time until everything dry-fits properly.
The cabin section dry-fitted ok, but a slight trim of the aft bulkhead was also needed:
The new door is fabricated starting with a section of styrene sheet that is pre-bent to shape:
A good contour match:
The door silhouette is traced on the styrene piece using the opening as a pattern:
First cut leaving some slack, just in case:
Adjusting the door to the actual opening:
Again good fit (the door of course will be posed open):
Transparencies are given the proverbial floor polish bath:
Archer "3D" louvers will be used to simulate the missing 4 vents on the fuselage spine (two pairs):
I decided to glue the landing gear in place, in order to facilitate any possible filling and sanding without having to manipulate the whole model:
The windows' fit is ok, but some little adjusting here and there will be necessary. Since they press-fit into place (no lip on the molds), I managed to create stress "spiders" on some, and cracked another. You get no spares. Why manufacturers do not add in the sprues one or two spares for the more failure-prone or missing-prone parts has been always a mystery to me. You should carefully press the windows until they lay flush with the exterior surface. Use a soft instrument, like a blunt toothpick or the rubber/teflon tip of a tablet or smartphone "pen", and have something on the other side so they do not fall out. The glue's choice is yours. Since I bathed them in acrylic floor polish, I'll risk a minute amount of superglue:
The marred transparencies -my fault- are easily replaced with clear plastic sheet:
Masks are measured, cut and applied to the canopy:
My stash of home-made airliner curtains comes to the rescue:
They are folded and glued over so the image is seen from both sides:
The Mexican plane had one curtain per window, back to front, whereas the others had two curtains per window, side to side. Visible too are two tubes or hand-grabs that run the length of the cabin. Of course the seat at the door was foldable, but I left mine straight. To represent it folded, just cut the back and pose it over the cushion:
I decided to replace the kit's Pitot probe with a home-made one. The aftermarket CMK resin navigation lights will be added to match photos:
The fuselage halves are glued together. The cabin floor, if you want to open the door, needs to be leveled with it, so it needs to go down just a bit. I made a part to secure it in its new position, just bellow the notch the kit has for it:
Wing and stabs are attached.
The fit is good and parts will only need a couple passes of the sanding stick here and there. The seams are going to be tackled next:
The landing lights are there in the kit's drawings and box cover, but not on the molds. I drilled the locations and will add MV lenses:
The kit provides a Venturi, but is nowhere to be found in the instructions. The Mexican plane had one right of the canopy, so it will be added. The Mexican Delta also had an air-scoop to the right (pilot's perspective) and aft the cowl, which I made of thin but rigid aluminium foil and will be added later. The canopy had rails on which it slid back, short lengths of heat-stretched sprue will represent them. The latter can also be done with two lengths of thin wire:
First coat of primer goes on:
Do not forget the door, cowl and prop. At this point the elevator hinges are not yet glued, since they could hinder potential sanding or touch-ups:
The black undercoat is applied:
Some blemishes still persisted, so after some local sanding another coat of black was airbrushed:
Small details are added before final painting begins. First the kits elevator hinges, and a fabricated air vent, missing in the kit:.
And air scoop seen on the Mexican machine is fabricated and added:
Venturi added:
The two other elevator hinges, missing in the kit, are fabricated and added:
Aluminum paint is applied:
Canopy on (the fit is perfect). The door can be seen ready to be glued after all is done:
The engine and cowl on, again, perfect fit:
After acrylic coat, ready for decaling:
Decals are well printed:
But the Northrop logos are inaccurate:
Williams Brothers produced recently a sheet for their Gamma kits, so I cannibalized the correct logos from it (Arctic Decals also produces a Gamma sheet with the correct logo and options):
This is the Williams Brothers sheet:
In order to facilitate the application, I separated the images where needed:
Decals are really very good, but that means very, very thin, and a little fiddly, and not very tolerant to messing around. Use plenty of water and a soft brush to very gently prod them in position.
I managed to fold three, but fortunately could unfold them without incident. Be careful and patient.
Here the wing landing lights (not provided with the kit) and exhausts have been added.
for the finished model please go here:
http://wingsofintent.blogspot.com/2017/05/northop-delta-completed-azurfrrom-172nd.html


No comments:
Post a Comment