


(The completed model is posted here:
https://wingsofintent.blogspot.com/2021/05/boeing-40b-4-united-air-lines-cmr-172.html
This stylized Boeing classic was used as a mailplane and passenger carrier during the late 20s and the 30s. The prototype, looking quite racy with is inline engine and elegant tail, lost the 1925 mail contract to competitor to Douglas M-2. Here is the prototype after some mods were made to its fuselage aft section:

Nevertheless, the design was recast with a radial engine, greatly modified and refined, and a couple years later came back in full force, winning several mail routes flown by the entangled network of companies and corporate mergers/acquisitions that eventually will become the airlines we would recognize today. Users included PAT (Pacific Air Transport), BAT (Boeing Air Transport), Hanford Airlines, National Parks Airways, Robertson Aircraft Corporation (later absorbed by Universal Air Lines), United Airlines, Varney, WAE (Western Air Express) and others, and it also flew in Canada, Australia, New Guinea, and other countries. It was also used by some oil companies (if you excuse my bad language).
The 40 evolved into a number of sub-types, with two or four passengers seats, different power plants, and changes in a number of details.
This kit was a modeling dream of mine that seems to have become reality. This one has to be up with the best of CMR resin releases, and definitely in the top tier of what you can get in the market. I finally bought one, and then a dear friend bought another and asked me to build it, so this will be a tale of two 40s.

This kit (unlike the recently-posted builds of the Dora Wings kits) is an example of good research, with plenty of gorgeous detail and a high level of accuracy. True, resin imposes specific approaches to the build, and has its little challenges, but that doesn't detract a bit form it, and overall this is a very nice kit. It's not new by any means, which makes it even more deserving of praise. Good instructions with plenty of references included, and color pages, a beautiful decal sheet, masks, vacuformed windshields, and a photo-etched set complete the package. Two types of resin are included, a cream-colored normal one, and black parts cast in extra-strength resin. The resin is hard, even for the normal type, but the casts are very clean, precise, and have great detail. A full cabin and cockpit interior are provided, and the two passenger doors can be posed open if desired. Two engines (Wasp and Hornet) came in the boxing, which gives the more adventurous modelers more options for other types.
Speaking of that, the first model, for my friend, will use one of the kit's decal options for United, while mine will walk another path and hopefully become a plane used by Robertson Air Lines after being absorbed by Universal, for which I plan to commission a set from Arctic Decals, this time -and for a change- rather simple. This plane had an attractive burgundy -reddish maroon-/silver scheme, with the emblem of the winged man used by Universal on the fuselage sides, but with the Robertson lettering. I am mightily tempted by other schemes, though, like National Parks Airways, and also what I think is a green version of PAT, and another for WAE, and may change my mind mid-course if I can ascertain to a fair degree colors from the B&W material, the nemesis of the old-plane modelers.
As noted by the great late Jim Schubert in a review he made
of the kit, the only detail that needs to be added is the recess for the
retractable wing landing lights, adding MV
lenses (or in my case home-made "lights"). Check your photos because some planes had the "ice cream cone" -non-retractable- version. And some also had a red "passing light", seen some time in Ford Trimotors.
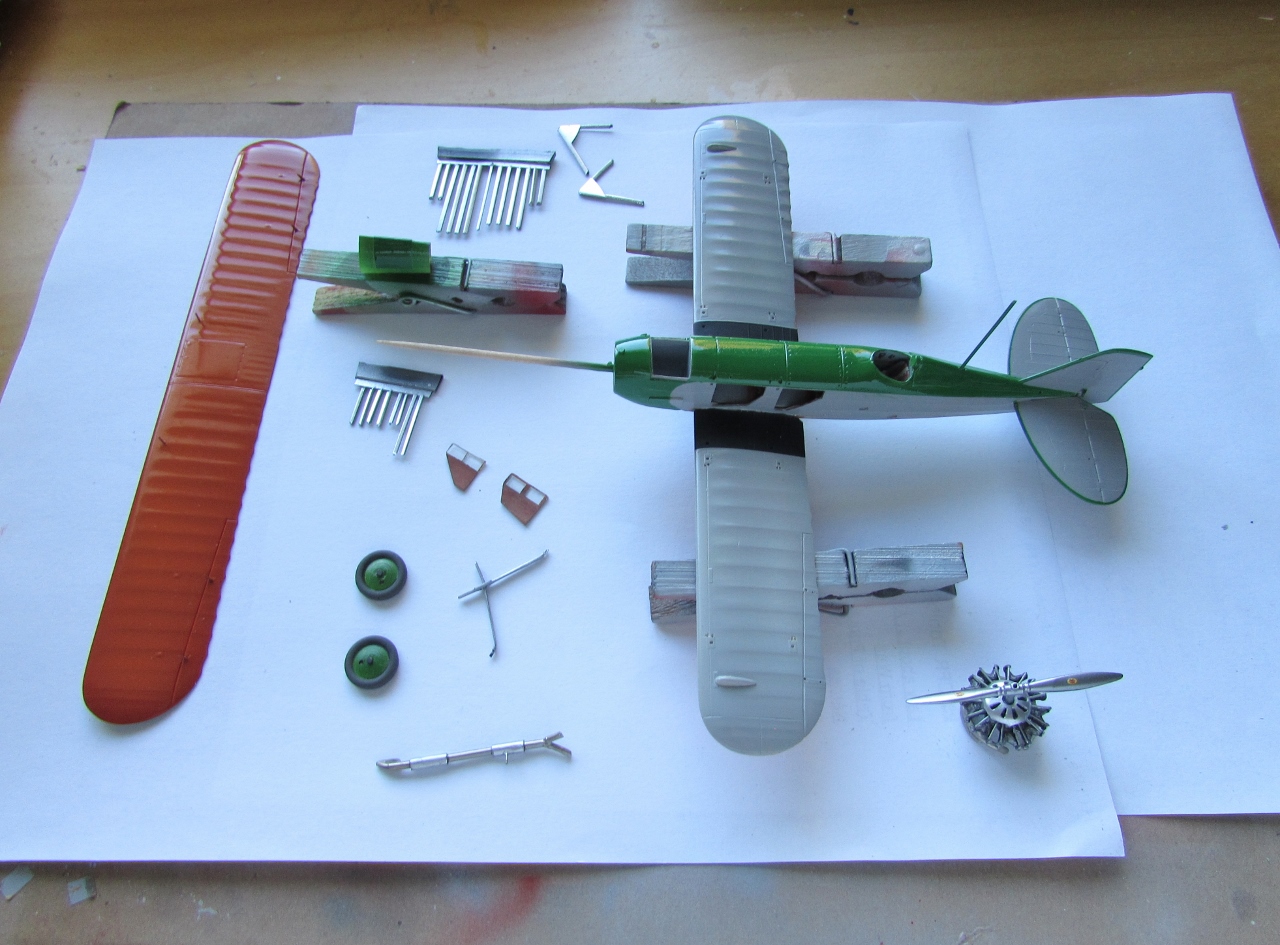
All the contents came very well protected and bagged in groups inside a welcome sturdy cardboard box. As per usual, parts are separated from their pouring blocks and cleaned up. Here are some of the contents ready to start assembly:


The two engines provided in this boxing. The one that needs assembling had some casting defects, and had to be worked out. The fit of the cylinders is indifferent and not self-aligning (opposite to the resin engines sold by Small Stuff, that are perfect), and ends up being larger than the one provided as one piece. I assumed these were the Hornet and Wasp, respectively, as the Hornet engine was bigger (only by some 5 inches). The one provided in one piece has the pushrods as a P.E. part and the shield separated. The kit marks them as options for the modeler to decide on the plan:


Meanwhile, and after some priming and sanding, the wing was given a base coat of gloss white to see what's going on with those pinholes. They have mostly disappeared:

Check the leading edges for blemishes, as resin wings often have some bubbles there:

The kit has seats side by side, but they were staggered (Boeing Model 40 and its descendants - the Great Mailplane of the Twenties by Walt Bohl), a frequent solution in cramped cabins to provide more elbow and shoulder room. Besides, the seats have to be brought back a bit from the kit's position, to match photos showing their relation to the windows:


Photos show that the seats have headrests, so they are added:


The upper side of the upper wing is also treated, and the pinholes are not visible:

Primer and some color are applied:

More paint is applied:

Oils are used to simulate the wood grain over the base color:


The lower wing do not have the recesses for the two retractable lights, but the kit includes one of the lights as an opaque resin part. Home lenses will be added to the drilled locations:


Engine and some of its associated parts. The engine, which is beautiful, does not scale up properly to a Hornet, been smaller, hence perhaps the need to include the other engine in the kit mentioned above, which scales well in diameter, but is pretty clumsy and inaccurate, thus discarded. I ordered one from Small Stuff Models in Israel:

so: of the two engines that kits has, none is good. Fortunately, I found in the spares bin a Small Stuff one that I assembled long ago. Here it is with the home-made prop and HS logos from Arctic Decals:


The windows are added from inside, the interior pan glued, and a ceiling applique with two cabin lights is provided:

And here is where your love for the kit starts to be tested: the interior, like seemingly all kit interiors in the modeling universe, is too large and had to be trimmed back. After decades of producing kits, you think manufacturers would be aware that this is a too common fault. The two fuselage halves are glued. These unfortunately are not really symmetric: the right half is onion skin-thin at the bottom, whilst the left half bottom is more than 1mm thick. This produced a very large step. The right fuselage half is a tad longer, and the profiles don't match too well around the seam either. Filling, sanding and re-scribing is written all over the wall:


This version has a headrest fairing that needs to be added. Again the fit has to be adjusted previous to gluing the part:


The top seam needed filling. The headrest fairing was masked around, in order to sand its flanges and reduce their thickness, trying to blend it better with the surroundings:


An air bubble opened up, a good chance to try a new product of which I know nothing: UV-curing plastic (NOT a glue, just a filler and volume maker). It worked so far:

Ready for a first coat of primer:

The tail feathers are added. The vertical tail, unlike the horizontal tail, doesn't have a lock-in device, so it is metal-pinned:


Now that the paint has finally set, the stubborn darned little pinholes were still a bit noticeable, I went for another sanding session and later will apply the coats of paint with the final colors. These pesky pinholes are the bane of many resin kits. Sigh...


The foldable step meant to be displayed open is made and fitted:


The nose mail compartment is lined and a collapsible cover made according to photos:


The wing fuel tank sump and the two lower wing light fairings are detached from their pouring block. As there is no parts' map for the resin bits, a couple items there remain unidentifiable:


A quick note for those who may be unaware of a detail: The Boeing 40 top wing had its partition not exactly mid-span, but displaced just a bit to the left -as you seat in the plane-, thus the "A" cabane struts do not anchor at that separation or partition line, but a smidgen to the right of it, on the right wing panel, so do not try to correct the location of the struts, as CMR got that perfectly right.
Struts primed and painted, mail compartment metal cover primed, body ready for the grey (first) color:

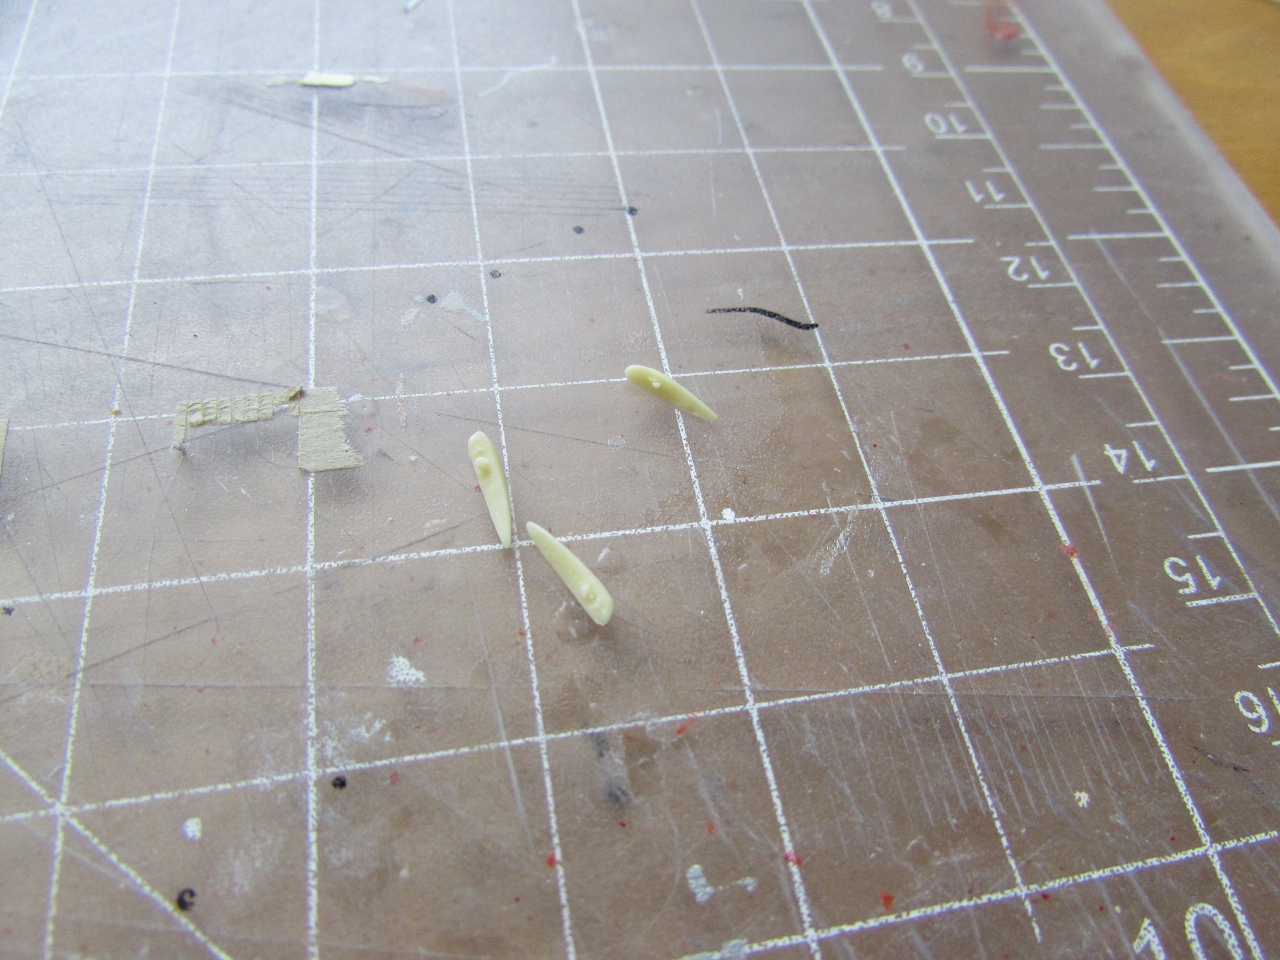
The kit provides PE horns only for the ailerons, and resin control horns for the rest, but I substituted them for different photo-etched aftermarket items. 16 are needed, as there are two for aileron (4 ailerons), 4 for the elevators and also 4 for the rudder, as at the bottom it also steered the tailskid (as per technical data). Do not forget at this point to drill the location for the 4 cables that close the upper and lower aileron control loops:

At this point all the rigging and control cable positions are drilled. The wing had double diagonal rigging, the cabane was also rigged but the holes need to be drilled according to photos, ahead of the cabane struts. The multiple tail surfaces control cables need their positions drilled too, as well as the tail group rigging. And then is the antenna wire drilling to, for their posts on the upper wing and their anchor on fin and fuselage. Plenty of drilling, one would say.
The other parts of the engine sub-assembly (shield, exhaust ring, and ring fairing) are attached:

I am doubting a bit the resin struts of the kit. They are -as explained- molded in a sturdier resin, but the longer ones still flex plenty, even on light loads. I have seen resin parts under load/weight pretty much giving up after a year or two on the shelf, so I am considering replacing these, or at least the longer ones, with metal Strutz:

The first color (grey) is applied. Metal strut stock is painted at this time in case I decide to go for them. The doors and step are painted at this time too with the external color:


Well, whaddayaknow...perhaps "never completely trust a kit"? Since the kit's masks set does not provide the side fuselage items needed to paint the green/grey version, I had to cut mask circles that, combined with mask strips, would hide the grey area to spray the green. Of course that entailed some measuring and verification, only to discover that the kit's fuselage pinstripe decals are way oversized, the ones for the tail feathers need some slight trimming back too, or there would be almost no space for the green rim. They will have to be cut in sections and overlapped to properly lay them down in place. Why, thanks, person that made the decals and apparently did not apply them to a real model to check them!:

The fuselage is masked in order to paint the black walkways. The top side of the wing is given a light grey gloss base:

How beautiful the lines of this design are:

The orange areas are painted:

A filling cap that was unavoidable lost -whilst dealing with the fuselage seam- is replaced:

After some hours of careful masking, the last color is applied. The kit's masks are thin, and they roll a bit onto themselves as you peel them from the backing sheet (still, I prefer them 10 times over those awful vinyl masks some kits provide). Positioning them was far from easy, and you have to provide your own masks for the rest of the scheme. This is something I will not like to do ever again, and to think that I still have to apply those complex decals that do not fit very well...

Masks are off:
A few things missing in the kit are added: a sort of finely corrugated panel on the fuselage top (home-made decal), a louver on the nose (Archer transfers), and the navigation lights on the small fairings on the wings (red and blue bits of decals):

Some postal packages and mail bags are created to be stored in the opened mail hold of both models:

As it can be seen in these images, the kit's decals are provided in such a way that each subject has an all-encompassing carrier. The vertical tail offers the possibility of you carefully cutting the pinstripe away from the text, which I will surely do. I decided to remove the carrier from inside the horizontal tail decals too, to eliminate the chance of silvering, yellowing and air bubbles, and to provide more flexibility to follow the already painted green outline. These decals are very thin (which is very good), but for the same token they turn into very finicky and misbehaving things that will fold over and mercilessly knot at the least provocation. My nervous system can only handle a couple at the time, with many hours between applications:


The kit comes with two vacuformed windshields, they are ok, but just a tad crude, so I made a couple and masked them:


All decals have been now applied, I am relieved this stage is over. They are a bit propense to silvering, and several applications of setting solution were needed:


It occurred to me to check photos, and whaddayaknow, both details have to be moved outwards, which I did, thanks to the glue that hadn't set yet. After that, the four downward struts were added:


The landing gear is added:


IMPORTANT: The top wing is added and more struts go in. As you do this, remember, as it was stated before, that the right and left top wing panels do not have equal span, and that the "partition" line is situated offset to the left (as seen by the seated pilot), so do not try to align it with the fuselage centerline, instead, align with it the dimples for the cabane struts:

And... I got tired of the combination of the kit's struts buckling, having pitiful anchoring pips, and the fact that they are wrongly-sized. So I ripped everything off, something I have never done in the last 20 years and close to 400 models built in that period. I will fix the sockets, make my own struts, and start again with better anchoring points and the right size for the struts. I usually replace resin struts in these kits with airfoiled metal items. This time I decided to trust the supposedly hardened resin struts. To start with, the primer and paint would not really properly adhere to them, and they felt flimsy to me, so my mistake to go ahead instead of replacing them from the start as I should have. So back to square one with this stage:

OK, re-done now:

Most of the rigging is done. The doors, wheels, engine and the long exhaust are added:

Antenna and other details are being added:

Will be seeing you at the completed model post.
No comments:
Post a Comment