

(the completed model is here:
What does one do when in England? yes, one buys an old
Airfix kit.
How old? look at the photos, 1957 vintage! a mold 55 years
old to this date.
Man those Airfix -and successive re-incarnations- squeezed
the pennies out of that mold.
What I want to do with it? you betcha. Convert it to a civil
machine, likely some variation of the Bristol Tourer/Coupe.
History: At some point after the war it was realized that
transporting people was much, much nicer than bombing then. This very
painfully-obtained knowledge was not, however, kept in mind for a long time. The
Bristol Tourer/Coupe was a direct derivative of the Bristol F2B. In that
regard, many countries, like Japan, France and Germany were doing the same: hastily converting war leftovers for the incipient civil market, many
times with the procedure of producing a “hunch” to protect the weary passengers
against the elements.
I may refer you to two of my models:
-Hawa F.3 (in this very blog, and old post):
-Hansa Brandenburg W.29 J-BCAL:
-Hansa Brandenburg W.29 J-BCAL:
You could model a civil machine without modifying a single
part of the Bristol Airfix kit, though. There were a couple of Canadian machines
(G-CYBC / DP and at least one Spanish that flew the plane as it is represented
in the kit (minus armament, of course).
Beware, since some of the other civil versions had different
engines, cowls, radiators, rudder, passengers’ compartment covers, supplementary
fuel tanks on the top wing, and minor details. Look at your photos, not even at
drawings: photos.
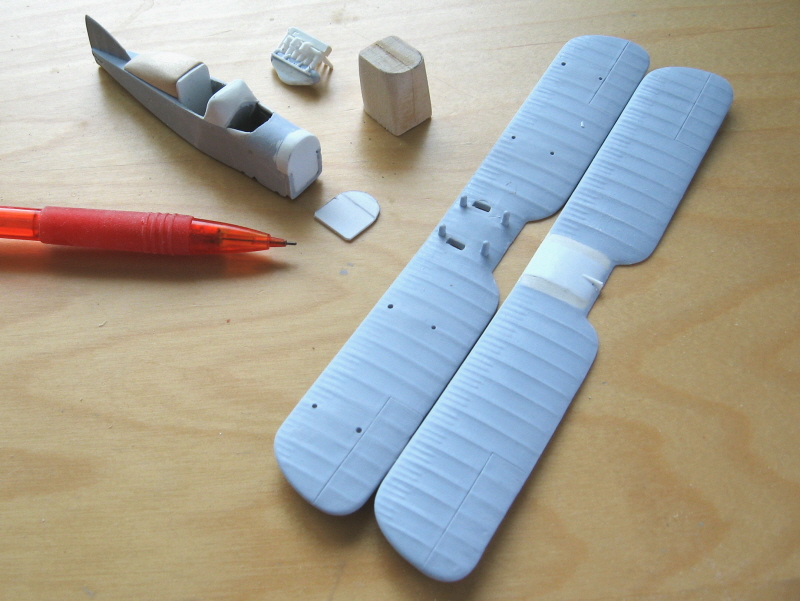
Since I was looking more and more at some G-AUD_ civil
versions I did some preliminary chopping, cleaning, filing, filling and sanding
as per images. All the stitching was eliminated at this point, later to be
replaced by other devices.
You can see in the building photos that some areas have been
removed and the section corresponding to the passenger cabin altered to
represent the increase in fuselage width that was incorporated in the real
plane in order to accommodate the side-by-side seating arrangement. Not all
Coupes/Tourers had this increase in width; again, check your photos. Some
formers were cut, and the usual interior paraphernalia prepared for the cockpit
and passenger cabin. Some external elements (augment rudder, different nose,
hunch, top wing tanks, etc.) had to be scratched too.
As you can see in the images the major work was concentrated
in two areas: the passenger cabin elements and the nose. The former is a
complex area that need careful observation of the photos and accurate
execution. Of special note is the transition from the former back of the pilot
(which has a sort or triangular shape at the top) to the first passenger cabin
former, which is quadrangular with round corners at the top, and leans forward.
The second area of effort as said was the nose. A wood
master was prepared in order to vacuform the cowling. Engine, radiator
and ancillary parts (like the oil tank) were scratched. The engine alone
insumed about fifty individual parts. Again, attention needs to be paid to the
sections’ transition, from firewall to radiator. At the firewall the top is rounded and the bottom straight,
and that reverses at the radiator’s cross section.
Home-made decals were prepared: a bundle of “stitches’
strips” and black regs on white decal paper stock. More details related to the
upper wing, control surfaces, ancillary parts, etc. were made; paint ensued
with a home-made custom color of all sub-assemblies.


More chopping and some assembling, including a new, larger rudder adopted by some of the G-AUD_ versions

The modified top wing with a dry run of the added tanks


No comments:
Post a Comment