
The first photos show, alongside the Lilienthal model, the box of the 14 bis, a second model that I am also building for the same aviation enthusiast and colleague.
Although photoetching is an excellent medium to reproduce
some aspects of a plane, not every element of it can be rendered with a
convincing degree of accuracy.
The Otto Lilienthal Glider of 1894 is, however, a perfect
subject for the media.
The box is made of flimsy clear plastic. The printed
material seems photocopied. Although the
contents were unharmed, I wouldn’t put back anything inside, since the boxes are not
robust enough, a malady suffered by other kit boxes too.
The metal parts are strong enough to endure the rigors of
building, and the kit includes –besides the metal parts- instructions, a resin
figure and some covering material. The resin figure is cast to an acceptable
degree of realism, but will do better with a bit of attention, since it has some rough mold seams and a few minor resin blobs. The covering
material intended to represent the fabric is white, silky and glossy. The
instructions are adequate, but written in Portuguese and many of the captions
are incomplete, as if they were inadvertently clipped. Nevertheless the images alone should be enough to guide you
through. Some details are a tad unclear, especially in the rigging department.
A nice detail is that almost all the photoetched parts come
already separated from their trees, all is needed is a quick swipe here and
there to eliminate a spot of slight roughness.
There are many little holes through which the rigging has to
go. Some of those needed to be opened since the etching process did not pierce
them completely, but it was easy and uneventfully done with a very fine drill
bit.
It is a nice little kit with a somewhat high-price tag (for
what I saw on the net, around $55) that can become an apt reproduction of an
iconic aviation history plane.
The parts were painted in a wood color and Mr. Smarty Pants
Otto was painted too.
It is not clear how Otto should be connected to the
airframe. A similar “Historic Wings” kit has some sort of braces for that
purpose, but not this one.
The parts were airbrushed with a wood color, and once dry
they were covered using a stick adhesive, since I was afraid the recommended
diluted white glue would be too wet and wrinkle the paper. The holes were
pricked through the covering. The vertical stabilizer was covered on both
sides, then inserted through the stabilizer. The holding bar was inserted
through the wing slots and the “poles” twisted to align them with the airflow
and position the holes on the top to better receive the rigging.
The rib stiffeners that go on top of the wing were liberated
from their fret. As said, the metal is stiff and kind of thick, so a good
-and heavy duty- Xuron-type tool should be used to cut them free. The rough spots were then sanded.
There are six of these baleens but only four are shown in the instructions.
Since no scale plan/ 3view of the model is given, their position is a bit vague, only
indicated by a perspective drawing that does not show if they run parallel to
the airflow or somehow angled in a certain way. Since they may hinder rigging,
I decided to glue them after I was done with it.
Once the structure was complete, I started to rig the model with very fine monofilament as per photos, but the model could not stand the necessary tension of the rigging, therefore everything was undone and the model was re-rigged with thin steel wire.
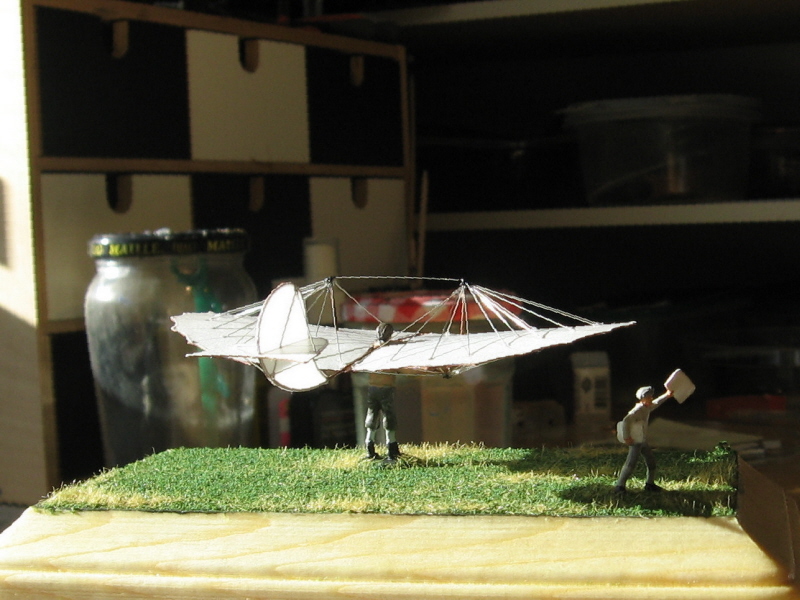
Once completed the model looks quite nice. Given its
fragility I posed it on small base with some “environment” details.


No comments:
Post a Comment