

(This is the building article, for the completed model go here):
http://wingsofintent.blogspot.com/2014/07/heller-based-172-scratchbuilding-of.html
Life is not easy for a super-villain that lives inside a
volkano at an undisclosed location in Europe.
Just imagine, for starters, what his heating bill may be.
Then is the payroll for all those security guards that are
there only to get shot, say arghh, and fall when they are attacked. And let's
not mention the bill that his "closest" sekretarien, Helga, runs. So
it is understandable that Zoenke (that's his name) used to aim his death ray to
the building boards of modelers around the world, while laughing and caressing his pet -a bald muskrat sent to him
from Alaska- that he some times unleashes upon his enemies.
Life is not easy either for the ones that have chosen the
hard path of unmodeling, like the Greek-American philosopher Xtmos of Malabamba
(actually the father and leader of the movement). The complexities, intricacies
and foundations of such profound school of thought are far beyond the scope of
this work. That these two characters will converge to facilitate the creation
of the model presented here, making the proverbial probability wave function
collapse, is a chapter taken directly from the quantum physics realm
Zoenke, repented of his super-villain life, and as a gesture
of friendship and atonement sent me the Potez 54 kit made by venerable Heller,
nowadays re-issued by Smer.
Mr. Xtmos of Malabamba sent in turn a wonderful reference,
the book by Monsieur Pierre Dumollard on the Potez 62 and 65.
More help came from master modeler extraordinaire Matias
Hagen, in Argentina
(as you can see this turned into an international cooperation effort) who acquainted
me with an article by Gabriel Pavlovcic published in the #27 issue of
Lima-Victor, a local aviation publication.
Monsieur Malain Bourret of Canada, another accomplished
modeler and flying cyclist, was a constant source of information and good
recipes, and Monsieur Alex Bigey (who flies high in the modeling world) also
contributed to the effort.
I should not forget to mention other members of the
underground modeling claque self-denominated Ornithopters - the majority of
whom would rather prefer to remain anonymous for the time being- that with
their moral support and unwavering encouragement contributed so much to my good
mood.
The conversion of the veteran Heller Potez 54 into a Potez
62 airliner is not unknown to the modeling universe. It is not an easy
conversion, and implies serious modifications of the fuselage and, depending on
the specific machine chosen, new engines and engine nacelles and other details.
The airliner will of course necessitate its new cockpit and a cabin interior,
with its many seats and other details -I'll just name the toilet for the
benefit of my friend Malain Bourret- a new set of decals will have to be
produced and some extensive research would be in order if you wish to obtain a
reasonably accurate reproduction.
Some modelers have chosen to modify the Heller fuselage,
while others took advantage of the Dujin resin conversion fuselage. This item
is not easy to get, but I believe is not impossible to grab one if you persist.
I passed for several reasons: price, material (resin) and the fact that not
having the opportunity of handling one directly I could not evaluate its
accuracy and level of detail.
This conversion has been tempting me for a while, but my
interest picked up in discovering that Argentina, the country where I was born,
had two Air France machines operating under French registration on the Buenos Aires
/ Santiago de Chile route, one of which was later acquired by the Argentinean
government and re-registered LV-SEC (F-ANQQ). F-ANQQ was a converted 62.0, therefore had no sweptback as the ulterior 62.1 series machines.
At around the same time two Dewoitine 333 and two 338s were
also acquired, but very unfortunately they were passed to the military and did
not go into civil operation, pity, because I would have loved to build models
of them too.
The Potez 62 LV-SEC operated only once, in half a flight.
That's correct. According to the Pavlovcic article it flew on an official
mission to Rio de Janeiro, Brazil, with some politicians and predictable
entourage, only to crash on take-off on the attempted flight back, fortunately
with non-fatal injuries but leaving the machine converted in a pile of
trash. So what's new regarding
politicians?
The same article features a photo (apparently the only
known) of LV-SEC's tail sticking out of the water, not a pretty -or memorable-
sight.
As I started to gather, read, and compare sources,
references and photos, it became obvious, as always, that you can not really take
all you read as uncontroverted truth. The Pavlovcic article, otherwise a good effort
that deserves praise and has many merits, seems to contain nevertheless a few
inaccuracies, the most potentially misleading stating that the engine on the
French machine that will become the Argentinean machine has its engines changed
from inline (Hispano Suiza 12 Xrs) to radial (Gnome Rhone 14 Kirs Mistral
Major) , which I believe is not correct. It seems it is all the way around:
having started as a Potez 62.0 it had the radials, but when upgraded to 62.1
received the inlines. Surprisingly enough, in the very same article there are
two photos of both Air France Potez with
inline engines. Furthermore, he mentions about the Argentinean machine that
had a "big radiator in the lower-front part of the nacelles", an
undeniable feature of the inline Hispano Suiza, and photos of the Andes
crossing taken from the Potez and partially showing the engine show an Hispano
Suiza inline front, so I am not sure where this confusion roots. This is
important, because being an inline engine, you could use the kit's nacelles,
although not without some modifications, as photos show. This mods will be
dealt with later on. If you are "un hermano de la Banda Oriental"
(that is Uruguayan), being your Potez CX-ADH a 62.1 (ex- F-ANQN), it should include the
modification of a 2 degrees sweptback as this one was a 62.1 from factory, therefore it did have the 2 degrees sweptback of the 62.1 series machines.
An article by John Stroud on Aeroplane Monthly of May 1986
in his "Wings of Peace" series states that the specific machines that
operated in Argentina
had five seats. This is understandable if you contemplate that they had to
cross the Andes to Chile,
reaching an altitude of 5.500 meters (source: article on the Potez crossing the
Andes on Revue Hispano Suiza). The same source
also states that the two machines had Hispano Suiza X engines, and gives
the second machine as F-ANQQ, instead of QO as the Pavlovcic article. In that regard the Pavlovcic article in Lima Victor is not correct. Unfortunately for Pavlovcic (and this mean absolutely no disrespect and does not detract from the merit of the overall effort) all references state F-ANQQ, including the Dumollard book and the registers:
http://www.ab-ix.co.uk/f-aaaa.pdf
Those original five seats were nevertheless surely increased in number as the machine passed to Argentinean hands, as the count for the infamous flight to Brazil shows: pilot, co-pilot, mechanic, radioman, mechanic assistant (five crew members) and eight passengers (13 total).
I started by making the fuselage sides. One quick look at
the kit ones made me realize that I would save a lot of time if I just
scratched the fuselage instead of trying to cut, splice, patch, fill, putty,
sand, smooth out, etc. the kit parts. My wife suggested I could save even more
time by not building the plane, but, although her logic is undeniable, I
suspect a catch there (as in everything she says in that particularly sweet
tone of voice) so I did not follow her advise.
The old and venerable Heller kit parts sent by Zoenke, minus transparencies. Note that he glued two parts together, the engine nacelle. That effort almost gave him surmenage. Note also the clear propping base, a cherished relic from the past:


More work on the fuselage sides, marking the locations of the diverse features:
 Starting the drilling to hollow-out the windows.......zzzz.....zzzzzz:
 Cross-cut to be able to pop the discards, doors are temporarily separated at this time:
 Some filing:
 Sides more or less ready:
 The reinforcement battens start to be added:
 Work steadily continues:

 The battens are all in place:
 The doors, that were cut earlier on, are carefully removed since the liquid glue was partially holding them. Now we should check for partially detached stringers and re-glue them and once dry a bit of sanding and rounding of the stringers ends:
 The supports for floor and roof are glued:
 Bulkheads and other details are cut next:
 More bulkheads and the instrument panel are cut, the Heller part is cut to be able to span the larger fuselage width:
 The lighting bars and the hanging storage are fabricated:
 A piece of mesh is cut with care (so it wont fall apart) from a 1/24 car grill mesh left over:
 The mesh is temporarily placed to see how it looks:
 The wing root moldings are cut from the Heller fuselage to be later added to the scratched parts. As you can see, I make sketches of areas or items I'll be building, so I have a clear idea of their geometry and components. This is indispensable for all scratchbuilders:

 Starting of the prop's axle (the cap end has been heated and flattened):
 Counterweights and hubs added:
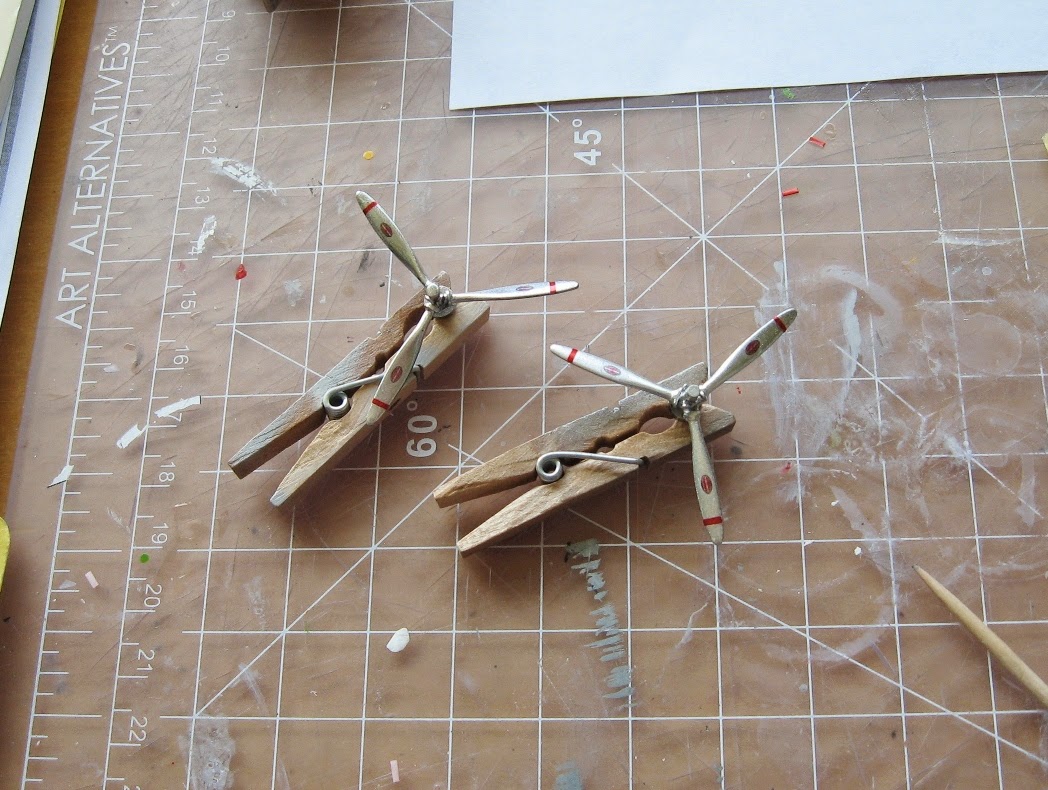
 Blades chopped from donor prop:
 A pair of twins counter-rotating props:


 The parts from the kit that will be used are cleaned up. The engine nacelles are not good for any Potez 621 as they are. They need to be modified, their front, top and back was different, and the scoops and panels too. I will also change the way the wheel struts locate, since the kit has a remarkably dumb way for those parts to be assembled, complicating the tiding up and most of all painting of the individual elements. All this will be discussed again at the proper stage:

 The nacelles are modified so the wheel and struts can be slide in after painting, by erasing the protrusion that locks the legs and supplanting it with a retainer; one side of the "box" at the back that locks the diagonal braces is opened. The statement by Vanchxz Gilberto that "Gauche" means in the manufacturer's French "Gaucho" -and so to be used to model the Argentinian Potez 621- should not be trusted, it means "left":
 Zoenke's glued nacelle is pried open, a difficult feat further impaired by the fact that he uses "Helga's Love" cement, which is very strong:
 The cockpit is tackled next:

 The fuel tanks are marked on top and bottom of the kit's wings, since it is possible that some of these surfaces were flat panels and not ribbed surfaces as in the kit. The plans on my main reference , the Dumollard book, show a "thickening" of the wing in that area at the bottom, a modification perhaps made to allow for more fuel on longer flights. I can also see in photos bumps, pipes, panels, etc,. The location of the two "bumps" under the wing in the Dumollard book plan is inaccurate, as anyone can verify looking at photos; the bump closer to the fuselage is almost right in location, but much more prominent on the side view; the one farther from the fuselage should be aligned more or less with the aileron's beginning. Bear in mind that the kit does not provide the tube/rod that runs from wing tank to gondola:


 The air scoops are removed from the kit's engine gondolas since they were not present in the airliners:
 The surface detail is subdued and a few panel lines retraced:
 Voids are filled-up with styrene pieces:


 Then the cockpit floor and seats:

 The ceiling details are being added:


 Second color applied and masks removed. The effect is subtle, but elegant: French:-)


 More detail painting:
 Some of my painting is done by hand using a number of brands. The "New" Citadel paints are a clear intent to sink the brand to the bottom perpetrated by their owners, lacking in every department compared to what their product used to be. How suicidal has to be a brand to ruin a perfectly good product, releasing to the market a "new" version that is total manure?:


 I had forgotten the toilet roll (sorry Alain!) but now is there too. The mirror is represented by a tiny piece of chrome metal foil:
 The inner side of the doors is painted (which I had also forgotten). Still far from finished, since all the windows have to be cut to size and fitted, the curtains made, and the net for the luggage rack -previously prepared- has to be applied too:


 The two Hispano-Suizas arrived today from Engine & Things in Canada, they look good:
 The plan is to open a couple of panels on the gondolas to show them:
 Paraphrasing once more George Orwell: "All windows are created equal, but some are more equal than others". The windows are individually cut, fitted, and put in place:
 Reading lights are added:
 The rack net is in place:
 Mr. Christos Psarras, famous unmodeler from Malabamba, suggested this method for the curtains. Conveniently shaped curtains are printed. In my case, because I used a an inkjet printer, I had to seal the images spraying from a can of artist's workable fixative, both sides:
 The images are cut and folded over and glued together in register, because the two sides will be visible:
 Individual curtains are then cut, their edges run with a permanent marker to eliminate the white line of the paper, and then glued in place. The effect is convincing enough in 1/72, although it has a pinch of theatrical effect. But modeling is theatrical by nature because it seeks to represent reality anyway.
 From the outside they are partially visible. Yes, it is a bit of a chore, but somehow amene:
 A bit of dry-fitting:

 The sides and bottom are glued:

 decals are printed (also the Heston Napier's in the same sheet):
 The top of the fuselage closes the assembly, the wing roots are added:
 The cockpit floor is shaped and added:
 The locating holes for the stub wings are cut out and drilled:
 The engine gondola sides are glued together after altering as shown before the anchorage points of the LG. The tail end is chopped off since the HS powered airliners had a big pipe coming out of it, to which the normal exhaust pipes were merged:
 One of the gondolas is prepared to show the Engines & Things Hispano Suiza, removing panels:
 Fit test::
 The tankage in the wings produced a bulging of the intrados, therefore the area is engraved, and material removed inside those lines for the "metal sheeting" to match the surface later on:
 The simple expedient of adding a rib will push the section outwards in a curved way:
 A general view of the remaining parts. A few more to scratch:
 The area where the tanks are is modified as previously explained and other details added:
 This produces the desired bulge:
 The stub wings are added:

 The kit's landing lights and probe locations are blanked out, since the airliner did not have them. Holes are drilled for the nav lights:
 Metal pipes are prepared for the gondolas exhaust system, very different than the one in the kit:
 Tail feathers in place:
 Scratched tail wheel unit in place minus wheel:
 The nose is now approached, first two parts that rig the geometry of the windshield panes are cut and glued in place:
 More auxiliary parts are glued to help shape the nose:
 Milliput is used to contour a nose using the radial structure as a guide:
 Milliput nose already sanded:
 One wing on:
 And the other. No dihedral, no swept-back:
 A view of the model at this stage:

 The engine gondolas are next. First the "radiator" part is removed, since it is not correct for the airliner:
 Only one gondola will be shown as being serviced, therefore assembly continues in the other by adding the rocker fairings. The space between them has to be filled with Milliput or similar, again as per airliner appearance:
 The front of the other gondola is tweaked before being glued. Of course new radiators will be made for both gondolas:
 A sort of flywheel can be seen in photos directly behind the prop, so those are added:
 Many other parts need fabrication, like this loop antenna:
 The windows are masked in preparation for the priming session:
 The gondolas are shaped according to photos with Milliput:
 The wells are boxed:
 Holes are drilled and shaped where the exhaust pipes will dip-in to meet the bigger pipe at the end, fashioned from oval brass tube:
 More time devoted to the gondolas' details. The airscoops at the front are drilled, a small hole at the spine is drilled too to later accommodate a pipe that runs into the wing. New radiators and radiator housings are made. The engine is painted a dull black. Details are carved in the "formers" ahead and aft the engine compartment. Still more details have to be added. As mentioned before, the kit's gondolas should not be used as they are to build any airliner:
 The radiator housings in place:
 The louvers are added. The engine wiring is in progress:
 A probe associated with the autopilot (called Constantin vane) that eventually will go under the wing is also fabricated:
 First coat of primer is sprayed:

 The gondolas are now primed:


 Masks are cut for the later application of the blue color:
 Painting begins by trying different hues of grey/aluminum:


 When a convincing result is achieved, the main parts are airbrushed:
 Showing how it reflects light differently according to angle:

 A plethora of small things still await its turn to be added:
 A session with the airbrush working with several different colors for diverse parts:
 Individual home-made decals for the props' logos and red bands are cut...
 ...and applied:
 The gondola with the landing gear in place, plus the exhaust and the gondola's tail exhaust collector:
 After quite a bit of masking -and no little anxiety- when all is removed the model starts to look quite nice:
 Keen eyes may have noticed that I had painted the model white as a base color, and that I should have masked the rudder before applying the other colors to ease the task of replicating the Argentinean task. Oh, well, white decals printed with the blue bands will have to be now. Still missing is the fin leading edge color, a slightly different blue than the plane's -Potez blue-, so another decals to print and apply. The hard work of the scratchbuilder is never done :-)
 A view of the gondolas and props in an almost-ready stage:
 Decaling begins, with the Argentinean registration and rudder flash. After that the cockpit transparencies and eventually the other main components will be added (gondolas, struts) and then the fragile details -rigging, control rods, probes, antennas, tailwheel, etc:


 The gondolas and stab struts are added:
 The model sits now on its own landing gear:
 The longer wing-to-gondola struts were a tad short. I remember this same issue from when I built Heller's original kit, the Potez 540. Little segments of styrene were glued at the tips that later will be re-contoured and adjusted for the correct length:
 Tail and wingtip nav lights are fabricated:
 The diverse struts and other minor components in place:
 The short rods that connect the struts to the wing are added, so is the Constantin vane and some tubing (possibly fuel) that goes from the aft gondolas to the wings:
 The front of the engines had at the top some fluid deposit with a cap, and so it is replicated:
 The radiators' "Venetian blinds" had an area that looked darker in the middle, possibly oil radiators, that again is added:
 The cockpit transparencies individual components are measured, cut, adjusted and glued one pane at the time:
 This and the other model under construction:

The kit's props as they are can't be used for this conversion. The machine I am reproducing had no spinners. I manage to get an Aeroclub Hamilton Standard three blade from my supplies (sigh, the last one!) and took a counter-rotating prop from the spares' bin from which I chopped the blades, that miraculously matched the other. Then I made the axle and hub details as described bellow:
The duties of a test pilot are never over:
Other comfort items are scratched too:
And, unavoidably...:
The wing halves are cleaned up of protrusions and barbs and joined:
You can see the nacelle that Zoenke glued. Here is a hint of how evil he can be. Once you glue the sides together you can't add later the landing gear assembly, which is meant to be trapped between the sides. The vertical stabilizer halves were glued at this point:
The second -cabin- floor that goes on top of the bottom fuselage is cut, and so is the part for the fuselage top:
I always like this part, to turn bombs into something more useful, in this case streamlined covers for some devices under the wing. Their locating holes are filled with rod:
The bulkheads are glued to the floor:
A view of the ongoing projects in parallel with the Potez, the Goodyear Supercorsair racer and the Junkers K-16 airliner:
The false floor is glued in place:
A view of the parts involved in this step:
The interior color is airbrushed:
Masking is applied on preparation for the second color of the squeme:
More details and painting in the area:
Some decals are applied to create a more realistic environment:
The bathroom gets its features, I do this only to make my friend Alain Bourret happy:

Completed model:
jaja.... conspicuo colectivo internacionalista de personajes.... eso no puede terminar mas que super-bien..... a por ello!!... wiiii.. ^ ^
ReplyDeletena... impresionante los elementos del baño.... para la delicia de Alain.. y el goze de los preiser... Si hay un preiser argento por ahi urge un bidet.... jajaja
ReplyDeleteExcelente trabajo....
Glad I could help this time instead of just aggrevating you :)
ReplyDeletewell, I mentioned it too on the Stinson A post.....:-)
Delete"Amene" Good on you; you sent me to my Webster Unabridged 2nd edition to define this neat old word.
DeleteNice model too!