

(This is the step-by-step building article, for the completed model post please go here:
http://wingsofintent.blogspot.com/2016/08/scratchbuilt-172-ford-flivver-completed.html
Civil aviation once had the very democratic dream of providing everyone with a personal plane, as it was happening then with cars. It didn't do it off the goodness of its heart, let's be frank, it wanted to create a market -already filled with home appliances and such-.
The dream (sorry, can't help it) never "took off".
But the trend spawned a legacy of "flivver",
"personal" planes, though, that make the delights of some modelers (I
have built a few).
Besides the floppy beginnings of the aeronautic endeavors of
the Ford company and the later
success of the -copied shamelessly from Fokker and Junkers- trimotor transports, the
company turned its attention to the personal market. The glossed-over figure of -ideologically very dubious-
Henry Ford merits no further mention in this article, but let's start by saying
that as the result of that directive Otto Koppen designed the Flivver in 1926,
which was reputedly an original idea of William Stout, in charge then of the
company's aviation program.
The diminutive Flivver had an Anzani of 35 hp engine, a wooden airscrew, a wide landing gear track, Gottingen 387 airfoil, and a span of 22 ft.
The Flivver came in two flavors: the first one, with an
Anzani 3-cylinder engine, no dihedral and no braces, and the second one with a
2-cylinder engine, dihedral, inverted wing bracing, different tail and inset
ailerons. Many other differences apply.
The first Flivver was modified a number of times (shorter
ailerons, for example) and photos show changes in the engine cowling, upper
fuselage and instrument panel.
As usual, if you want to build one, check your photos and
written references.
Since no manufacturer wanted to kit it in 1/72 due surely to
its limited bombing capacities, I decided to scratchbuild it (there is a
William Bros. injected kit issued in 1/48, many times mistakenly stated as 1/72
due to its small size).
This very little model has a chubby and cutely stumpy
appearance, and it wouldn't have been out of place in the comics and cartoons
of the 20s and 30s. Its stance is proud, and you expect it to walk away
swinging that wing to one side and the other on its short lading gear legs.
At it:
I learned time ago that smaller does not mean easier when
scratchbuilding. So be it.
The usual materials and tricks were utilized, as you will
see in the following photos and captions. An old Aeroclub prop was used
(thanks, caballero Armando!) and the adapted cylinders came originally from
Matías Hagen (gracias, Mati!).
No decals for this one, since I will depict the model
unmarked as it appears in trial photos with a particular prop, spoke wheels and
a shorter engine cowl (and in Flight magazine, Feb. 17 1927). As explained
above, the plane was modified many times, and decorations and details vary.
Work in progress


The cut to insert the stab is performed. The fuselage is carved to accept the wing:

I must confess that when I was getting ready to build this model I pulled some old "already scaled" plans from my computer. I happily started the build, but some measures were strange. So I checked. And realized I was building a 1/100th scale version.
No worries, I resized, printed, and started to build the 1/72nd scale version. But here they are compared anyway.
I was thinking that if my good friend Christos Psarras finishes one of his 1/100 airliners, I may finish the Flivver and gift it to him...

The bottom of the fuselage:


The 1/72 and 1/100 models in progress:


The tail surfaces are glued in place:


Interior in place, wing glued:


The landing gear legs are made and put in place:

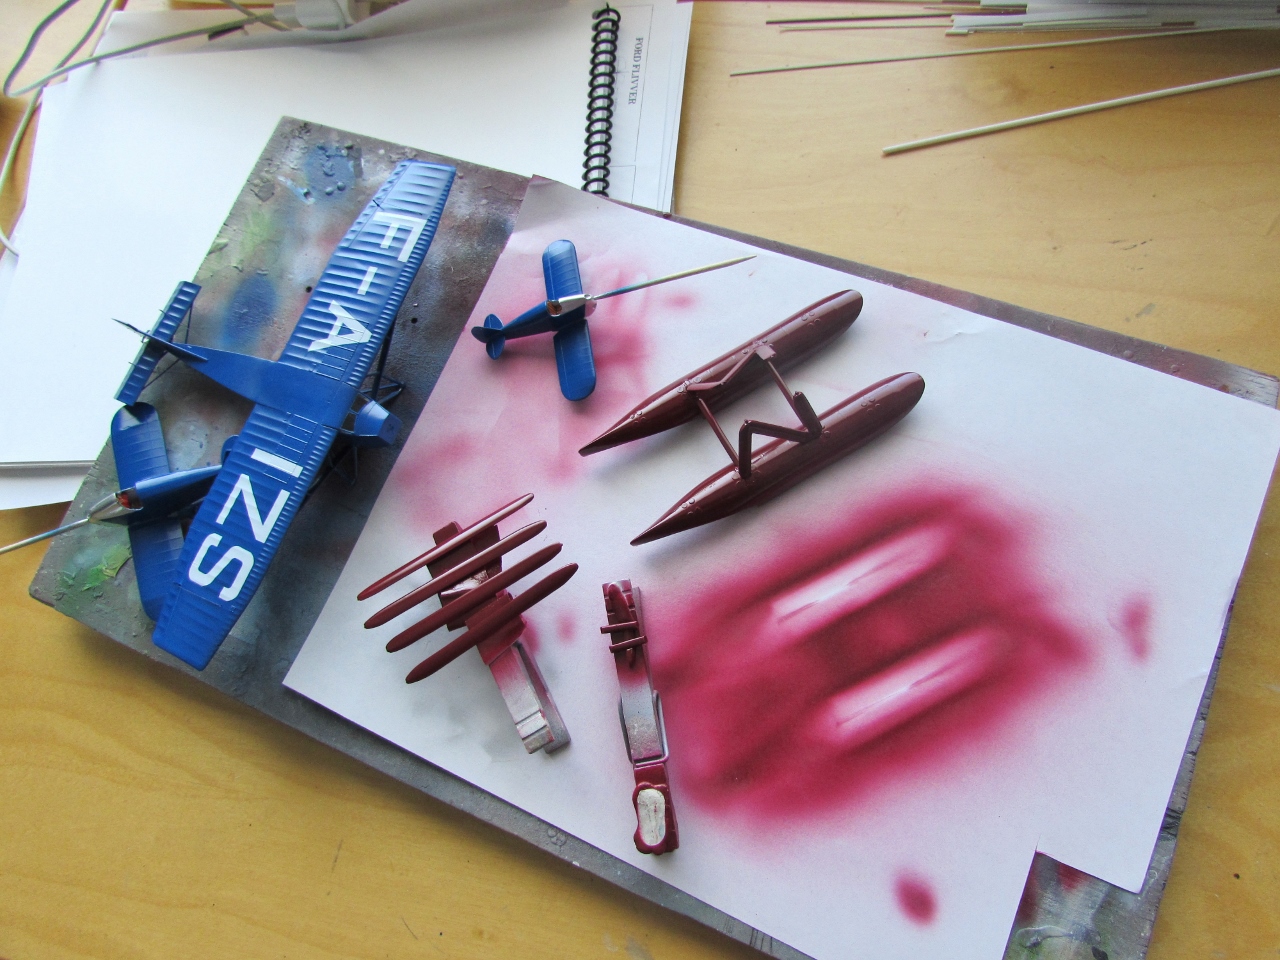
All parts completed, now they head for the airbrushing session:

The blue color is airbrushed first. This very early incarnation of the Flivver had a different color scheme that the one it wore later on. It was mostly blue with some nose areas in aluminum, and there were no visible registrations. That is fantastic, so I don't have to publicize a name that is a source of shame:


The wheels are assembled for both scales. Fortunately photos show the same plane with and without spoke wheels:


To be continued....
No comments:
Post a Comment