(this is the building post, for the finished model please go here:
First impressions:
SBS: The best kits in the market, in my humble opinion. Period.
I think SBS people are extraterrestrials applying an unknown technology to kit-making.
The level of this kit is just incredibly good.
This iconic symbol of speed (it still holds the speed record for seaplanes, decades and decades after establishing it) attracted me so much that first I attempted to scratchbuilt it for a friend:
http://wingsofintent.blogspot.com/2014/07/scratchbuilt-172-macchi-castoldi-mc72.html
And then made the
Despicable
Delta ancient model:
http://wingsofintent.blogspot.com/2016/10/modified-delta-2-172nd-macchi-castoldi.html
So finally, and definitively, a proper kit of this beautiful piece of Italian design.
Justice at last.
Beware that the box represents the plane without the aft fuselage belly surface radiator, but it is engraved on the kit. The plane flew with and without it, depending on the ambient temperature (season).
Contents of the very sturdy, conveniently-sized box. All well protected, and with nice cover artwork and good instructions, both B&W and color:
Goodies: etched set, nicely-printed decals, and SBS offers a separate -steel- PE set for the rigging bits:
The etched steel wires for the rigging are as said a separate (aftermarket) product -from the same vendor-; this is the instruction sheet:
Clear parts...really clear, not just in name:
The parts:
Beautiful fabric effect:
Superb detail:
Oh, the beauty...:
Perfect castings:
So subtle:
I just screams -"Build me!!". And -"Buy another!:
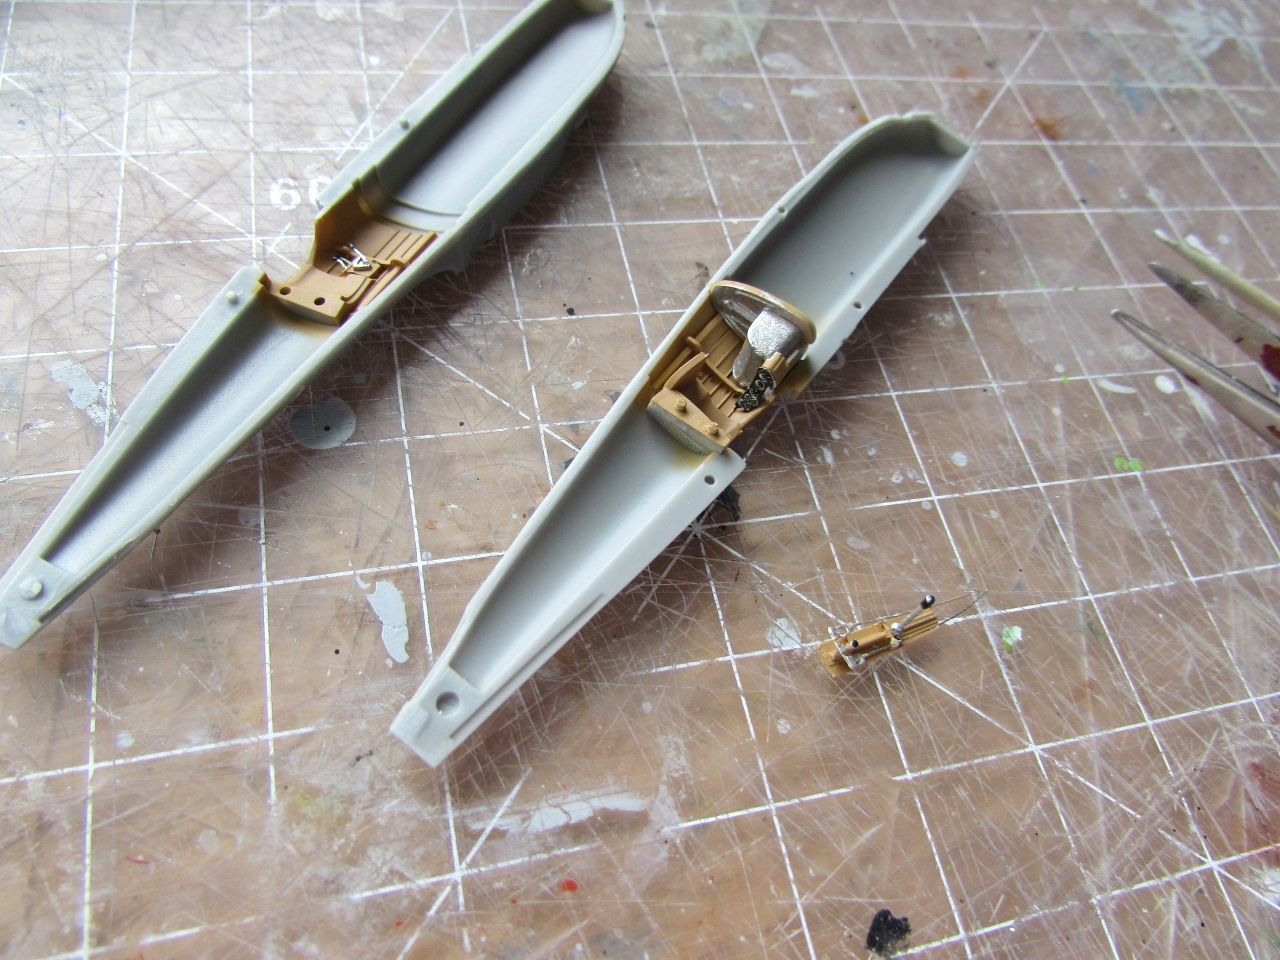
Read bellow BEFORE excising the signaled parts. Those collars make the parts fit properly one inside the other and with the fuselage, they are necessary!:
The parts are separated easily (but very carefully) from their casting blocks:
All parts are placed in a screened coffee filter, washed with soapy water, and rinsed:
Then let to dry on a paper towel:
This resin remain from pouring block has to be removed:
Cleaned now:
And parts glued:
There is a joystick floating in the vacuum of the instructions sheet, whereas it should be included in the sub-assembly of the controls pan bellow. It reminds me of Rabelais' "Whether a Chimera, bombinating in the void, can devour
second intentions". The pan's ultimate position is not clearly shown in the instructions, but it's easy to deduce where it goes
:
Now that's better:
The instruments film is given a whiteout coat on the reverse to provide background contrast with the black print:
The pedals in place. They are correct, I checked with photos:
The flat "stirrups" actually where attached to the control cables. Here I added them:
The fit of everything so far is perfect.
The PE levers are added and all interior parts are there already, minus the pan:
The film and PE part are rolled on a dowel, since their seat is curved:
Interior masked and airbrushed with a wood color:
All OK so far:
Some areas and details are picked in color:
The fuselage halves are united. There are locating devices, pegs and holes, unlike in most resin kits. They work mostly well, but I got a slight misalignment on that airscoop on top of the fuselage:
I ended up with a bit of a gap, partially on top and along most of the bottom. This is most likely my fault at cleaning the resin pouring block, but I think there could be an issue with some lip at the bottom where there is not clear what should be removed and what not. Masking tape is used to confine the area of puttying and sanding to a minimum to preserve detail as much as possible:
The fuselage seams were hid. The upper portion of the vertical stabilizer was a good fit. The lower portion was not (you have by the way two options, a "normal" and a longer one). The horizontal stabilizers halves have two very tiny pips that are supposed to go into minute recesses in the fuselage. It does not completely well. A tongue and slot would have been much better:
The wings go on, the fit is good is you clean the casting line from the wing root:
With this type of design, alignment is a concern. The way to go here is to paint the base color on the elements, mask and paint all the different radiator surfaces comfortably, and then glue the legs to the floats (they have a positive, self-alignment fit), and then glue the floats to the fuselage checking everything continuously. This should minimize boo-boos:
I drilled holes in the fuselage nose, the spinner parts and floats, to be able to grab them for painting. The elevators were added to the fuselage, they come conveniently prepared with a "pivoting" point to insert in the tail area, this allows you to "rotate" them and then fix them in the desired position (a bit drooped in my case). The photoetched mooring parts will be glued on the floats before painting:
The level of care of SBS is shown for example in the fact that they provide a couple of extra mooring PE parts and locating devices for them. Notice they have a very small stem, which should go in a hole in the float's front and back, as per instructions. Those holes are marked already in the mold as little dimples. I used them as a guide for my drill:
The primer shows the most impeccable kit surface. Not a single blemish, pore, scratch. A few minor touch-ups will be needed where I glued or puttied something:
Now white enamel is airbrushed in preparation for the red. The underside of the floats should be masked before the red, since they were white. At this point the spinner parts and four prop blades are painted aluminium:
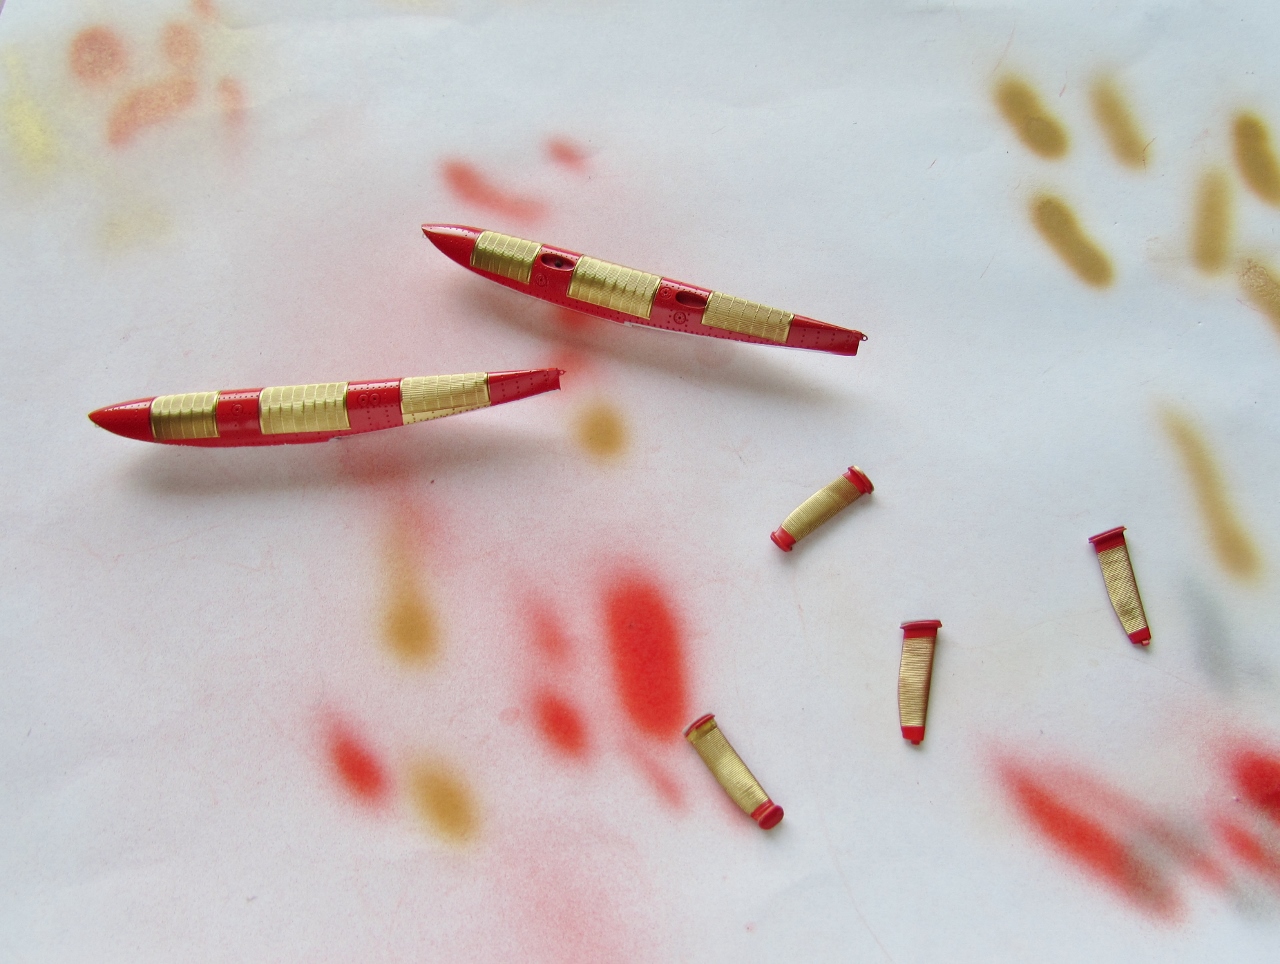
The floats' bottoms are masked, and the parts are airbrushed with the Italian red color:
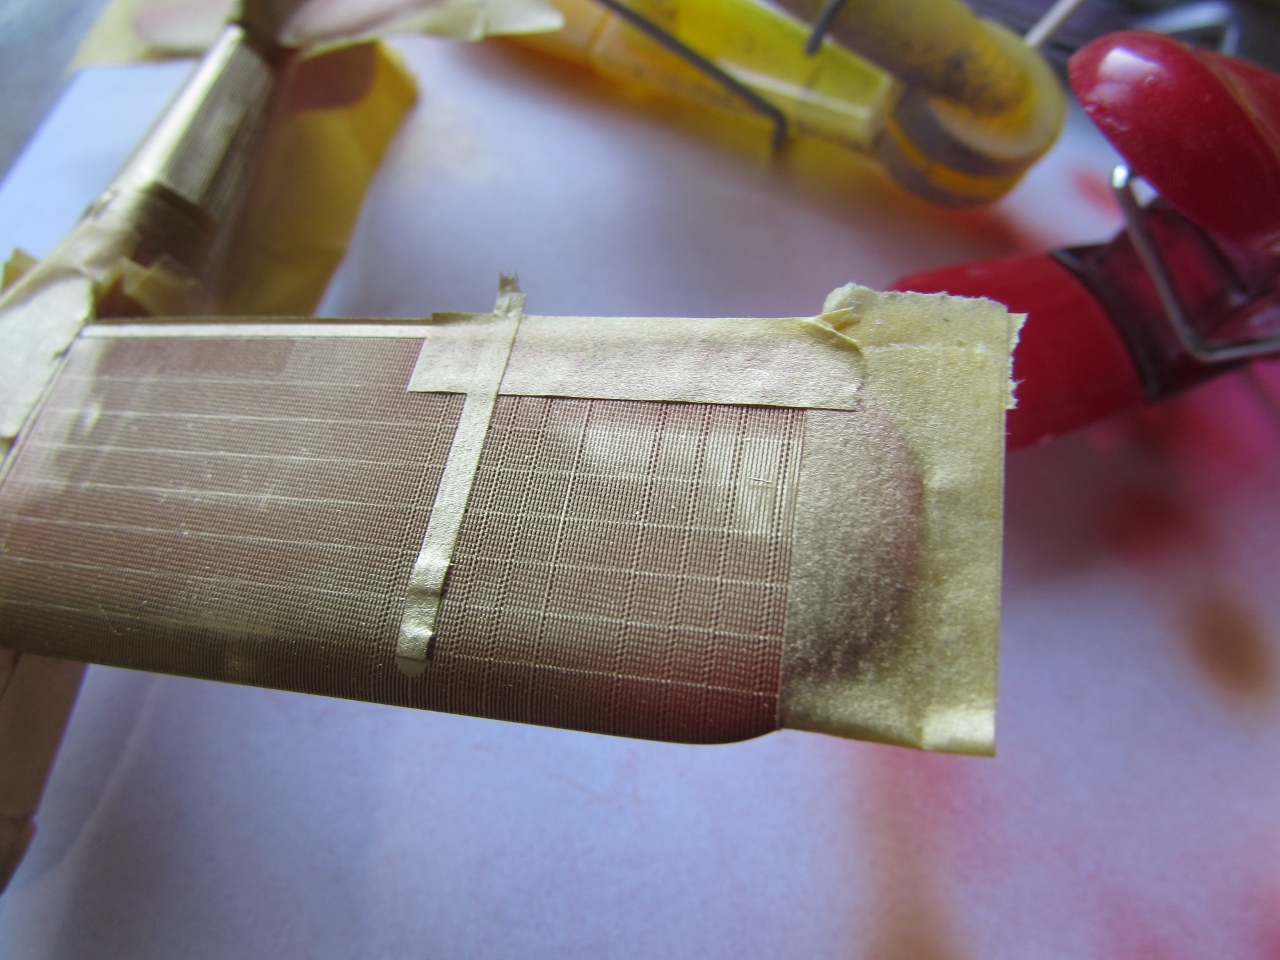
The different parts are masked, to leave only the radiators exposed. This took quite some time and care. Then the brass color was airbrushed:
So far so good, but in airbrushing the wings, some strange interaction of the paint with the very fine texture occurred. Retrospectively, the wing radiator areas should be given just one coat of "brass" or gold paint, in order not to clog it with primer and undercoats, as I did.
To fix the model I'll go the opposite way, sanding the texture a bit and applying an undercoat, then the paint, so the surface may appear leveled and the paint won't fill the texture partially. We'll see:
The floats and legs came out ok, given the not so fine texture:
After lightly sanding that problematic texture on the wing, I applied a couple of layers of acrylic floor polish in an attempt to fill-up that texture somehow. Once dry, I airbrushed the brass paint. The results are much better, yet not totally satisfactory.
So you are warned: paint that texture first, the amount necessary to give the color and no more, no primer, then mask and paint the red, otherwise this strange high-resolution texture of very fine grain will partially clog with paint and show streaks.
The floats, which presented as said no problem due to their no-so-fine texture, are given their legs which will lock-in the alignment.
Masks off and more work ahead:
Prop has to be assembled, floats attached, canopy added, photoetched rigging installed, and painting in alu color two little covers on the nose, plus decals.
Dry run of props/spinner assembly which goes very well (provided that you have left those collars I pointed out to in the instructions).
The legs as said attach positively to the floats. The front leg has also a positive lock (although alas small) with the fuselage, but the aft leg has a roundish feature that doesn't provide as good a fit. It is actually somewhat wobbly. The whole thing sort of self-aligns, but not perfectly or securely. Not sure why in this joint SBS did not do something similar to what they did on the floats: good locking devices. If those aft legs would have attached to the fuselage positively, this song would be different. As I use cyanoacrylate to glue resin parts, there is no chance of fiddling too much. The proper separation and parallel setting will have to be refined with the cross-members that unite both floats horizontally.:
May be SBS or other vendor will come up with a beaching trolley, not only needed to pose the model credibly, but also to provide the means to properly align those floats in gluing them to the fuselage:
The fuselage front has some bare metal areas in the shape of a stripe. Cut to size alu-sprayed decals were used for the task (
NOTE: actually, the version modeled with this kit does not have those metal stripes, but other do. I removed them when I realized it):
I am surprised that SBS did not provide a pontoon alignment schematic for the modeler to achieve the proper distance without floats and to get them parallel. No 1/72nd top view is provided either:
This is SBS' rigging accessory P.E. set.
The steel is rigid enough to span the distances without flexing or sagging if done correctly:
The two horizontal elements are glued to their locations, the P.E. parts fitted correctly:
All other P.E. rigging parts were trimmed down to correct length:
More to go:
The rest of the rigging completed. Canopy is set place. The prop sub-assembly is added. Decals are applied:
I was tempted to build the beaching trolley, as I did for all of my seaplanes, but I am confident that an aftermarket one is going to be released by some manufacturer sooner rather than later:


I'm about to build the other SBS version of this kit, and reading this has been very helpful! Hopefully they've improved the ease of float alignment.
ReplyDeleteIt's a very nice kit, glad the article helped. Cheers.
Delete