

(The completed model is here:
Models some times come to our hands via strange and winding paths.
So it happened that I got this one as a gift from Liz and
Jeff (thanks again!) from their Palm Springs
hobby store that I frequently buy from. The kit was a "rescue" kit,
since at some point during the many years of going from one home to another, it
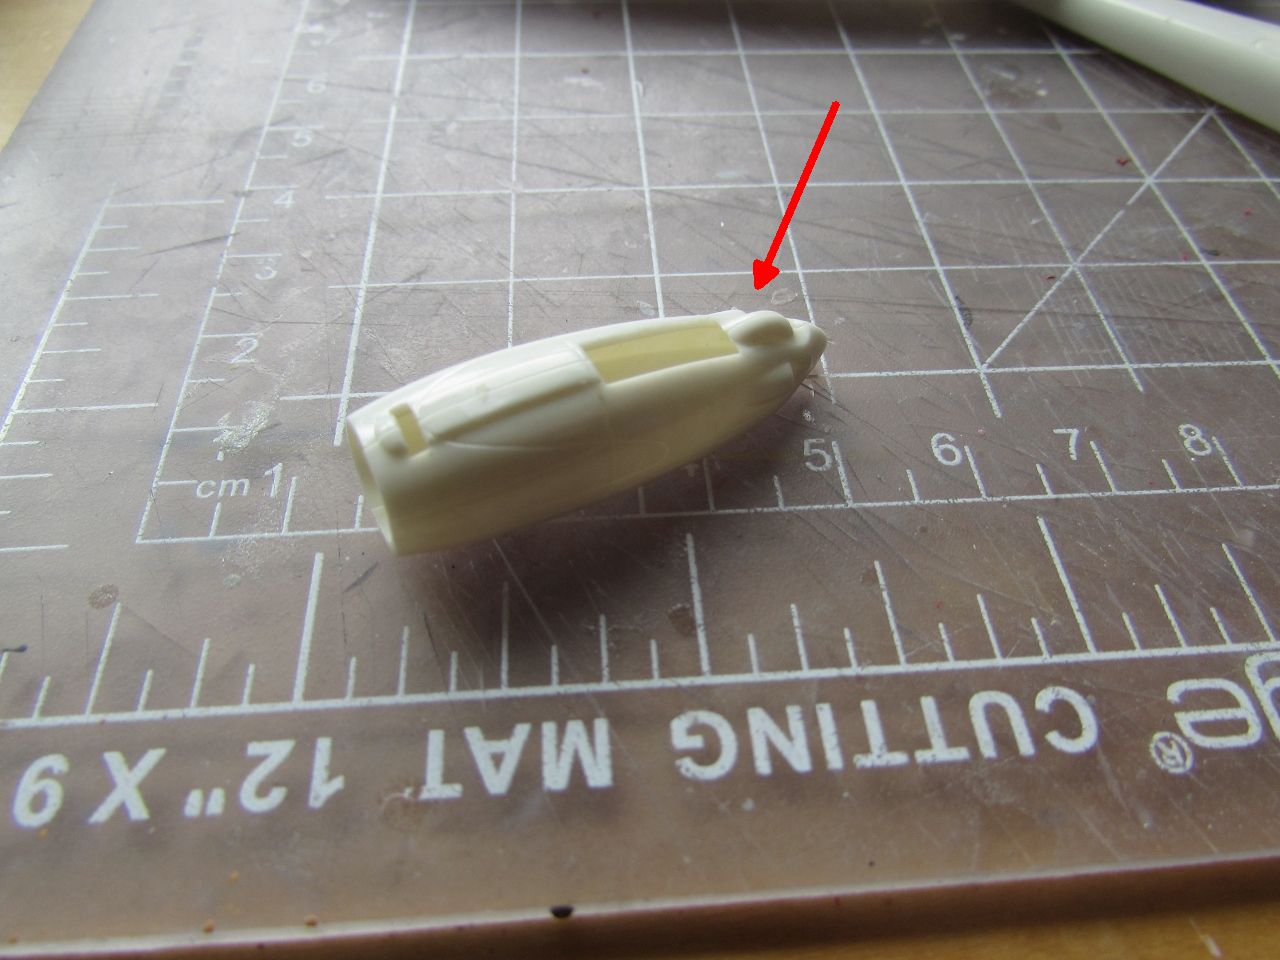
lost and engine front.
Perhaps knowing that I like a challenge and that I would
take care of the missing part, they were kind enough to put it in my hands.
So I had to honor the gesture by building it, of course!
The Commander is too modern a plane for my usual modeling
ventures, but one had to concede that it has nice lines and undeniable
charm. I am extremely reluctant to build in any other scale than 1/72nd,
so I had to overcome the queer feeling of tackling something in 1/81st.
too.
Now, this kit comes from the prehistory of the hobby,so there is no interior or even landing gear, and the surface, otherwise fantastically detailed, is marred by the engraving of the decals' position.
Other than the points already discussed, this is a wonderful little kit, and a jewel considering its age.


A proof-of-concept trial run for making the replacement for the missing part (engine front):


The decals arrived! the project will continue soon:
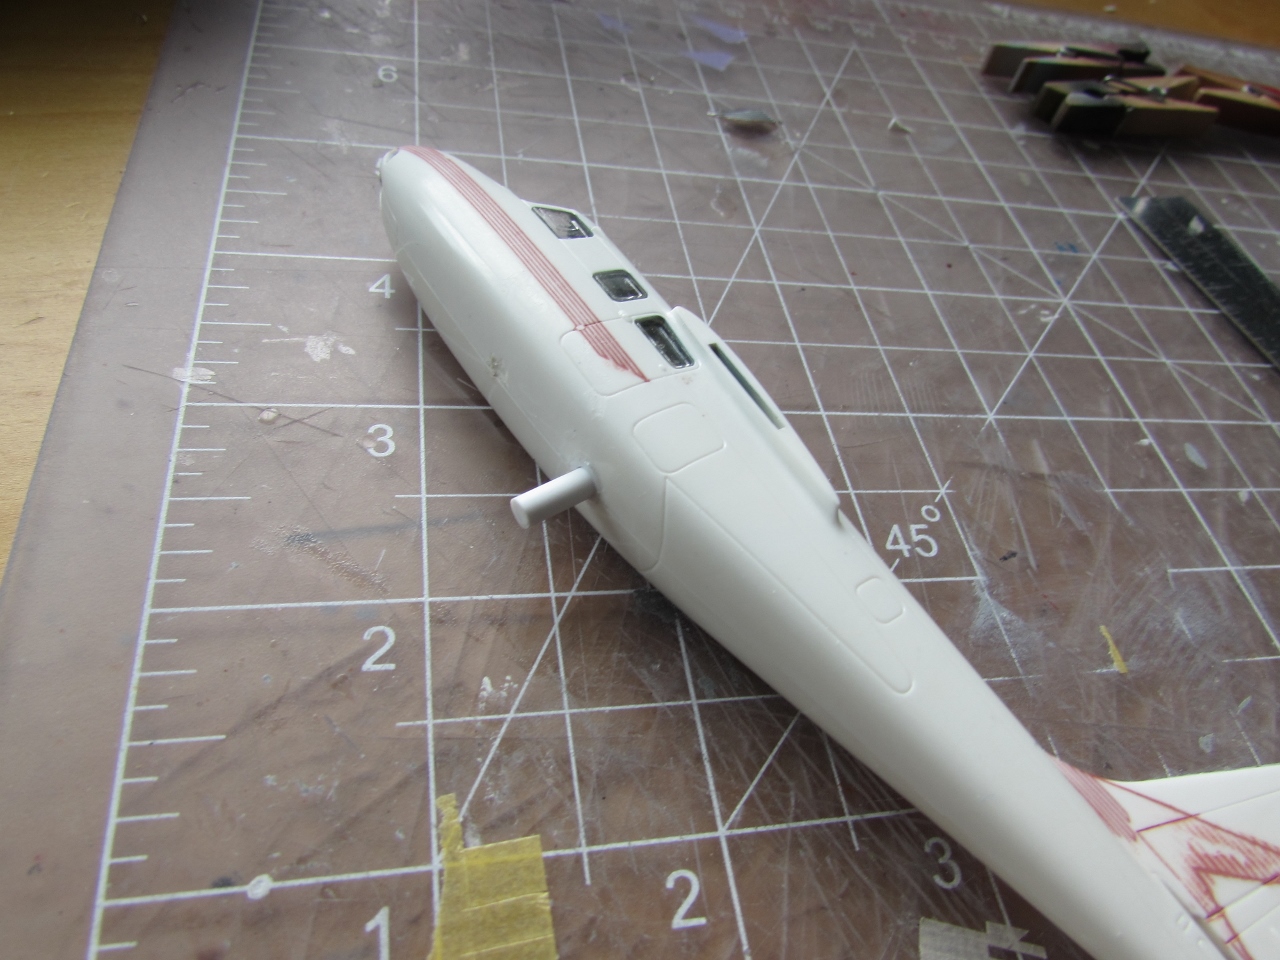
 The masks are applied without any issues, and the areas not to be painted red are further masked>


Red color is airbrushed, also on the prop blade tips:
 Masks are off:

 Decal application begins:
 Other details like anti-glare panel, props, wire antenna, Pitots, lights, exhausts, etc., are added:
 Tomorrow hopefully when all is dry I can take some photos:


(The completed model is here:
Nice! And a very unusual subject. I'd love to see it finished.
ReplyDeleteWaiting for Mika's decals and masks.
DeleteNice looking plane, what a pity it is not to "The One True Scale" you usually bild to.
ReplyDeleteYea, but close enough (I tell myself..)
DeleteI made a mold from one of those kits, Claudio, I could have cast the cowl front for you!
ReplyDeleteAnd now you tell me! ;-)
DeleteCan't wait to see it finished!
ReplyDeleteWaiting for the masks and decals from Arctic Decals, en route.
DeleteWONDERFUL REBUILD Claudio!!!! Keep on, it will be a great pleasure to watch this one finished in the proper hands of a great modeler!!!
ReplyDeleteThanks, Luis!
DeleteNice modell...The 500 is so stable to fly..almost hands-free.
ReplyDeleteThanks!
DeleteCongratulations for this Wonderful rendition of this done model. Really a true masterpiece in truth!!!. So wonderful and influent is your build that I got one previously built to make one that flew with the colors of my country's air force. So, was wondering wheels from which model you have used in your masterpiece to put mine properly. Thank you very much for sharing!!!
ReplyDeleteHola Luis
DeleteIt looks like I just raided the spares bin for whatever was the right diameter and similar hub. Not sure what I used, it was long ago.
Cheers