
The stocky and rather ungainly appearance of the Vultee V-1A
is balanced by the impression of power and compactness it gives. Fast and
rugged, with a characteristic forward-slanting windshield, its general lines having
a portly look.
(The completed model can be seen here:
https://wingsofintent.blogspot.com/2020/11/vultee-v-1-special-citizen-kane.html
One of the Vultees was modified as a seaplane, and sold to Russia, and I
have modeled that plane using the Execuform vacuformed kit, some time ago:
Capable of carrying two crew members and eight passengers in
relative comfort, it was used by airlines as well as private owners, among the
latter William Randolph Hearst, the newspaper tycoon, reputedly depicted in
Orson Welles' "Citizen Kane".
The Special Hobby kit has been in the market for a while,
laudably also in a civil guise, which is the one I purchased. The kit decal options
are nice: American Airlines, Lady Peace (more like an afterthought since it's
not depicted in the instructions) flown by Merrill and Richman over the
Atlantic, an oil company executive transport, and one of the American Airlines
machines in which Jimmy Doolittle established a record (sponsored by Shell,
whose logo was added to the plane).
Some of them need a different interior, a fact not
contemplated by the kit makers. Lady Peace needs long-range tanks and exterior
modifications (window arrangement, RDF antenna, engine, etc.), and others had
an executive interior (the oil company hack).
Pay attention to the exhaust plumbing which is different in some planes -most likely tied to the type of engine used) and
at least one machine had different L.G. doors (Vultee NO A-181).
For the adventurous modelers, other possible civil schemes
are Alaska Airways, Frank Fuller's plane, one that went to México (only a
couple of not very satisfying photos on the Net), United Gas System, Spirit of
Pueblo, Sierra Aviation, Canadian Colonial Airways (CF-AWC), and some others.
All the kit options were considered but discarded since I
decided to represent the Hearst machine, which was overall gold with stylized
elements in red, plus the logos of the San
Francisco and Los Angeles Examiners, owned by him.
I became curious about Hearst after watching, more than once,
that remarkable movie -cited above- that is Citizen Kane. A few years ago I
visited Hearst Castle
in the California
coast, a perfect example of all the taste money can't buy, a monument to cultural pillage and appropriation
rendering a remarkable kitsch result. In any case, the plane landed in Hearst's
private airstrip at his property, as well as other of his planes and the planes
of notable and famous guests.
Do not be tricked by the Lady Peace that is in a museum,
which is not the original machine but actually Hearst's. If you are
representing Lady Peace, there are contemporary drawings of the different
interior, and rather base your model on photos than on the reworked, repainted
museum example that is, like some museums examples, an absolutely meritorious effort, but
not necessarily accurate.
The kit, as many kits, needs some details added, which will
be dealt with during the construction stages. Since parts of the kit are shared
with the militarized version, unfortunately you have to close with a lid a hole
on the spine of the fuselage, that will keep you busy trying that the seam
doesn't show on the finished model.
Being a luxury model, Hearst's plane had six reclining seats
(instead of eight) and a full bathroom (instead of the standard one), as well
as better radio and navigation systems.
The engine was more powerful too.
One Vultee V-1A even participated in the 1936 Transcontinental
Air Race (decals in the kit) with number "B3", obtaining a third
place, whereas the first and second were obtained by women. Here is the roster, juts for the sake of detail:
1. Thaden and Noyes
-Beech C-17R NR-15835
2. Laura Ingalls -Lockheed
Orion NR-14222
3.
William Gulick -Vultee V-1A NR-14255
The prototype X12293, of smaller airframe, is
distinguishable because of its different landing gear covers, rounded rudder
where it meets the fuselage tailcone, different exhausts and in most photos a
three-blade prop. It went to American Airlines.
Many long but fruitful hours of research led me to an
article in Air Magazine #18, an old Aero Digest April 1933 article, Aviation
April 1933, Popular Aviation August 1934, Air Classics, Paul Matt Scale
Airplane Drawing Volume 2, pages on Flight Magazine, and other sources.
I would like to commend Special Hobby/Azur/etc. on the
release of refreshing civil planes. The kit moldings, though, were meant to cover
a number of variants, not all civil. This, we know, helps with sells, and provides modelers with more options, but
at the cost of a burden put on the modeler to deal with some fixes. As
mentioned above, there is an opening on the fuselage spine that doesn't apply
to any of the civil versions presented in this boxing. There is a cover to deal
with it, and the surrounded area has to be sanded and re-engraved to delete any
traces of the paneling of the military version from it.
The pesky ejector towers should be removed from wings and
fuselage interior.
There is some minor thin flash in many parts, mostly easily
cleaned, though.
As it is the rule with this type of kit there are no
locating pins, and the ridges molded to indicate where parts go inside the
fuselage are a bit vague. There are some butt-joints that will need securing.
The fit of assemblies that come in halves (fuselage, engine cowl) is again
imprecise and will need some adjusting and a little persuasion (one half is a
tad smaller than the other, creating a ridge). A full interior is provided,
although somewhat basic and as said above, not accurate for some of the
versions.
The drawings in the instructions are not bad, but they sin
-yet once again as it is common with this type of kit- of imprecision. Where, exactly, goes the floor? above that
faint ridge? below it? against it? and the bulkhead? On that ridge molded on the fuselage sides? behind it? before it? and the cockpit floor? and
so forth for other parts.
"More or less there" "Try and you will find
out" "Oops, may be not there" could be the calls for the
drawings.
The kit's box with a rather nice presentation:
The sprues:
Some details:
Bagged decals, resin bits, canopy:
I was elated that for a change the resin parts did not come pre-broken. I noticed this difference between exhausts:
The vacufomed canopy looks nice:
The clear parts look fair too:
The ejector pin marks have to be removed:
A bit of a short pour for the aft part of the floor:
Parts are out the sprues and cleaned up in a couple hours:
A new cabin floor is made, and new, larger seats (6 in this
case instead of eight for the executive version) are allotted:
The door on the bulkhead between cabin and cockpit is the wrong shape, and has to be corrected. The drawing shows how it should be:
Now, that's better:
I decided to open things up a bit, replace some parts,
detail others, and add more detail to the interior, something I always enjoy to
do, especially (I can hear the laughter already) the relief facilities, so indispensable
for my 1/72 crew and passenger. They complain a lot if I don't provide them,
toilet roll included.
Door removed:
New door made:
Luggage compartment hatch removed:
The external covers for the landing gear are too thick as molded, so new ones are fabricated with a little detail added as per photos:
The added elements so far:
The landing gear legs-cum-cover are provided with extra detail as per photos:
The holes of the wheel wells are lined and covered with some hint of structure:
The kit's prop is noticeably inaccurate. A spare with a closer to reality hub is separated in order to make a blade transplant:
The engine provided is quite usable, but a -decades older- Aeroclub item is better:
The blades have been transplanted to the new hub, and the counterweight discs added:
Another alternative would be to use a similar engine from Small Things, they are really nice and have used them before, but I think I will use the Aeroclub item to save some time on this build:
The wing and wheel parts are glued together. No locating pins, as said above. The wings may benefit from some sanding of the inside surfaces, otherwise the wing tips and trailing edges are rendered too thick:
The resin control wheels provided are, again, inaccurate, the originals were round and complete circles. The instrument panel, just barely OK, has little to do with reality also:
Here are obvious the disparities between exhausts. That area goes into the cowl.
The wing needs its landing lights cut out and opened, as well as the cabin air intake:
The cockpit seats had a narrowing to the top of the back, so two are modified accordingly:
The kit's inaccurate control wheels are substituted for P.E. items from the spares:
The cockpit assembly begins. A printed inst. pan. is glued to a styrene bit:
Using the print as a guide, the inst. are drilled. It will be far from perfect, but perhaps a slight improvement over the kit's simplified part:
Sir Phileas Nutcracker-Huffnpuff, my toilet test pilot, is about to evaluate the facilities. Here we see him concentrating to absorb prana, as he prepares to do the deed:
With a seating ovation, the toilet gets its CofA
(Certificate of Assuagement):

The new inst. pan.:
The differently-shaped ends go in to the cowl:
The exhausts tips are hollowed:
The added internal structure is tried on:
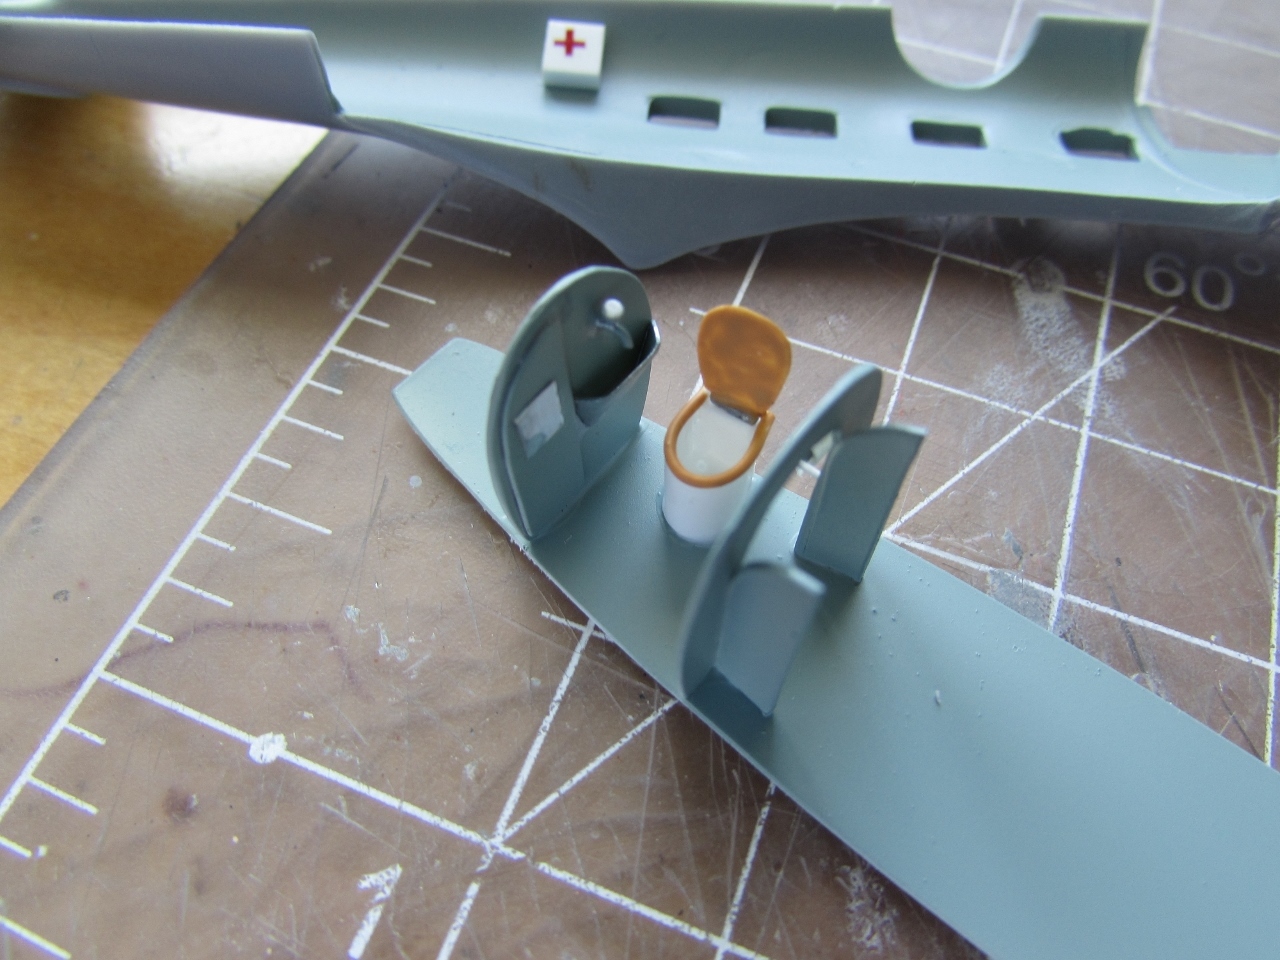
Toilet roll made of real paper. Accept no substitutions! Behind is what will become the fist aid cabinet:
In order to spare myself the associated issues related to that annoying lid to cover the spine hole, I cut, curved and glued to one side a "roof":
This will provide support (otherwise nonexistent) for the lid, that will simple fall through after the fuselage is assembled if attempted to simply glue it, to the joy of a maraca player, and that piece of styrene will also provide more gluing area for the fuselage joint, which has no locking devices:
From inside, the fuselage seam will be hidden, and it will look like a panel of upholstery, to which cabin lights may be glued after painting the interior:
Some parts and sub-assemblies are ready for the first session with the airbrush:
Basic colors air airbrushed, and the wing is primed to see what's going on on the leading and trailing edges:
Some provisions for comfort are made.
I found no photos of this plane interior and details, only a couple of vague descriptions, so the arrangement carries some degree of speculation:
A typewriter for the secretary is fashioned:
Cabin and individual lights and vents are added, a couple of carpets, and the tables in progress.
Above the typewriter is the newspaper cover, that says "Citizen Kane". My good printed kaputed long ago, so this is a low def print, still convincing for the purposes of an interior that will be barely seen. On the background are the windows drying from a bath in clear acrylic, and the masked wheels to paint the hubs:
The detailing of the interior proceeds. The two tables with brass edges are added, and then the typewriter, newspaper, book:
The windows required a few light passes with a sanding stick to fit in:
As it is often the case with this type of kit, neither the bulkhead nor the cockpit floor fitted properly, being too big, and thus impeding the fuselage halves to be get together seamlessly. So out again with the sanding stick:
Not without some fiddling, the fuselage halves are joined.
But the real fiddling began trying to mate the wing to the fuselage.
The front and back of the wing centerpiece had to be sanded. The seam between wing and fuselage was a yawning gap. The dihedral was too flat. The airfoil on the fuselage will not coincide with the airfoil of the wing.
Sanding started on all contact surfaces to improve the fit. At the end, the wing airfoil had to be propped-up with some short lengths if styrene rod to match the curve on the fuselage Karman.
Now, if I am not mistaken, the last smallish Avis kits I built and posted here (Bristol Racer, Short Cockle, Short Satellite) were also short-run kits. And their fit was superb compared with this one:
While the main parts set, small details are taken care of: the airscoop on top of the cowl (this plane did not have one below, nor the little bump on the cockpit roof (both parts come in the kit);
the Venturis are hollowed a bit to improve them, and the antenna masts for the belly are prepared filing some Strutz short lengths:
Windows are masked. Wing and fuselage are joined. The firewall is added. The area of the filled dorsal position is puttied. The wing tip nav. lights positions -erased during the wing leading edge sanding- are drilled to later insert clear rod:
Nav lights are made as said from heat-stretched clear sprue, the tips rounded and polished, and tinted with a permanent marker. The horizontal tail is drilled and pinned with a discarded drill bit in preparation for its addition to the fuselage. A tape length is used to help with the dihedral and closing of the seam gap ("Mind the Gap"):
Two landing lights of my own making are prepared. One of the canopies is separated from the backing sheet. The kit provides the top as an alternate injected separate part:
I checked the spare, which unfortunately suffered from crumpling on the windshield vertex.
Damage viewed from inside. This won't do, so one shot it is for me with the first one. Let's hope I don't mess-up:
The horizontal tail is on. The trailing edge of the cowl, too thick, is thinned down.
The canopy is trimmed still leaving some excess material to play with, and given a bath in acrylic floor polish:
Some sanding and further puttying follows, the canopy is being patiently trimmed:
The canopy is finally fitted. All ancillaries ready:
Good time to drill the location of the wire antenna:
And the one for the Pitot:
Legs, ventral antenna masts on, locations for the Venturis and exhausts drilled:
The canopy is masked and glued:
Primer is applied, revealing some blemishes that have to be corrected. At this point the wheel hubs and exhausts are painted:
Working on the seams, that are giving more trouble than I would like to deal with. Still, this stage is fundamental for a good paint job, so on we go:
While the putty dries, some parts are replaced for better scratchbuilt items:
This stage of the build is taking its time. Close to be able to apply paint now, but first had to enlarge the notches for the exhaust pipes. As they come in the mold, they are not nearly enough to accommodate them:
A coat of gloss white is airbrushed. Not sure if the finish will involve masks, decals, or a mix of both, so I will stop here for the moment:
Nope, I didn't forget, I am still waiting for the decals:
Since the red areas for the scheme are going to be masked to paint the gold instead of being red decals, a gloss red base coat has to be airbrushed, over this immaculate, beautiful, pristine white finish. No pressure, uh?:
The red coat is applied, fortunately without a hitch:
The decals for the Vultee and the Vega have arrived. My idea was to mask the red, but Arctic Decals has provided the red motifs as decals, therefore the model will be painted gold before application. This hiccup in coordination added an unnecessary red paint step, but it will be a nice base for the gold color anyway, as was the original white:

The quality as usual is superb:
The gold color is airbrushed:

Masks are lifted, and now starts the addition of details. Keen eyes will notice the acme of any proper model through the cabin door:
The belly of the beast, or as our sushi chef friend Gen san would say, Vultee otoro. The wells are touched-up:
Engine glued on the nose, antenna spanning the belly masts, all wheels on:
Exhausts and Venturis added, wing landing lights lenses and nav lights added. Just starting to apply the decals, still wet in the photo:
The cowl is on and decal application continues:
To be continued....


Thanks for the panel photos, Claudio.
ReplyDeleteI landed at Hearst's strip one in a Beech Baron. I took a guest to a fund raiser that night. They had to chase the cows off the strip first so I had to call ahead with an arrival time. The Hearst Hangar was still there. It may still be. I think he had a Lockheed 14 or 18 at some time.
Wow, John, that's a cool memory!
DeleteHe also owned a Stinson U trimotor.
Cheers
Very nice improvements and corrections, look forward to more progress.
ReplyDeleteThanks, let's see how it goes.
DeleteCheers