
One of the greatest pleasures that this hobby has for me is to turn bad things into good things.
To take a kit that leaves much to be desired, and make it into something better, gives me a lot of satisfaction.
So: bad things into good things, which is why I long wanted to convert a
despicable thing with hateful, totalitarian symbols and more than
obscure intentionality into something of a better nature, in this case
an airliner.
(The completed model is here:
https://wingsofintent.blogspot.com/2020/05/junkers-ju-86-airliner-lan-chile.html
Over the years I gathered references about machines that operated in
Switzerland, Australia, South Africa, Bolivia and Chile, noticing the
differences among them.
Long ago fellow modeler and friend Sönke from Marzipanland sent the old
Italeri kit, to be rescued. It long sat in a deep and forgotten crag in
the garage.
I knew of the Kora conversion sets to adapt the Italeri kit to these
civil versions. They include resin parts and decals. I was never
tempted, neither by their quality nor by their price. The resin parts
are somewhat heavy and coarse, feeling heavy-handed. The decals do not
strike me as fine products either. Still -and as I am often forced to
say- who else is going to provide these after market accessories to
satisfy the needs of a small group of modelers wishing to represent
lesser known types? so we accept what we get with a -somewhat reluctant-
thank you.
I plainly discarded the Lufthansa version, just a cosmetic
half-disguise of its true intentions and nature, and sooner the Swiss
version too, having seen it quite often modeled.
My attention turned towards the Australian version, registered VH-UYA,
which has an interesting story. I was able to gather some reasonable
material, discovering in the process that some renditions of it
(drawings and models) steered quite far away from reality, mostly
regarding the colors of the plane, but that's a story for another time.
None of the mentioned versions needs burdensome kit alterations.
But some of the machines operating in South America (Lloyd Aéreo Boliviano and LAN of Chile) had Pratt and Whitney engines.
That's what one of the Kora after-market products offers, then: one set
of the new engines, cowls and nacelles, and the decals for those two
planes.
LAN actually had four JU-56Zs, from 220 to 223, but Kora only provides regs for one: 220.
This, therefore, will involve some deep surgery, and the usual addition
of some details missing in the kit, which provides an open cabin
door... to no interior other than bulkheads and cockpit. It seems
Italeri thought that the passengers just floated around the cabin, or
hanged from straps, underground-wise. Cheeky monkeys, passenger plane
without seats. This was, of course, an afterthought, a mold adaptation
to squeeze more copies off the military molds.
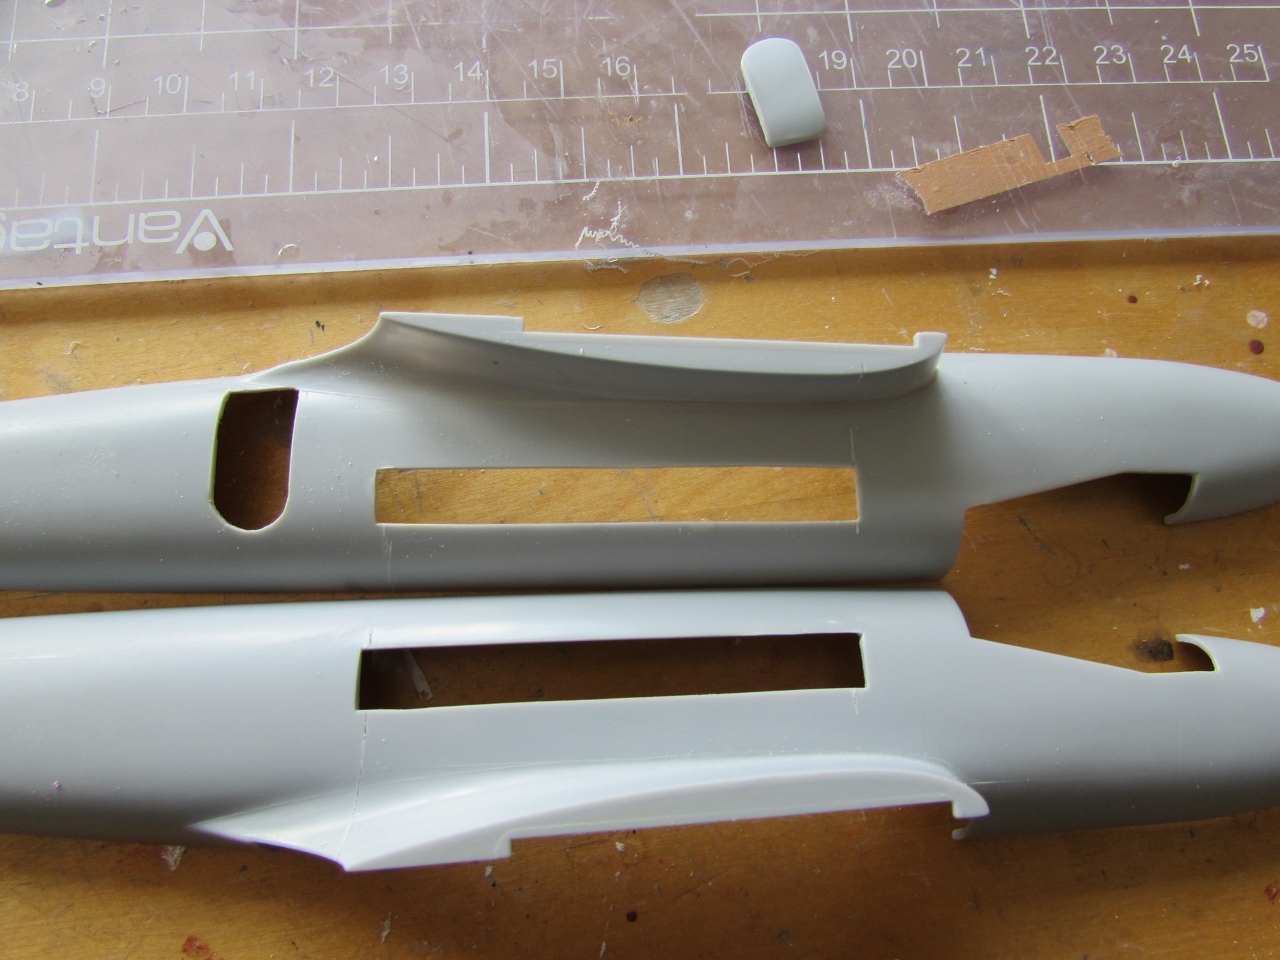
When I say "rescued" kit, I mean it:
The kit had endured the "Igor" treatment, thus we have some parts
already glued that shouldn't have been, raised panel lines erased
-unfortunately before using them as guides to trace the engraved ones-,
sections of the fuselage excised following and ebil plan that was left
like Beethoven's 10th symphony, and so on so forth.
As it stands, it looks like a post-apocalyptic gathering of plastic.
Another wonderful aspect of my subject choice is that only a few, bad
images can be found on the Net of it, which invariably makes things so
much more interesting.
And so we start:

Reason somehow prevailed, and after pondering the remains of the kit lying on the bench for some time, I ordered a new kit.
Therefore the one sent to me by my friend will be used as a trial airframe, experiment base and spare parts repository.
I do have many images of this airliner interior, so I guess I could start there while the Kora set and the second kit arrive.
I think the kit is still a fair one -generally speaking- if we
account for the "senior kit" effect (raised panel lines, somewhat chunky
bits, etc).
Still, squeezing a civil version from the military one, is not just
abracadabra, and completely omitting passengers seats for a passenger
version (with an open cabin door option) is not Italeri's highest
moment. Other details pertinent to the civil version were also lost,
whilst military parts were not replaced by real civil parts (fuselage
belly, cabin floor) but left as they were. As I said above, in spite of
all that, we have to be thankful that someone at Italeri thought of a
civil release, same case for the Junkers Ju-58, which is really a
half-way, half-hearted "conversion". Both seemed more geared to get some
extra bucks from those molds than to provide a bonafide civil version.
Same case for some other "civil versions" in the market then and now, in
cases just cosmetic adaptations.
But I see with joy many good, pure civil releases these last years. There is hope for mankind😏
Whilst the (so-called) box art on the Italeri kit shows a long tail
Lufthansa machine with associated "hump" over the elevator -which the
original plane didn't have-,
it also depicts on the box, in a smaller frame, a Swiss machine with (accurate) short tail.
So which is it, Italeri? which is the tail style you are catering for?
OK, it's confirmed, the Chilean planes had the longer tail.
I know there are kits with that feature, but getting a third kit is too much.
Two paths: add a scratched longer tail cone... or build Illimani (Lloyd Aéreo Boliviano), which had the shorter tail.
Drat, that deceiving, misguiding box art.
In retrospect, it looks like getting the Revell 4260 civil release
(Z-2) with radials and long tail (again, if the box art doesn't lie,
like in this case) would have been a sounder approach?
Still, decals would have been needed to be commissioned (for the Latin
American variants). I believe that those BMW radials were licensed
P&Ws anyway, which would have served the purpose.
In any case, the soil has been prepared a little regarding choices for future civil Junkies.
Oh, a modeling quagmire, and I still didn't glue a single part!
Here is the start of the passenger seats:
A fragment from "How to make the frigging passenger seats the manufacturers do not include", by Greek philosopher and olive pitter Styrenides, V Century B.S., Peloponnese Editors, portable stone tablet (PST) edition:
"- Why is it, fellow airplane modelers of the Great Greek City-States, that our task is so difficult? Is it because the airplane hasn't been invented yet? But, I ask you, since when philosophers have been deterred from speculating and freely give their doxa or episteme on things that don't exist, like perfect kits, perfect plans or modelers that are not opinionated? Onto you I say: it sucks to make passengers seats, but it would have been much worse if we would have to make tricliniums."
The other side of the structure now, and to the right the armrests:
To the paint shop now:
The new kit arrived, this will save some time, and the one sent to me will be for spares:
The instructions as you can see show two guides on the fuselage side to glue the bulkheads.
In reality, there is only one, and none on the other fuselage side:
This vague, indifferent positioning is the curse of many kits, mostly short run, but from Italeri I would have expected much better.
The same vagueness spreads throughout whole assembly:
Italeri did not bother erasing the details pertinent to the military version, so you have to deal with it.
The relief (as seen in this modified part of the spare kit) is sanded down.
At the same time some visible ejector marks that riddle all parts are also sanded as I go.
That cabin floor does not span the length of the fuselage as it is needed, so some remedy will have to be found:
In order to take advantage of open door and bulkheads in the back, the floor has to be extended. Here some trials using the spare kit:
Starting with the addition and modification of the bulkheads:
The bulkhead to the right of the door as you enter the plane needs touching up:
The cargo hatch is drilled:
A last corrugated bulkhead for the cargo area is added:
This area will be provided with some structural details:
The constant vagueness of fit and poor instructions regarding that continues to greatly annoy me. In that regard, this is among the poorest Italeri kits I have built.
A little trick for the cargo bay: a curved piece of corrugated styrene is glued making a sort of structural liner:
The cargo bay had a hatch to access the tail, therefore a little of it will be seen from the outside.
Some structure is simulated there too:
Going back to the first, used, gifted kit. I was trying to come up with a way to build it too, if it didn't become too onerous (which is just wishful thinking, considering the state. Nevertheless I started to clean the parts and repair the ones that were broken:
An example are the "double wing" Junkers feature, which comes molded as one part, with an engineering that is not really satisfactory, given that all segments are only united by a hair of plastic. You all know (including Italeri) what happens when you render big, long parts like this that way:
I had to repair a missing bit:
The original owner wanted (I guess) a clearer view to the interior, so he excised the whole window area. In order to deal with that, I cut a somewhat thick piece of acrylic to create the missing section (then the idea is that you mask the windows and blend the rest) but the curve of the fuselage is too pronounced. Some modelers superglue the part leaving it protruding a bit, and then sand the clear part to conform to the curve, first with coarse sandpaper and then progressing to superfine and polish. I did that once, it takes for ever and sometimes the clear parts just pops, taking you again to square one:
Therefore I desisted of this approach, even as the two clear sections were ready.
I am thinking of either a thin clear sheet supported strategically from behind, or a white styrene sheet with the windows cut out and doubled with a clear strip (which will leave a slight recess).
Or just drop the "used" model completely and concentrate on the new one in progress.
We'll see...
I have said this before... a number of times. Not all kit's are worth of your blind trust.
The aft cabin bulkhead is bogus. A new one will replace it, with the door displaced to the right side (looking at if from the cabin, facing the tail):
An additional bulkhead, another miss from Italeri, has to be installed after the cockpit one, creating the space for the radio operator, as per photos:
After looking at the very scarce references regarding the nether regions of this plane, I realized that, as with some other airliners of the time, the bathroom did not have a proper door. As you boarded, you entered a vestibule, facing a closet. To your right would have been the restroom, and to your left a door to access the cabin itself.
If you wanted top go the loo, you opened that door from the cabin, and locked it after you for privacy.
Photos seem to indicate that the toilet was part of a bench-like surface, with a square trap door you have to lift against the back wall to use the facilities.
Me thinks.
Speculating now: would a squared toilet lid indicate a square toilet seat? we all know what squared engineers are capable of...
The instrument panel received a styrene extension:
Cabin floor extended, front cabin bulkhead in place, flooring added to the aft sections:
Dry run of the ten seats. They were staggered, being the right column a bit ahead of the left:
Thanks to the courtesy of Italeri you now have to correct all the military bits, by adding some parts and redoing others. This is glued:
And then a thin sheet is glued on the reverse for firmness (especially during sanding):
And we all know what this is, a paleokit feature, for the dreaded stand:
Those doors you see crossed can't really be used, they are thin, they buckle, and their edges are beveled. More styrene sheet bits it is:
More reinforcing sheet:
This part has a notch, that you have to deal with too:
The square seat is replaced by a round plywood one:
The wheel wells would have you looking at the void, in good old kit fashion:
I decided to add a resemblance of structure in the form of a corrugated section, to which some general idea of plumbing will be eventually added. This should not interfere with the cabin floor of the wing tongues sliding in later:
Similar treatment will have to be also performed on the section of the wheel wells that pertains to the wings:
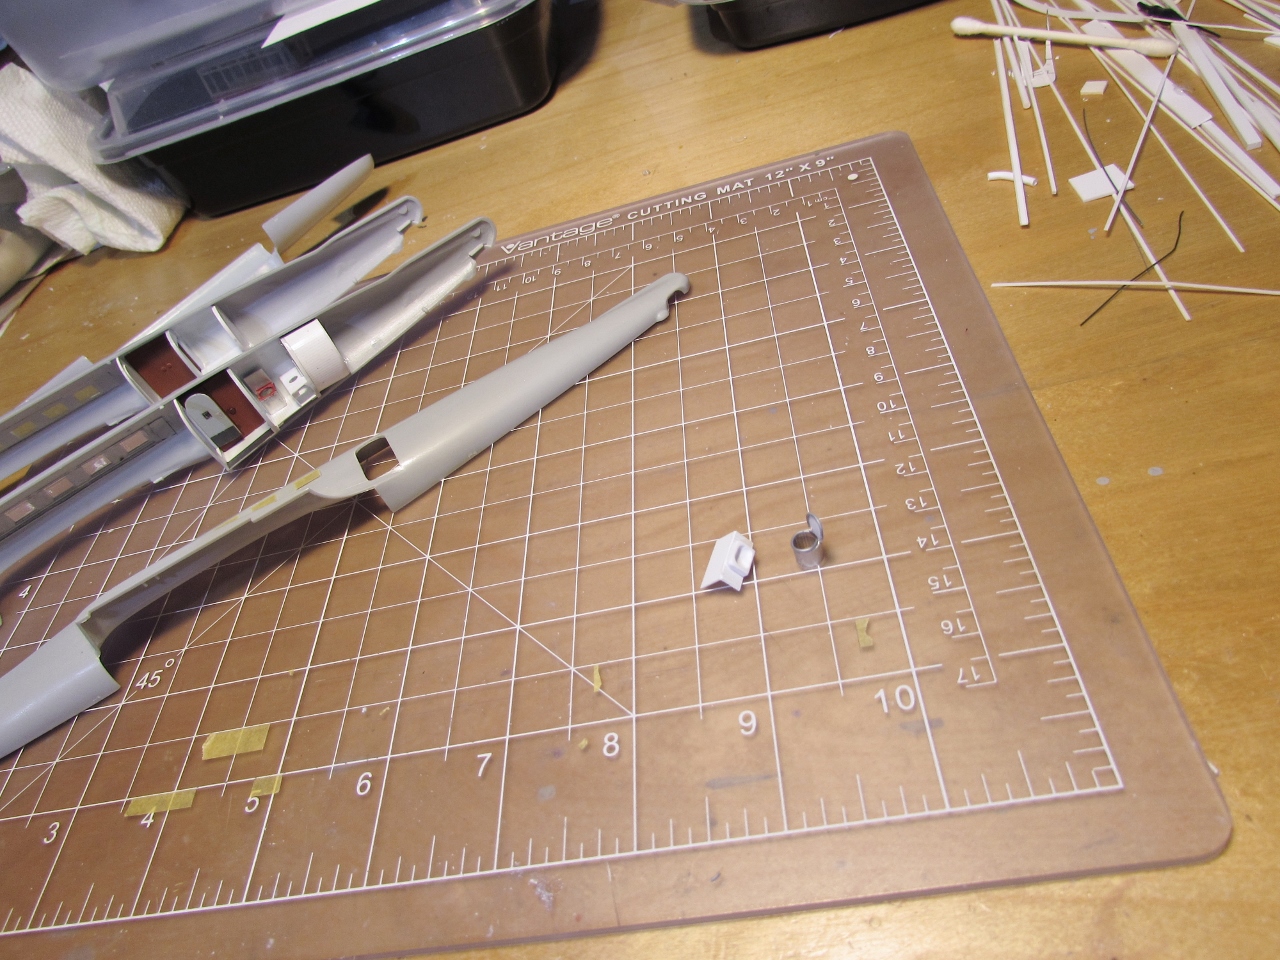
Even if you do nothing, to arrange the parts in an orderly fashion provides a sense of accomplishment:
Using the kit's raised panel lines as guide, they are scribed. Later on a light pass with sandpaper and vigorous brushing using an old toothbrush will take care of the old lines:
All flying surfaces are given the new, engraved panel lines. As specified above, the wing wheel wells are provided with some structure resemblance (why even old kits missed that is disconcerting. Some boxings of this kit even have photos on the sides of the box showing "details", like the -poor- landing gear and such: "-Look, mom, it got wheels!"):
The hatch for the cargo compartment is made:
Nope, it's not a vitreaux on a cathedral.
It's the onion skin that remains when you are forced to sand down the spurious military detail on the cabin floor of the civil version of the kit:
I just received a very, very useful tip from Mika Jernfors, to whom I am indebted for saving the accuracy of the build:
Not only the seats were staggered, as I mentioned above, but he made me notice that the windows were moved forward as well.
Therefore to obtain an accurate civil
version, you have to "advance" so to speak, as a whole, the windows on
the right side (as perceived seating normally in the cabin).
Sigh...
Pictures from the ETH Zurich website:
I decided to work a bit in the first, gifted used kit. The previous owner had glued to door, so it is opened again:
As you can see the previous owner as said had excised the window areas, but did not go ahead and moved the right side ahead:
The area is marked and that fore segment removed:
A compensating piece is glued behind:
Meanwhile the wardrobe doors for the new kit are fabricated:
There are different ways to correct the window row. One is just to remove the whole area, as in the used kit, and either "advance it", or replace it with a clear section (very tricky) the other would be to remove a section ahead of each window, and add it behind. We'll see what we do:
A trial run on the used kit installing the acrylic and sanding it to shape worked ok, but you can't really restore full "as new" clarity on the clear part, and besides it takes forever working with progressively finer sanding grains and then polishing. This method is too brutish and takes way too long for my taste:
I decided to move ahead the window section of the right fuselage side. This required multiple, precise, controlled passes with a very new X-acto. The plastic is very thick around the window section proper (that is depressed and thinner) and takes patience and a steady hand to cut. If you force anything at any point the plastic will brake at the weakest point, the frames between windows. If you apply to much force cutting bad things will happen.
I am not sure I can recommend this solution, but if any of you is thinking of applying it, a good move (which I realized later) would be to thin the fuselage side around the window area to facilitate cutting.
Now the little section at the front needs cutting off, and re-placed at the back or the row:
I think that there is -as said above somewhere- another way: to cut a piece ahead of each of the five individual windows and re-placed it at the back, thus "advancing" the openings. It sound complicated but I think it will be less risky.
In fact the space ahead can be just filed away, and a piece of styrene added behind.Presto.
The excised section is moved ahead:
And the bit at the front is moved to the back:
After the glue has set, it would be a matter of some puttying, sanding, and re-scribing.
The kit's transparency can be used without a problem.
A bit of generic structure is added on the area that will be seen on the belly, to keep things busy:
I decided to go for the extended tail, to be able to do the LAN Chile machine. For this the elevators have to given a clearing in the middle, where the pencil lines are:
This is the core of the extension:
Of course it will be adjusted to fit over the horizontal tail, filled and shaped in place later on:
Going back to the used model, the other side of the windows is added (not really looking forward to that extended sanding and polishing session, yet again...):
This is the area where the actual windows will be. The provisional masks will allow for some preliminary puttying and sanding of the surroundings. Once treated, the actual individual masks for the windows will be installed (inside and out) for airbrushing first of the interior, and eventually the exterior:
No promises, but I keep working on the used kit:
If the used kit go¿es ahead, those nacelles need some work. Firstly, those exhaust ports need drilling
(Ed.: This was not a good call, the solution is down the thread):
Then exhausts have to be shaped:
To be later added so:
The intake lips are too thick compared with photos, and need thinning:
The "radiator" detail inside the air intake in the nacelle is not accurate, thus it is replaced for more credible items:
The bulkheads for the possible second model -with the "used" kit- will be shut, even if the door to access the plane will be open. There will be curtains and no seats, no restroom, no cargo compartment unlike in the other model:
The copilots had a simplified steering wheel, so those are made for both models, just in case:
I have to correct the exhaust arrangement: The pip at the end of the nacelle belly is one exhaust, the teardrop shapes I took for the exhausts are actually blisters (which is good, I can cover them now, and use the exhausts in that other place):
Blisters on. The exhaust pipe will go on the bit at the end:
You may drill and carve those pips:
Or you could make the exhausts from shaped and glued thin alu foil of the the stiff type found on coffee containers and such:
Cut a strip, bend it, superglue it from inside:
Trim the excess, sand the edge. You can make short telescopic struts, trailing antenna housings, exhausts, etc.
And in any size you want:
Thus:
It seems that Italeri got wrong the position of the details behind the cockpit:
This is how the "teardrop" actually looks:
And you can see that the positions of it an the directional finder were actually all the way around:
Going back to the used kit, the fit of the nacelles is really good, as it was the fit of the wing halves. One brownie point for Italeri (and minus 1,000 for all the other stuff):
A replacement "teardrop":
A replacement finder, with its beveled base to follow the fuselage angle on the side:
What, you say the finder had two rings? gosh, you guys are insatiably nitpickers!
Here the double finder, then:
The leftover lengths of plastic are cut off, and a second ring is mounted on those tiny bits of plastic:
Then, carefully, the rings are open a bit and inserted in the stem, and superglued in place.
Two made, one for each model:
The the left, the rescued kit, to the right, the new one. Waiting now for the arrival of the Kora set from the Land of Eng. I could start doing some basic painting, but the thought of setting up all the airbrushing rigmarole and then clean up is not particularly enticing at the moment.
And remember: there are more things than aircraft modeling. There is also car modeling, bus modeling, etc.
Bulkheads added to the rescued kit:
Preparing a common painting session for tomorrow... if I feel like:
We'll have some apricots in summer looks like:
Some primer and some paint:
Not only did Italeri miss the second control joke and inst. pan. for the civil version, they also kept the "open" control wheel, whilst the civil version had a full wheel.
Curved stretched sprue to the rescue!:
Some painting and the inst. pan. ready with some little blobs of clear on the instruments drying out:
The window masks to paint the interior are measured, cut and applied:
Then the provisional mask strip is removed, and the exterior window masks applied:
Meanwhile the transparencies are bathed in acrylic floor polish:
And the gluing edges protected to star interior basic painting:
Another short session with the airbrush:
The internal masks of the rescue kit are removed, and the windows on the new kit are glued in place. The wardrobes in the foyer are added, the small cargo bay of the new kit is painted metal inside.
Work on the interior can now commence in the form of curtains (almost all closed in the rescue kit, since no seats will be provided for that one) and perhaps some lighting:
Starting to add some details:
More restroom decoration. I changed around a couple things, just as a divertimento.
Is airplane restroom decorator a profession?:
Another airbrush session, to apply the metal colors where applicable, tire color, cabin floor, wheel wells, restroom elements, tailwheels, pilot seats etc.:
More details:
New kit:
Rescued kit:
After a little bit of modeling meditation to enhance relaxation:
The innards are glued in (this is the rescue kit, so no cabin here):
The fuselage halves are glued together, and then the fabricated resemblance of structure to avoid the void -so to speak- is glued:
And the belly section added:
Looking now like a fuselage:
The fit of the transparency is quite good (dry-run):
I thought that I had followed the marks on the kit's door to augment those hinges, but somehow they are on the wrong side, either because the kit had them wrong or I did:
They were deleted and new ones glued on:
The used kit had the detail on the LG doors erased. I removed the very prominent ejector pin marks on the new kit, but lefty the detail:
A structural member seen in images is added:
The seats had their frames painted metal and their seat belts added:
The engine nacelles molded in the used kit are not exactly a faithful representation of the real ones, you notice once you have studied photos. I am not messing with that, but added two air scoops, the lower of which is oval in shape to be closer to the real thing:
The new kit interior is being prepared to be glued, and then unite the fuselage halves.
As stated above somewhere, the seats were not only staggered, but also toed-in:
Interior in place:
Fuselage halves glued together:
There is a bit of short molding on the right half of the nose close to the inst. pan., that will have to be filled later:
The structure and belly are added to this one too:
A small section between the elevators is excised to allow the new tail cone fairing to go on, in order to match the version for LAN Chile.
I am still waiting fort the conversion aftermarket set, but it is now clear that the post offices around the world are predictably slowing down; in fact, I juts ordered a kit that I hope to build 20 years from now, that will give the parcel time to arrive:
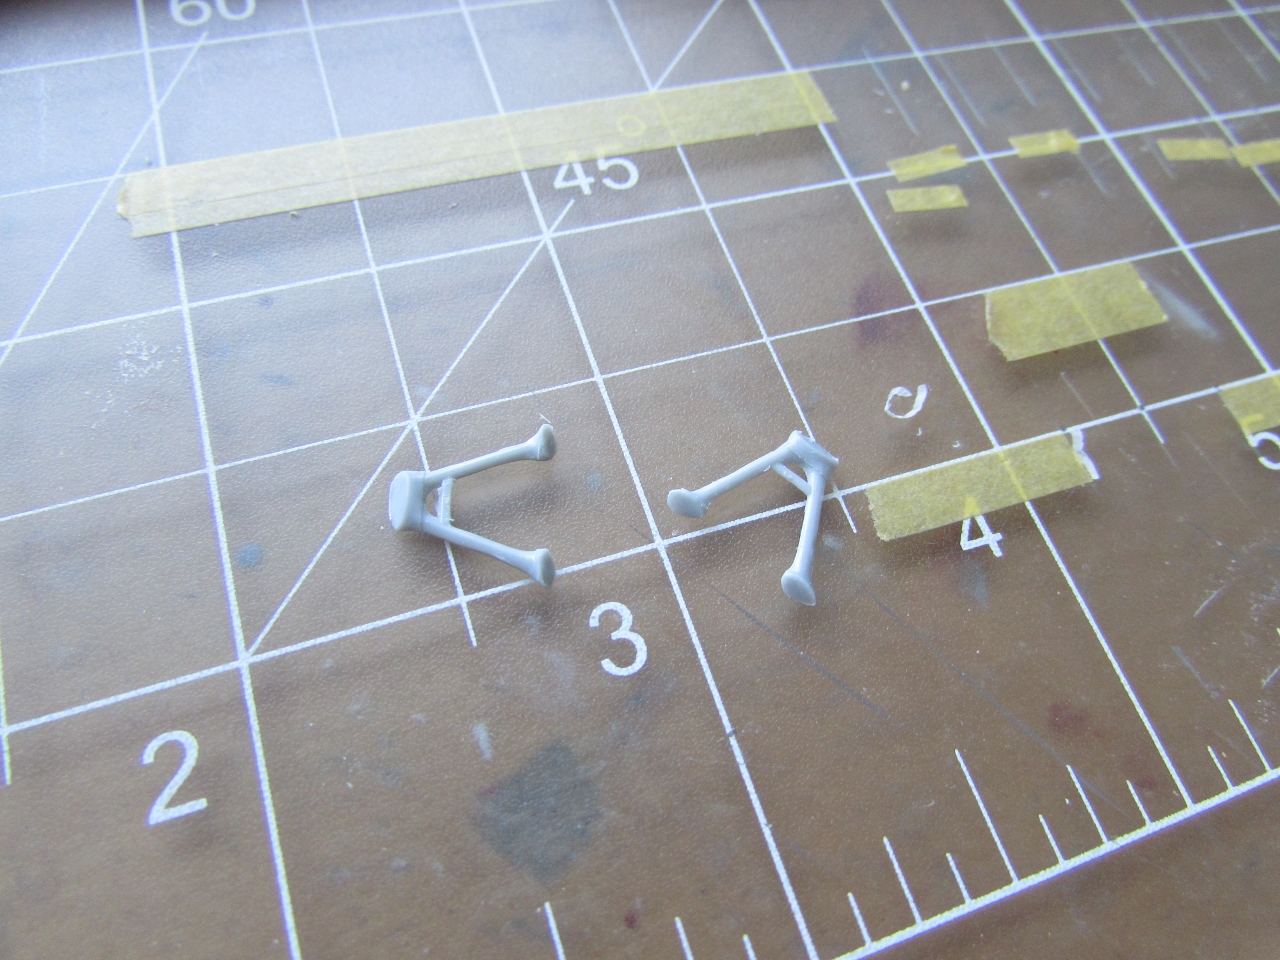
The little struts for the horizontal tail have a tiny bit that needs removing, and it's easy to miss:
The tail for the Australian version is on:
The core of the extended tail cone is glued in in place. Milliput and modeling exercise (sanding) will ensue:
The canopies are in place. They are a fair fit, but not perfect, being just a few hairs wider at the bottom. They are also thicker than their contact area, so you have to be very carefully trimming the plastic from inside to clear the inst. pan. and cockpit "hood". You can see that the old kit with the stab in place has some putty to blend it in, and the new kit has Milliput applied to the tail extension core -glued before. Both (naturally) need sanding and blending-in:
The Chilean airliners had a particularity, only shared (perhaps, for what I can see) with the Swedish cargo one: the radio position between cockpit and cabin had small circular windows on each side.
This is an important detail, of the kind you would like to have discovered
before you closed the fuselage. I think I can drill those windows while blowing air inside the fuselage at the same time to keep the debris out. We'll see:
And done. I did the latter, drilled very close to a vacuum cleaner adapter:
The Kora decals are missing the "LAN" seen here under the right wing. Chances are that they were over the left wing too. Now I will have to source those myself. Why, thanks, Kora!
The Milliput over the styrene core addition is blended-in:
Once the stab is added, there is an area that has to be bridged over it:
A stick of adequate size is sanded to shape:
Here a dry run. Once glued in place, of course, the transition between all the elements has to be made seamless with more Milliput and putty:
The old kit gets its wings:
Work commences on the spíne over the stab:
Don't be like me, having to drill the wire antenna location uncomfortably in situ:
Do it when the vertical stabilizer is still unattached:
The Peewit masks for both models have arrived from England.
The strange thing is that this order was made seven days ago, it came quite fast, but the resin parts ordered from the same business, 18 days ago, are not here yet.
I opted for the no tracking, less expensive mailing option.
Should I be worried?
The old kit Junkers is ready for a first session of priming:
The Kora set arrived. This is what's in the box:
You get also the small "icecream cone" to replace the kit's, which is inaccurate (I already scratched it before):
The quality is just ok, nothing extraordinary:
Some details is there:
The dreaded pouring blocks:
Very poor "instructions", small, and child-like. Unprofessional is almost a compliment:
Not sure if the blades are supposed to be pinned, there are small sockets, but they are too small:
Since no metal pin is indicated in the instructions, I opted for enlarging the holes to be able to receive the blades, for a firmer setting:
Kora's resin is the hardest resin I ever worked with, and removing those blocks was not a pleasant task:
There are fair panel lines:
A passenger door is included in the form of sticker or a decal (most likely the former), but the kit already has one, not sure why this is here:
Now, the real question: How's the fit?
The part of the nacelle that dictates where they should be is the lower half, given that it shares part of the wheel well "circle". Taking that into consideration, the fit is
very poor. The upper half has a very poor fit too, and they don't "meet" properly
The left left wing is much worse than the right one.
This is very disappointing, since the fit of the original kit parts is excellent.
A lot of work will be necessary here to get a proper fit, trying as you go. Sanding resin with its noxious dust is not my preferred hobby activity, but I see lots of it ahead.
Sigh...
The "trays" of the oil coolers have to be installed before gluing the nacelles onto the wing:
A centerline is drawn, it's 20mm from the root:
Alignment looks good:
The lower was not reaching at all the "meeting" point ad the leading edge, so several passes scrapping the resin and trying were done, until it reached the necessary fit:
And now the upper half can meet the lower half, without a yawning gap.
Some minor puttying is going to be needed, anyway, but nothing like if you would have glued them as they were (which would have also produced an oval at the front, due to the distance between halves):
A primer session revealed as usual much to be done:
A piece of scrap is used to impede the void effect behind the opening:
More touch-ups on the old kit after priming, the most tedious, repetitious, boring stage of modeling for me.
By modifying the kit's prop axle assemblies (which like many old kits will have you stupidly install the props at a too early stage) I am able now to install them at then at the end of the build and still have free-milling:
The new kit went through the same touch-ups; more will still be needed surely after I glue the wings, once I complete the aftermarket nacelles installation:
After the touch ups, one more light coat of primer. Now the provisional masks can be removed, and the canopy masks installed for painting:
At some point I had to face the dreaded step, and, as I feared, the fit is very poor. Much working around to get a decent placement. This is not a product I would not recommend to anyone but those seasoned modelers willing to put up with problems. Not only the fit is poor, but the parts are not really mirrored, and again adjustments have to be made, trying and shaving and trying again and not forgetting the other half:
Finally in place. I will do most of the necessary tidying before installing the wings:
The rest of the resin parts from the Kora set are prepared without major hiccups.
Since no guide or keyed assembly support is provided for properly locating the prop blades into the hub, you have to make your own devices to help with that. The engines just needed a few passes with a sanding stick to fit inside the cowls (dry-run):
All resin additions are now ready for priming:
If you are using the detail part that goes on the roof after the cockpit, you have to remove the aft bit...
...as in reality it was a truncated shape:
The primer revealed just a few little spots that need attention, fortunately:
Provisional masks removed on the old kit, one wing added to the new kit:
Peewit masks in place, thanks to the Modeling Muse for those! :
The other wing is glued in place:
One step closer:
A coat of base black to some parts. The landing gear legs were in fact black, something missing in many models:
After adding a couple details and priming some areas that were touched up, they look ready for a first paint coat:
Just a couple of details painted to take advantage of another airbrushing session with different models:
The wheel covers had a bent absent in the kit's parts, thus they are carefully induced. Then bend is slightly different in both models due to the nacelles' shape:
The ailerons came really battered up in the rescue kit, so they are restored, their counterweights added:
The counterweights on the elevator are added too, up and down.
The kit provides just the necessary number, no second chances here, so be careful, or you will have to scratch them:
The aileron/flaps went on smoothly in both models:
Little more work:
The "Australian" model is airbrushed. This is my personal interpretation of the two color references we have from different sources, "mustard" and "light khaki".
If it doesn't convince any of you,
please be my guest, build one, and paint it anyway you want:
The "Chilean" model is given a coat of the gloss light grey, in preparation for the aluminium (the same I did for the ongoing Cochran Northrop Gamma).
As you can see, I prepared the ancillaries... and forgot to paint them. Next session.
A general mist of aluminium paint:
Believe or not, I am working on so many models, that I forgot I could proceed with this one!
Many other are waiting for things that are coming (or not) in the mail, and that's why I keep starting more!
The masks are removed:
Now all the other parts have to be added:
engines, cowls, landing gear, directional finder loop, Pitot, wire antenna and mast, props, decals, etc.!
The mast for the trailing radio antenna, the Pitot, the tailwheel and the main gear minus wheels are on. A home-made light is about to be added:
Decal application for the Chilean plane begins. The Kora set decals are good, but took about 15 minutes to become loose from the backing sheet. They are thin but opaque, and allow positioning with not issues.
Their engines look good too, now that they are painted and in their cowls.
I was about the add the props, but I encountered an issue: the Kora spinners won't go over the props, because of the prop detail in front, and the thickness of the spinners' casting. The detail at the prop axle will have to be removed. I thought of making vac copies of the resin spinners, but they are painted already and the process will likely affect the finish.
In preparation for the blue, the area around the nacelles is masked:
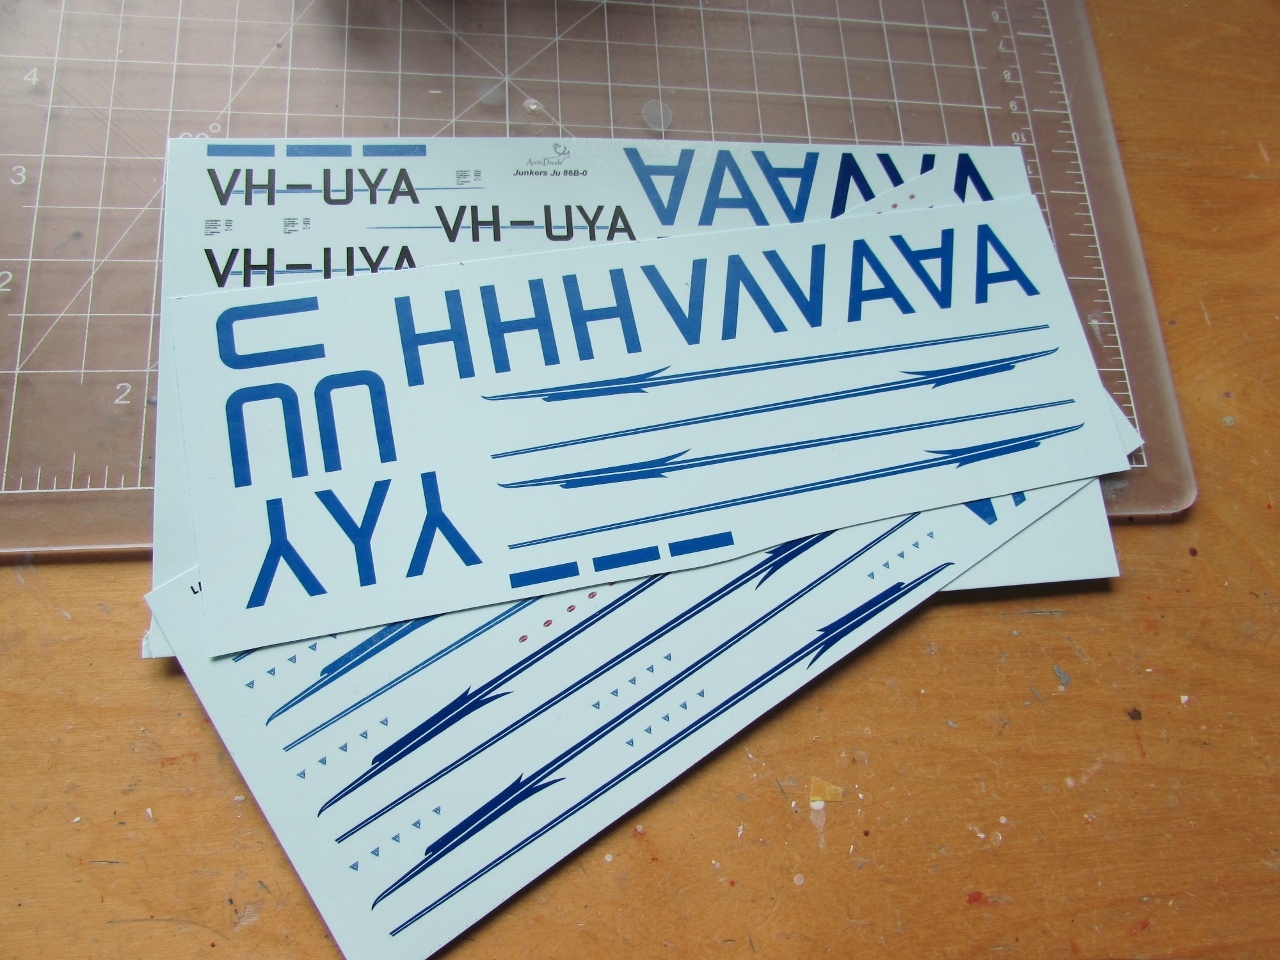
The commissioned Arctic Decals set has arrived!
The blue areas are painted, and the masks removed:
Working on the belly side of things with landing gear, decals, trailing radio antenna mast, Pitot.
It always amazes me how close to completion the models seem at this stage...and how they are really not, endless details needing to be applied, and touch-ups still to be made:
The decal sheet even includes the Junkers logos for the prop blades and the data placard:
I have made a paint mix to match the decals to my satisfaction.
As I was applying it, I stupidly doubted myself (being airbrushing with artificial light) and added more of the darker blue. Now the match is close, but not spot-on as it was. Well done me!
In any case: decal application continues on the top side. All goes well.
Next will be the antenna mast and its wires, the door, the props, and hopefully it will be ready.
Here is a teaser, a few more details and it will be ready.
Just in case, I had made a few counterweights, since they were the most knockable items. I had to us one that I broke and lost during painting:
To be continued...


Some impressive surgery on diplay, I look forward to future updattes.
ReplyDeleteCheers,
Mark
Thanks, Mark.
ReplyDeleteThe patients are still in the operating theater, we'll see how it goes.
Cheers
Great work on the Junkers, reminds me of the South African Z-7 I did a few years ago. Looking forward to the end result.
ReplyDeletePeter
Thanks, Peter.
DeleteHi Gabriel,
ReplyDeleteUnfortunately, it is too late, but it does not seem that the seats windows were staggered on all versions - the interior pictures of South African planes seem to indicte a different layout (including the rear cabin door)
Hi Eddie
DeleteWell, ALL windows (left and right)were displaced from factory, so the correspondent seat columns (left and right) had to accompany, unless the owner made mods.
But this was a machine coming from Germany, in airline service when purchased, so that's very unlikely.
Do you have photos to support your point?
Of course:
Deletehttps://atom.drisa.co.za/collections/N_Collection_lo-res/N46126.jpg
https://atom.drisa.co.za/collections/N_Collection_lo-res/N46127.jpg
Unfortunately that photo is miss-captioned, as the interior (much smaller, by the way) corresponds to a BFW M.20, something you can easily corroborate online. That very interior is in a model of it I made and posted here months ago.
DeleteLook for it.