For many years I have wanted to build a Ford trimotor.
Dutifully purchased Monogram's (the scale of which is usually stated as 1/77th)
and Airfix's (1/72nd) kits.
The trimotors, thought by many to have been based on
Junker's ideas and products, had not doubt nevertheless played an important
role in the field of aviation in the US and abroad.
The first obstacle I found years ago as I started to collect
information on the trimotors, is that they came in an extraordinary diversity
of flavors. It's not just a matter of slapping your preferred decals, or
registration, or schemes on them, as details varied from minor to major. There is excellent literature on the matter,
and I have more books and articles on it than I can remember. The data
available is so vast that while trying to make sense of the complexity, by
nighttime I am already confused about what I read in the morning. In a week, my
"knowledge" of the plane would be a jumble of small details rattling
like a maraca inside my head. As I am more used to research obscure types,
mainly one-offs, the idea of wading though a quagmire of ever-multiplying
variants is not really appealing for me.
Thus I decided to cut the chase and center on the possible
planes I would like to model, and, from that choice, find out the pertinent
details of those specific machines.
After looking at hundreds of photos and considering the
history and aesthetics of the candidates, I narrowed the selection to a few:
- Any machine that operated in Argentina with local reg., or under
NYRBA, or Pan American Grace.
- A machine on floats, for which I acquired the aftermarket vacuformed
items from Execuform.
- The SACO (Servicio Aéreo Colombiano -Colombian Air Service) plane F-31, in which Carlos Gardel, the
Argentinean world-renowned tango singer lost his life -together with his
entourage and crew- in a catastrophic accident during take-off while on tour in
Colombia.
As I went through the photos of all trimotors I noticed some
unusual schemes that also grabbed my attention, alas with no more information
than an image or two, so may be for the future.
The Airfix kit corresponded well, with minor exceptions, to the
details of the SACO plane.
And so the choice was made.
I had acquired long ago a second kit, just in case, as I
usually apply mods and some surgery to my builds, in order to have spares. And
what do you know, once again, missing and marred parts that I only discover as
lay down the part of the building boards and check them. In the second kit the
cockpit transparency is a short shot, and the tail wheel and horizontal tail
are missing. Drat!!!!! Fooled again! Check your kits immediately upon buying
them, fellow modelers.
One important fact that I would like to add to the
historical context is the despicable, rabid racism and anti-Semitism of Ford,
well established and thoroughly demonstrated, by others and himself, in writing. If you
want to have indigestion, track and read his publications, or the nazi praises
to him. And yet here is another whitewashed American industrial
"hero", same as Lindbergh, a close pal of Ford, and holder of the same
disgusting racist views. No defense or "explanation" will do for the
above-mentioned characters, racism is indefensible.
Back to the build: The Airfix kit is incredibly old, but it
holds relatively well, if you are not tremendously demanding.
There are a number of things that you would like to
correct/enhance, but if your goal is to keep things reasonable, here a few
things you may like to address (things actually I may like to work on):
- The wing trailing edges are very thick, thus sanding from
inside the wing halves is desirable.
- Only the outer section of the wing leading edge was
smooth, the medium inner sections carried the corrugations on, wrapping them
around the LE, whilst the kit has none. A trick should be employed here.
- The engines are not state of the art, but aren't awful,
you may consider replacing them, or at least the nose one, that in most cases
doesn't have a cowl.
- The props have the wrong side of the blades (flat/concave)
facing the front. You have to either shorten the long pin, make that side the
front (convex side), and add a new long pin to the back, or just carefully
drill away the axle and add a new one that is longer on the flat side of the
blades. Capisce?
- The mail compartments in the wing varied according to the
model in size (single or twin-bay), or weren't present at all in some
trimotors, and the kit has a rather crude depiction of them: it has the size of
the twin-bay arrangement, but only external sides boxing it, whilst it had also
separators in the middle. Those boxing sides were made of a square section tube
structure and wire netting, they were not solid as depicted in the kit. Study
your intended plane and modify if needed. If displayed open, you may like to do
a better job than the kit's parts.
- The elevator and rudder control arms are molded fused with
the fuselage side. Not sure how acceptable the result might be of removing
them and then having to restore the corrugations, and adding new arms a bit
distanced from the surface, plus the cables from them, through the wing, and
over the fuselage to their destinations.
- The kit has a reasonable interior, with cockpit and cabin
aft bulkheads, it even has a positionable cabin door, BUT...NO RESTROOM!!!!!
this MUST be corrected.
The metal-colored plastic is somewhat hard, and sands
strangely. Like many other old Airfix kits, in opening the box you will find
that many parts had freed themselves from the sprues (yippee!) and are happily
cavorting and rubbing against each other, a lifestyle not particularly
recommended for the transparencies: the cockpit one was scratched. The other
clear parts are so bad that it doesn't matter, as they probably will need
replacement anyway. Since I will build a different model than those catered for
in the decal sheet, I threw it away, as it was, like many old Airfix decal
sheets, not really good. My older son, who built two of these trimotors, has a
bitter memory of them.
Contents of the box:
Comparison of some parts of the Aifix and Monogram (smaller) kits
The Monogram kit (that I won't be using) comes with adorable animal life:
And figures:
The Airfix kit is riddled with ejector pin marks:
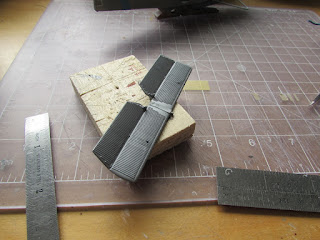
The wing trailing edges are very thivk, here is just one half:
Thinning them is a must, but has to be done properly:
Now, that's better:
Not forgetting the center panel:
Ejector pin marks are removed and sanded:
The detail, given the age, is almost admirable:
The door on back bulkhead has been opened. The same will be done to the cockpit bulkhead. Instead of struggling with the kits parts, these easily be scratched from styrene card:
The LG legs suffer the most from improper molding:
All parts cleaned up. Took about a day:
The leading edge on the kit is inaccurate, as it wasn't smooth all the way, just the most outward section, thus the corrugations need replicating:


The build's acme has been reached, as the toiled is ready. Other accoutrements are in progress.
The prop axles have been respectively shortened and extended, to reverse the direction the blades face (how could Airfix have gotten this wrong, is beyond), the nut or bolt at the front added as a small punched disk:
The control arms have been removed, their pivoting points drilled for later:
Toilette a la carte:
I took these at the San Diego Air and Space Museum.
They are a general guide, as almost no Fords were created equal, so always study photos of the very same plane you want to represent:
I took these at the Smithsonian. Notice how different the two trimotors are (smooth belly, to start with):
Do not sand the seam in the wingtip area, as there was a very visible flange there:
As mentioned somewhere at the beginning, the mail holds in the wings seemed to be of two types, single and double bay. Some trimotors didn't have them at all.
The one I intend to represent had a single bay mail hold, so the kit has to be modified accordingly.
I think I will shut close one of them, resurface the area to match photos (the kit is also missing a very prominent bar/lock). and then rework the other one and depict it in the open position, redoing the frames/wire netting which are ignored in the kit.
Tabs are added to add strength, since work needs to be done on the other side later on:
More reinforcements:
The other mail hold part is cut to obtain the one needed for this specific build:
The "leftover" section is glued to the wing:
It should look like this, but the modified area has to be blended-in, which is going to be quite the challenge:
A tab on the part that holds the kit part that poorly represents the sides needs removal:
There. The new side frames and wire net need to be added, plus some ancillaries missed by the kit:
The flange on the cut side had to be recreated, removing a narrow band of corrugations:
The hold was boxed with styrene sheet, and as a "roof" corrugations were made and glued to the other wing half:
So this is how it will look (all this will be barely visible once the mail "drawer" is in):
The bar and lock are replicated:
Sections intended to hide the kit's mail hold demarcation are prepared:
The frame to substitute the kit's crude part (in the foreground) is in progress:
Once the glue sets the netting will be added:
And here is it. The tailwheel, by the way, had spokes on this one, so an O ring is separated:
The SACO plane had a strange feature in the left wing, a cone in the shape of a fish mouth, perhaps another light, maybe an air intake. Whatever it is, is reproduced:


The tail parts are drilled for the rigging. Their coarse control horns are re-shaped and thinned-down:

You never know what may turn up from the dungeons: I had yet anopther kit of the trimotor, also with missing parts. The fact that Airfix then did not bag the contents, the parts would come from the sprues as mature fruit a week after molding, and that the boxes tended to self-destroy, did not help much with kit integrity:
If you found flash in your parts, no worries, a Flash Service is offered. I think it consists of Gumbies coming to your home with sandsticks and hurting brains:
Yet another set of poorly printed decals:
The person in charge of quality control was too busy watching "The Avengers" on TV (the real ones, with Patrick Macnee and Diana Rigg, not the shallow, pumped, go-nowhere produced now for popcorn-filled brains) and missed checking the printing color register, that is there to show if things go wrong (they did):
The five wing sections are assembled. The fit is fair, without being exceptional. Considering the molds are from 1968, 52 years old to date, not bad:
I would say I am pleased with the improvement, as removing about 1.5mm of plastic thickness (10.8 scale ctms., or a bit more than four scale inches) resulted in a far less chunky feeling.
One pancaked each other for better comparison: to the left, the untouched wing of the spare kit, to the right the current model's wing:
The work is worth it, I think:
The corrugated patches for the restoration of the mail hold area are glued in place.
They are glued with slow-curing superglue, very carefully pressed with a soft cloth, and the edges run with thin superglue to seal them. Once primed and painted, you may faintly notice them, but that's for me better than a completely bogus mail hold area. To mitigate the "patches", you may run extremely faint rivet lines, as the corrugations in the original needless to say had sections, and were not a "single sheet" as in the kit:
Paper patterns for the needed sections of corrugated leading edge are measured and cut. These will cover the areas that the kit inaccurately left bare:
This is the restroom of the Junkers G-23/24, another corrugated beast:
The corrugated patches are applied to the LE:


The small areas where control cables pass through where most likely of leather or rubber, or perhaps rubberized fabric. Rubbing on metal would have caused fraying of the cables:
Careful examination of photos rendered yet more surprises: the position of those hatches underneath the wind should be ahead of where they are, and the control cable go-through area should be a back from it is.
More corrugation restoration is not a menu that pleases me, but I think I may move the cable portal back, and leave the hatches where they are. We'll see.

Meanwhile I am studying the engine gondolas, that varied greatly among sub-types. F.31's were slightly different arranged, having a shroud for the exhaust, some bumpy bits not present in the kit, and a small triangular faring behind one of the aft connecting struts.
The aft point of the cones was hollowed:
It helps for holding many parts that are being glued simultaneously:
And we now face the next challenge of this old kit, one of the most inexplicable and shameful of them: the location of the engine gondolas.
As warned by many, and suffered by all, nothing seems to work properly here.
a) Utterly deficient and confusing instructions.
b) Poor fit of the struts.
c) Inaccurate and misguiding locating holes on the wing.
There could be many solutions for this, again, extremely poor job by old Airfix. I elected to approach these issues thus:
1) Assembly of the gondolas (which required more than a little prodding and cursing and some enlarging of the locating holes.
2) Measuring of the distance between the wing contact points on the fore and aft V struts, obtaining 11mm for the fore and 11.5mm for the aft one.
3) Since the holes on the wing over the narrow smooth strip that separates the wing panels are more or less where they should, the gondola locating holes under the right wing (inwards) are re-drilled.
The fit now was ok.
4) Trying the same approach on the gondola under the left wing proved impossible, as everything seemed to go out of kilter at the same time in all possible directions. Repeated trial and error and enlargement of the locating holes eventually allowed for an acceptable fit and alignment.
My intention was to provide a guide with small mods -or even a printable pattern- to improve the fit in this noticeably problematic area, something that Airfix did not bothered to do in decades, but I am afraid I could not find an elegant solution for the engine under the left wing, and only an acceptable jimmy-rigged fix for the other.
I will now wait until the engine sub-assemblies glue sets, so the struts are fixed in the right positions, and then I will fill some of the holes that had to be unsightly enlarged, and re-drill.
And, as Kurt Vonnegut Jr. justly wrote: "So it goes"
I am not new to the hobby by any stretch of the imagination, and have dealt with many a wild despicable kit succesfully, but I expected more from Airfix, even if it is the "Old" Airfix.
Parts are grouped for the first airbrushing session:
The cockpit of course had corrugated sides:
Almost nothing will be done with the cockpit, as the transparencies won't allow much to be seen:
The long exhaust and shroud provided in the kit (shown below) does not correspond to the version I am building, that had a shorter and bulkier one that will have to be fabricated:
The gondolas in this plane had a few details not present in the kit, among them, these to fixtures:
This variant had the two side engines shrouded by a cowl, so they are not really that visible, but the center engine is well exposed and the kit's representation is rather simplistic.
You may like to replace it by one of the many aftermarket options available, here are the two I have at hand, from Aeroclub, and Radial Engines & Wheels (there are others):

Work continues on the wing. A light coat of primer first to spot blemishes followed by a light sanding, and then the kit's aileron control horns -that were removed as they were poor-, are replaced with metal items, and the control cables position drilled:
The (we believe) passing light housing was added:
The cables run shorter on the upper surface of the wing:
The cockpit bulkhead access is replaced with a scratched item that as a separate door. The door is made from clear stock, so the window can be masked and the rest painted, instead of carving an opening on the opaque plastic and having to make the transparency:
Groups of parts are either primed or painted with their respective base colors, and stored inside the closed for safe drying:
The props in this plane had the customary Hamilton Standard logo, and the blade tips that common tri-color bands, so more work is ahead:
I started to paint the seats, when it occurred to me to look at actual photos. And of course this plane had different seats, curved, not oblong, the back shape like a catenary curve.
Looking at dozens of interiors, I found none that have the seats depicted in the kit, save executive arrangements of less seats and different layout. One more lesson learned. Actually, again and again the same lesson: do not blindly trust a kit:
New seats from a donor kit are shaped to reflect the ones in the planes, all 12 of them (to the right a re-shaped one):
More painting and touch-ups ensue:
The cockpit was given seat belts and an additional small panel on the console with three instruments seen in photos, most likely engine instruments.
Work on the nacelles continues as more detail is added following photos. The white channels are the shrouds the exhausts need for this variant, made of course of split thinned tube. There were sets of louvers at the back that will be added after painting in the form of Archer printed resin decals:
The slot in the floor is just a devise to clear the tongue of the stand atavism:
If you are not using it (does anyone ever?) you may fill it and restore the surface:
More painting ensues, as some elements have a different color on the back (bulkheads/doors), or need a top coat (metallic paint), or a different color in another section (the white for the restroom area, the tri-color prop blade tips). Notice that the area inside right in front of the cabin door is not covered by the cabin pan, and will have to be painted accordingly once the white has dried and can be masked:
Seats painted and in place. The vents for the heating system were added to the floor, as well as a different color walkway:
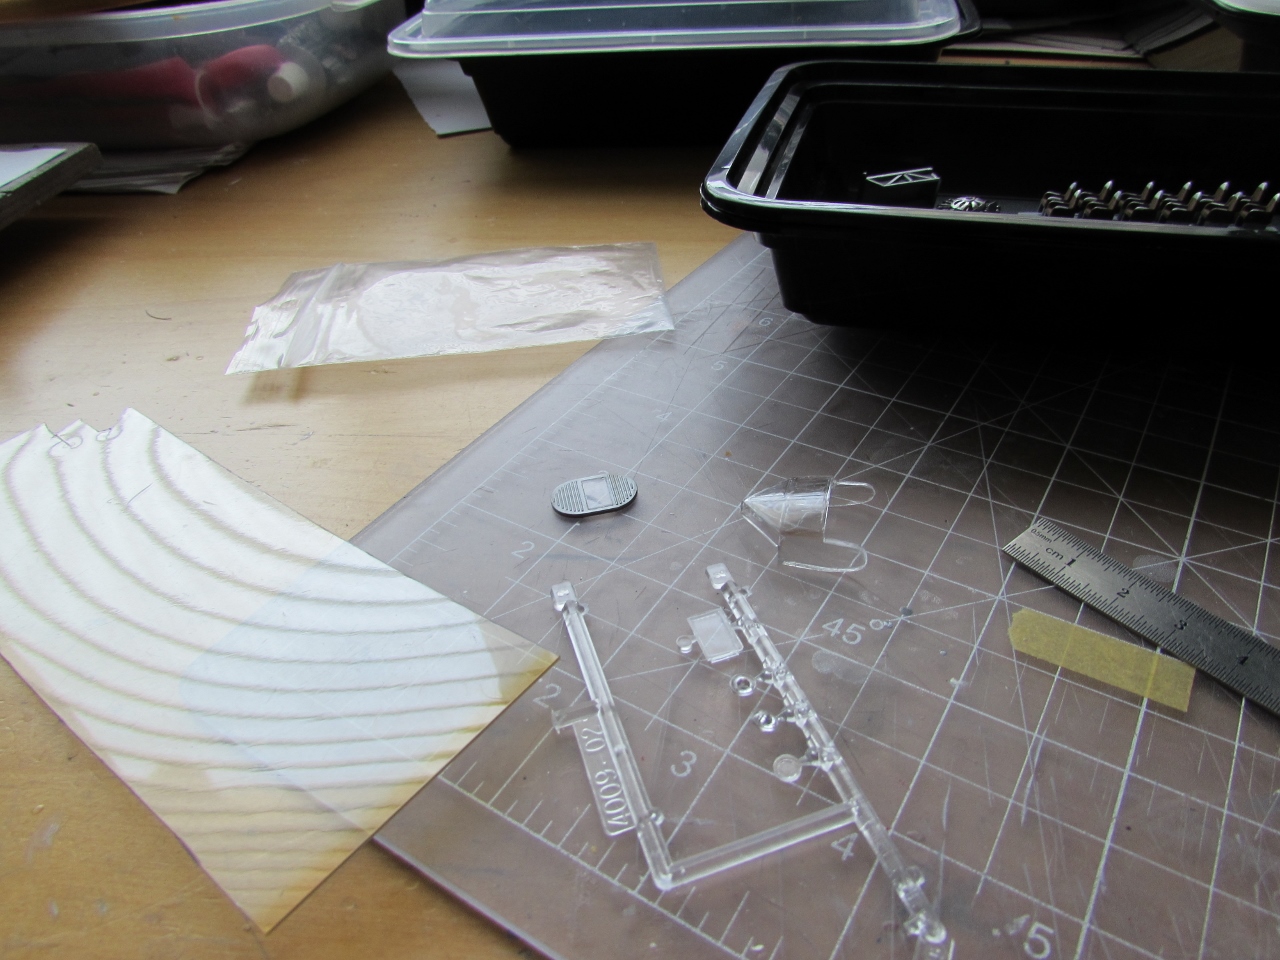
Starting to think ahead a bit: the masks for the transparencies and the louvers. The masks are vinyl. I have used that brand before and I am not particularly fond of them for two reasons: they curl-up/detach at the corners when using lacquers (like Alclad primer and metal paint, which in this case is all that will be used), and sometimes they do the opposite and it's difficult to remove them. I rather have masking tape (paper) masks, which to me are 100 times better, but I couldn't find a supplier of those for the trimotor:
The Archer resin louvers apply just like decals, here are the instructions:
They have "relief", that is they are 3D. You may apply them before painting for a subtler effect or after painting, for a very visible effect:
Some particularities of quantum mechanics -too lengthy to explain here- make it possible that past and futures mes are much more intelligent than the present me.
I have applied before with success (and posted here at BM) several times, the expedient of excising the whole row of windows, substitute it for a clear section, and happily mask the windows.
Of course I forgot to do that with this kit, which would have been remarkable easy, and thus had to set up -with a long and deep sigh- to cut and install individual acrylic window panes.
Ruler in hand, I started to measure the windows, only to discover that they were all different.
Some screaming -of which I shan't make you privy- ensued, and once I had calmed down, I had to set for plan B, which is to endlessly sand the clear strips with progressively finer grits to remove their unevenness in thickness and molding flaws, and then polish them, not unlike the philosopher Baruch Spinoza may have patiently polished his lenses, but of course without his patience and his wisdom:
The door is given an acrylic window:
The detail inside the back side of the Townend rings represents the exhaust ring, and has to be painted accordingly:
Acrylic floor polish for the transparencies:
The "these are ready or almost" tub:
And let's not forget the amenities:
At this point Airfix's instructions have become more complicated than usual:
Other pages describe interesting vacuforming techniques:
Tired of ordering plastic containers (and other items) that arrive smashed, I had to risk a trip to the local store and get a few to store the models of the last months, as it was a bit out of control with small temporary boxes everywhere:
The Archer louvers were trimmed in width as I needed smaller ones than those that come in the sheet. They were applied and then painted over:
The 5-step prop painting went uneventfully:
Prop logos on, and the brake rods are restored on the LG legs, drilling the leg for a firm grip:
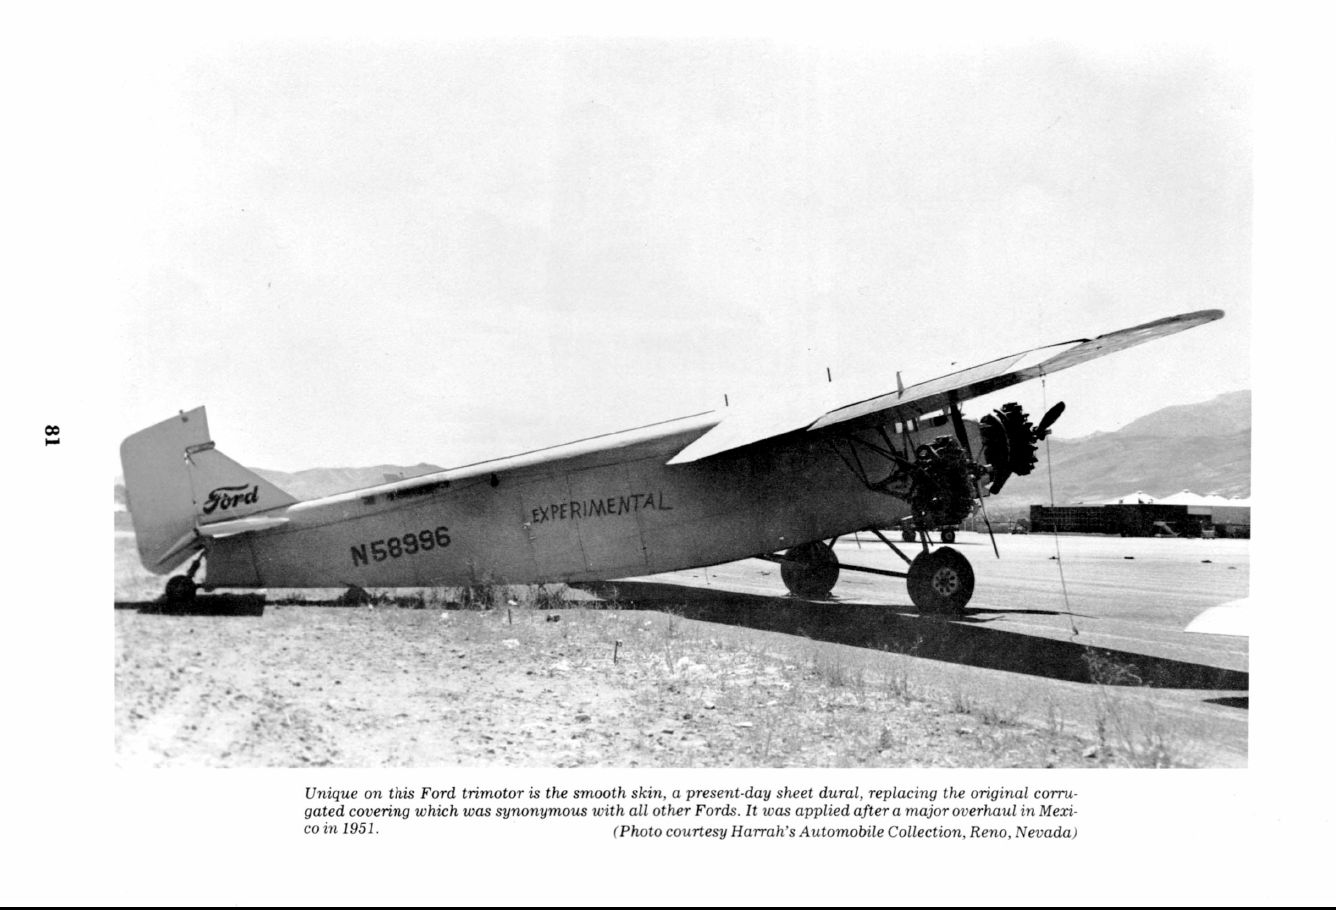
For those with Corrugaphobia, I am pleased to announce that if you don't want to deal with corrugations at all, and find extreme sanding sports pleasurable, there were Ford trimotors as flat as the electroencephalogram of certain current presidents:
Putting together the LG legs. The fit of these parts (tire, cap, leg with hub, mudguard) is very bad, unfortunately a constant characteristic of most old Airfix kits, together with some chunkiness and lack of finesse. This contrasts greatly with most Heller kits, that have per rule a much better fit, better defined parts, and a more refined feel:
With the transparencies in place more work on the interior is done:
Well, I committed gluing the cabin floor to one side of the fuselage, and then adding the other side.
We'll see how it works:
The dishonorable discharge:
As per photo:
And, lest we forget...
Well, careful cleaning and dry runs, plus the removal of a ridge made the fit much better:

The main problem is that the width of the cabin floor is much narrower than that of the fuselage bottom, thus if you glue first the cabin floor (as I did) then the gap for the fuselage bottom is too narrow (I had the pry open the fuselage sides from the cabin floor a bit).
One more time: darn old Airfix.
But now everything is in place, no awful, gaps, all aligned and flush, and only a pass with liquid primer at the seams should be enough:

Very little work at the seams requiered:
A beautiful hawk perched today in the garden:
The well-appointed facilities:
The lid goes over, have to keep an eye, as usual, on the fit and alignment:
One of the various culprits of the fit issues: Airfix tells you to glue the cockpit bulkhead (and at that point the whole
interior attached to it) before the ridge. But if you do that, it misaligns
the top of the bulkhead that has to go inside the wing's corresponding partial
bulkhead. If you glue the bulkhead behind the locating ridge, the wing fits
comfortably, but the first row of passengers will barely have any leg room, and
you have to modify the other cockpit locating ridges to clear the cockpit floor:
This is supposed to be the right location initially devised by Airfix, but the kit makes it impossible to do that:
Properly locating the wing, and following the instructions regarding where the cockpit bulkhead goes, you get this (dry-run):
The detail on the bulkhead facing the cabin won't be visible if it's located ahead of the wing's partial bulkhead:
Since I just discovered this, I will have to remove the wing partial
bulkhead to allow the fuselage bulkhead to be seen from the interior.
Thanks once more, old Airfix.
Scoring the hinge line and deflecting the elevators a few degrees for a more realistic effect:
As explained, the partial bulkhead in the wing is removed to allow the view of the cockpit bulkhead detail:
The tailwheel is of course somewhat simplified in the kit, and weak
Thus a metal pin replaced the shock absorber connecting bit, and two wire parts are made to account for the parts present in the real article:
To that triangle (present in the kit part and this reworked one), bungee cords were attached from the fuselage in the real thing to minimize shimmy:
The fit of the wing looks ok so far:
Right, I forgot it was a spoke tailwheel, not a solid one. Back to square one:
There:
Notice how yellow is the white cardboard above. That's natural light from the wildfires.
It's all brownish/yellowish
The cockpit transparency is a bit wider than it should.
Here I located it so one side window is flush with the fuselage.
The walls of the transparency are very thick:
Therefore the cockpit bulkhead has to be shaved on the sides, to allow for the transparency to be "squeezed-in" and made flush with the fuselage sides:
I think I will glue the transparency before the wing. It could be added after the wing, but doing some strenuous contortions.
A bit of dusting to clear any debris (we know we can't clear them all, and some are lurking, hidden, waiting to stuck to a window from inside as soon as the model is completed):
Here are the masks. Their instructions unveil a very interesting piece of information: apparently the windows were not the size idiosyncratic carnival Airfix depicted, but more evenly sized:
As I stated previously, a way to solve the transparencies issue is to excise and replace the area:
With a clear section, later to be masked in evenly sized windows:
This is just a demonstration with a spare kit, as I am not backtracking now with the current build, but I hope it may help other modelers.
A solution not for the faint of heart, though, that requires precision and neatness:
The over-wide cockpit transparency, following a traditional South-American head-shrinking procedure, is set in place, wiggled and wriggled, and then superglued:
So far so good. I hope we are not waken-up at 3 in the morning by the sound of a splitting fuselage:
Wing on.
Not a natural fit, took some minor scraping here and there:
The British trimotors had wheel spats, not difficult to make:
Horizontal tail on:
Notes:
-Some of you may have notice that I have a clothespin under the fuselage, so the landing gear legs are not supporting the weight of the model at this stage. The widely open legs are very flimsy and fragile, and also pone to retain the bend they acquire under flexion. Mine, in fact, were already "curved" upon arrival as the sprue was pressed against other contents in the box.
-As you know I replaced the too generic engine for an Aeroclub white metal item. Here's the rub: the engine fits oh on the nose, but the diameter of the exhaust ring in the kit is too large, and unfortunately doesn't coincide. This will have to be remedied by cutting and shortening the ring, or by making a new one. We'll see:
-The exhaust in this plane was different than the one offered with the kit, so an aluminium addition is fabricated, the kit's "long" part discarded.
Photo-etched bits are being repurposed as part of the control cable guides:
New control arms are being made from brass sheet:
Arms ready:
The guides for the control cables are added to the brackets in the form of very small tubes:
These ones had two guides:
Plan z with the engine exhaust ring: new parts, starting with the stacks from the cylinders. Sigh....
Then sections of plastic airfoiled strut material were cut and curved:
But then I realized that the complication was unnecessary, and proceeded to remove the pips from the kit's ring, curved it more tightly, and snipped a bit at the each thinner end, then glued it to the pips I already had installed in the new engine, and presto!:
I didn't have small chisels, so I repurposed a probe as one:
That is needed to delete the corrugations on the small panels where the control cables go:
These and the ones under the wing were also drilled to later accept the cables.
Now, where was that little bushing that I saw long ago...
The masks are on, and a coat of primer is airbrushed, revealing the usual spots that need tiding:
The gloss black coat is on.
At the same time I quickly airbrushed the... you know what's
coming, don't you?... toilets.
These (2) seem in photos to be in dark steel tone, thus I
committed (and not for the first time) the horrid mistake of using Alclad II
steel.
This produced, as every time I use this crap, a massive
clogging of cup, body and nozzle, as the particles seem very coarse, the dry
time too fast, and the mix abominable.
Now, Alclad is a good product, and I use it a lot. One thing
it does NOT have is consistency. Especially in thickness. Some bottles will be
almost clear medium with two colloidal particles in it, and others will be like
thin mud.
I hate that. That is to say: I hate that. Not sure I am
explained myself clearly: I hate that.
The kit of course lacks the characteristic boarding step, so a P.E. part is repurposed to that effect:
Just details; the arms are given their axles, and the nav lights are separated:
The half plastic tubes that I envisioned as the needed exhaust shroud for this particular plane did not work, as the surface of the pod has a pronounced double curvature. Thus thin metal sheet ones had to be cut and folded, taking in consideration the necessary geometry:
Another look at references revealed yet another cable guide close to the tail, so three are made from small tube and pieces of P.E. leftovers (one spare, they are minute and VERY easy to lose:
I continued performing the BM-required fatigue and resistance tests, dropping the model once again.
This time a weakness was discovered in one of the elevators' hinges, which detached. And this is why this tests are so important, as they eventually may save 1/72nd scale passengers lives:
Have to perform now the needed repairs and apply a clear coat, then the list on the right is waiting:
Clear coat on. Instead of the proverbial acrylic floor polish, this time I used, for the first time. Alclad II Aqua Gloss Clear. It atomized much, much finer than the floor polish. Once the coverage was completed, the metal paint shine was subdued a bit, which is normal and I like, but after a few hours it picked up big time, and the metal coat was very shinny again indeed. So I conclude that this product has a longer drying time, and renders a coat much clearer coat than the usual household floor polish.
Masks have been now lifted:
Engines and landing gear on. All nav and landing lights on. Tailwheel, exhausts:
Adding small details now, like the instruments on the engine pod struts (how the heck could the pilot actually read those from the cockpit?) and the little exhaust detours that go into the fuselage to provide heating:
Working on the details, which often sends me back to photographic references, I realized I had missed the antenna mast and wires.
This type of tall mast located at the aft restroom bulkhead is associated with Western Electric radios.
I have only two other photos of planes with the same antenna, a NAT machine and Ford NS1, a Dept. of Commerce machine for which, no matter how many hours I spent searching, I only found one bad photo. It seems to be a beautiful example, with some small notes of color.
I have added the control cables from the front of the plane to the wing, fabricated a crank for the open mail hold, and prepared the above-mentioned antenna.
Just to further complicate the build, I decided to try to add the guides and sliding windshield panels. Very thin clear plastic (of the type that comes with the printed instruments for the PE panels) and very thin wire are used to make the panels.
Not sure how this will work, tomorrow we may know:
Also added the two smaller antenna masts on the wing, that will have the
wires from the main mast (at this point not mounted until decals are
on):
Not bad...
Comparative size of Trimotor and Fokker F.32
The beautiful and extensive set from Arctic Decals has arrived. It includes the masks!
The decals went on without a problem. Tomorrow will be time for all those control cables, their guides, some additional rigging, antenna, and the itsy-bitsy teeny-weeny bits:
More rigging and details:
The mail hold is ready, even with its crank:
Antenna and door and the other bits:
To be continued:


Super post! Love all the reference photos and the solutions to the multiple pitfalls of this kit. I used to have one, but I guess I've given it away... good riddance!
ReplyDeleteNo Dieguito! go and get one! I don't want to suffer alone! ;-)
Delete