

(The completed model is here:
https://wingsofintent.blogspot.com/2022/04/scratchbuilt-ae-c2-tenga-confianza-have.html
A product of the Argentine native aviation industry, the Ae C.2* saw the light of day in the early 30s, first aimed to the civil market, but then almost immediately morphing into a trainer. The plane, in its very short-lived civil guise, is what we see modeled here. It was powered by a Wright Whirlwind R540, but very soon it was modified and given a bigger engine. The wheel pants were also removed, the windscreens changed, the fuselage top altered, and the rudder, originally with a cutout to clear the tailskid arrangement (a la Ford trimotor), was also altered as the skid was in turn modified. Needless to say, this original civil version was more colorful and elegant, but it did not spur any significant interest. Very few photos can be found of the plane in this original configuration, only one showing the complex paint scheme, a few others depicting it with a spinner and bare finish, and a few more with the plane unmodified in an aluminium fisnish during a promotional flight, with the characteristic low-profile windshields, and a fairing that went from the top cylinder spanning the two headrests and fading towards the tail, a bit like some racing designs of the time.
A few elements were scrounged from the spares bin: prop, spinner, wheels, pants, seats, and the rest scratchbuilt using the traditional approach of styrene sheet, rod, and stick. I based the model on a few plans and photos of this plane found on the Net, tweaking here and there a bit, as they are perhaps not absolutely reliable, but in the ballpark. For some details as usual some educated guesses were made. Friend and fellow modeler extraordinaire Matías Hagen from Argentina sourced additional information that helped with the project (thanks!).
*The Ae C.2 was the successor of the extremely cute Ae C.1 (a similar machine, but for three people and having a closed canopy), also a project oriented to the civil market that was reconfigured as a trainer. The change in use, curiously enough, somehow reflects a certain aspect of Argentinean history, for many decades dissolving elected governments and replacing them with military rulers that performed well below the government they supplanted. Hopefully this will never be repeated, as the last time this happened it threw the country into its darkest, most shameful, cruelest period, known as "the lead years". This also explains why I am replicating the original civil version.
The build starts preparing the powerplant, using the wonderful engine resin "kit" from Small Stuff:


The cockpit deck is prepared:


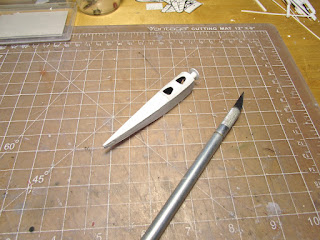

Aileron horns and control lead fairings added, as well as two bumpies close to the fuselage. The wing center section skin is removed, as the wing will embrace the fuselage via a notch for the spar that has yet to be carved in it:

Fuselage notched:

Dry run:

The wing and stab are glued. The vertical stabilizer is given a metal locating pin, photoetched control horns, and in turn added to the fuselage:

The spine is fabricated and added (the front section will be contoured and glued once the nose is completed):

Round cushioned headrests are made sanding the end of a rod and slicing the tip:

Covering of the nose section in panels starts:

Once again, the difference in size compared to the Gulfstream jet in the same scale is striking:

Once the fuselage nose was done (some areas filled with Milliput and contoured), the front section of the spine fairing was glued in place. The engine sub-assembly is ready. A nose tip master is created, as that part, that "wraps" the engine, will be made as a vacuum-formed part to be able to cut off the cylinder openings:

The nose tip is vacuformed, together with some unrelated wheels pants:

Tailskid on:


A coat of primer to spot blemishes:

After two attempts carving the part that goes around the cylinders and not being happy with it, I tried the other way and it worked better. Sometimes the path to success is not in a straight line:

It's interesting how even what looks like straightforward builds almost invariably have a point where you get stuck in some detail, and have to work it out:


Gloss black base in preparation for the metal color:

The metal hue is airbrushed. I started with polished aluminium, later I will mask the metal nose, and then apply to the rest of the airframe a mist of normal aluminium to simulate the fabric. Once all that is done, the plan is masking again for the application of the red decoration:

Before airbrushing the metal color, I added some Archer louvers:

The nose is masked and the duller aluminium color airbrushed:

Unmasked, and shine difference:

The scalloping decoration will require a number of masks to be placed on wings and tail, both sides:

The Arctic Decals masks set arrived, so hopefully soon this will go to the painting area:
.jpg)
Masks are applied and the red color is airbrushed on the airframe, LG struts and wheel pants. Wheels and headrests are also painted in their respective colors:
.jpg)
Masks off:
.jpg)
The landing gear, head rests, and engine are added:
.jpg)
.jpg)
Home-made decals and rudder and aileron control cables are on:
.jpg)
This bird is ready to fly. When weather allows the completed model article will be posted:
.jpg)
Looking good so far! That's a handsome little monoplane; surprised you're doing one, as it's too small for a loo!
ReplyDeleteI may be able to squeeze a little bucket, though... ;-)
Delete