
.jpg)
(The completed model is here:
https://wingsofintent.blogspot.com/2022/12/howard-dga-6-mister-mulligan-bendix-and.html
The Howard DGA-6 "Mister Mulligan" was one in a successful succession of race planes designed by Ben Howard and Gordon Israel, being preceded by the famous Pete, Mike and Ike. It won the 1935 Bendix trophy, flown by its designers. For that feat it was provided with a long-range fuel tank and a supply of oxygen, as the strategy was to fly non-stop and at high altitude. It went on to concurrently win the Thompson trophy. From the DGA-6 a whole line of other designs was developed that had remarkable commercial success. Resembling a Monocoupe on steroids, "Mr. Mulligan" shares with it the compact lines around a prominent radial cowl, giving it a very "racy" appearance indeed.
Here are a couple pages from Aviation Week, 1935, in the very words of Benjamin Howard:


Another page:

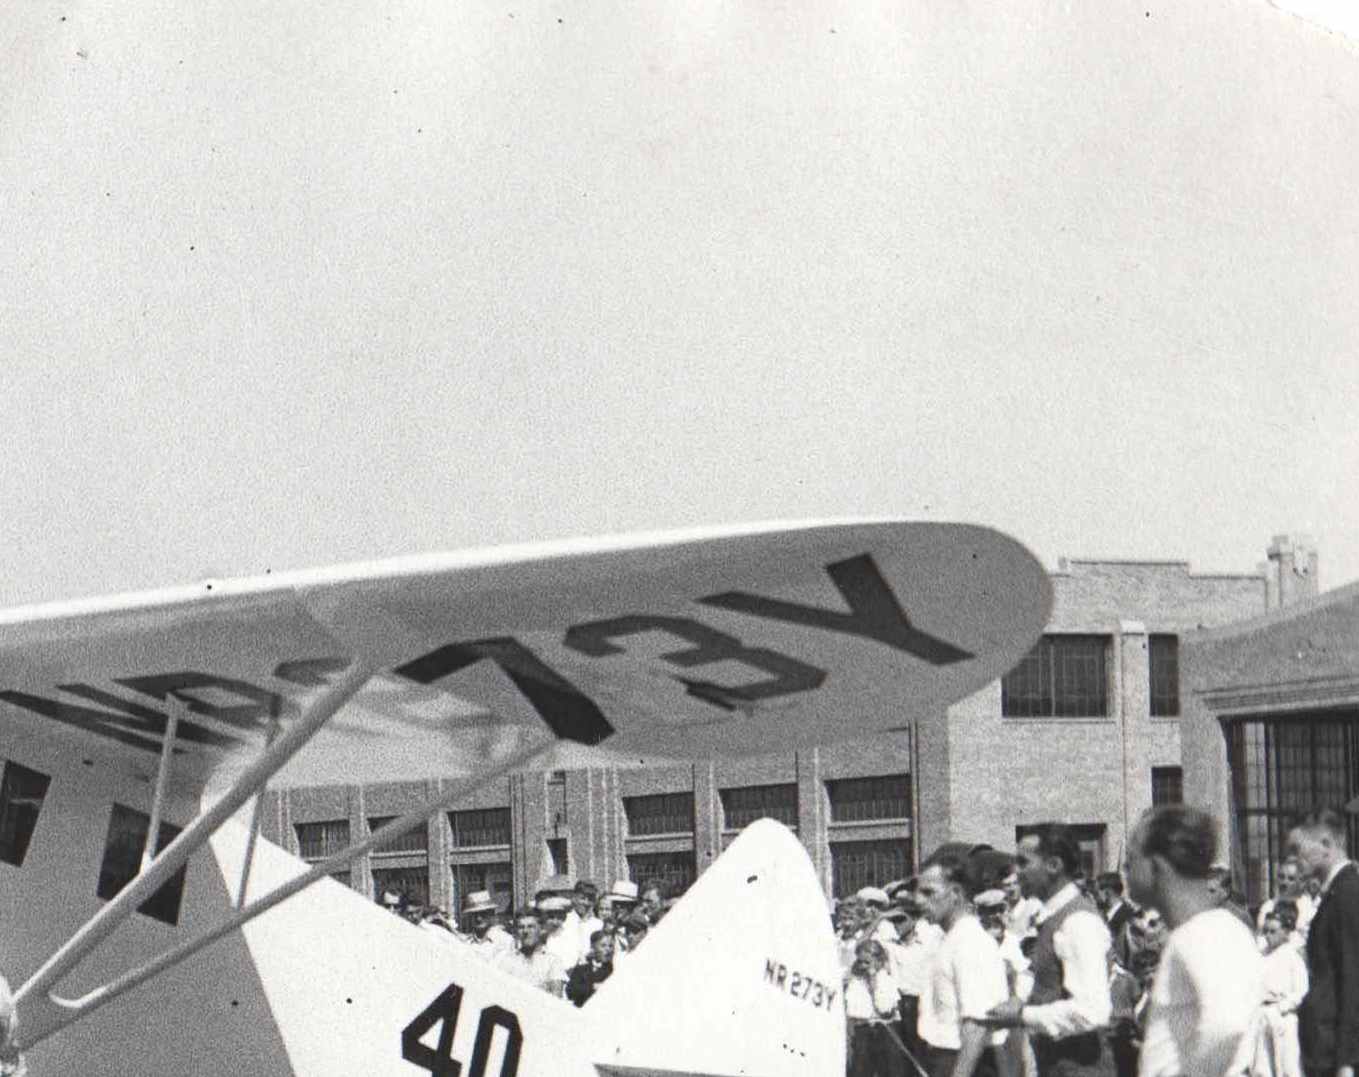
To represent the plane in its Bendix racing guise, the back seats provided in the kit should be replaced by a fuel tank occupying that area. It's a good idea to check photos of the original plane (not the replica) paying attention to the markings pertinent for the moment in time you want to represent the plane on (for example, sponsor badges, that vary in number and location, race numbers, etc.). Photos show two positions for the registration under the wing, one where the number 3 is overlapping the struts fairing and another where the number 7 is doing that (in some photos the plane has a Hamilton Standard prop on those, in others the Lycoming-Smith). The spacing on the latter is bigger, and the last letter reaches the wingtip. This may be due to repairs performed after a bad landing in 1934, or just a repaint of the plane, I haven't been able to find out yet:
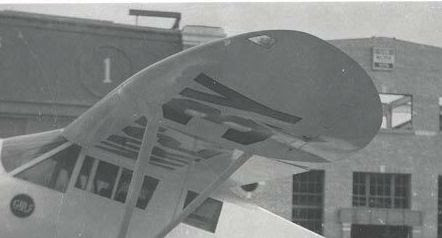

The photos that show that number 7 mounting on the fairing instead of the 3, are associated with a Hamilton Standard propeller, as you can see below:

Contents:
.jpg)
Decals:
.jpg)
Parts:
.jpg)
.jpg)
.jpg)
.jpg)
.jpg)
The exhaust ring came with several small stubs broken, as it was properly bagged, but not protected with additional supports on the casting block:
.jpg)
There is a small deviation at one side of the recess for the fuselage:
.jpg)
.jpg)
The clear parts, perhaps due to the age of this kit, have yellowed. The side windows will be replaced with clear material, but the front may need another solution. I tried already all the remedies found on the Net, to no avail, the yellowing is not superficial:
.jpg)
.jpg)
Parts separated from their casting blocks, cleaned up and washed:
.jpg)
The airfoil in one half of the wing that was a bit thicker, and was sanded down from the top and bottom to make it equal to the other half:
.jpg)
Now it's corrected:
.jpg)
A preliminary base color application. The prop has been given a metal axle, as the resin stub was a bit misshapen and too short :
.jpg)
The struts, that were a bit thick, are sanded down:
.jpg)
The attaching points for the rigging are conveniently marked on the parts, and only need drilling:
.jpg)
The navigation lights were recessed, and they are marked on the wingtips and fuselage tailcone, to be painted and cover in clear varnish. Bits of decal may do too:
.jpg)
The interior is painted mahogany as per references:
.jpg)
The provided instrument panel is quite detailed, and together with the seats and control columns should be enough given the limited view from outside once the model is built:
.jpg)
Some priming and some painting. The prop (a Lycoming-Smith) had two bars added to the hub to be more realistic:
.jpg)
The flat transparencies are replaced without a problem from acrylic stock, measuring, cutting, adjusting and pressure-placing each panel :
.jpg)
The interior is almost complete, lacking only the long-distance fuel tank I am scratching separately:
.jpg)
.jpg)
.jpg)
.jpg)
Fuselage halves glued:
.jpg)
The wing center section needs adjustment (material removed) to seat properly on the fuselage anbd match its back, and the angle (shown somewhere above) needs as explained correction, otherwise the wing will seat askew. Some vent holes and the hole for the crank -seen in photos- are drilled on the nose:
.jpg)
The side windows are masked:
.jpg)
Had to supplement a bit the bottom of the rudder:
.jpg)
.jpg)
Just for the sake of playing, as the kit's parts are ok and usable, I made two sets of wing struts using airfoiled material:
.jpg)
The landing gear is on. In this kit Dekno provided locating devices for both, legs and pants, which no doubt makes life easier for the modeler. The wheels are integral with the pants, a solution some manufacturers go for that I don't particularly favor, but it works ok:
.jpg)
The replacement windshield arrived from Dekno, it's promptly washed and given a bath on acrylic:
.jpg)
The wing and windshield are added after some minor adjustments:
.jpg)
And a light coat of primer to spot blemishes:
.jpg)
White paint airbrushed:
.jpg)
Engine, struts, cowl and rigging on:
.jpg)
.jpg)
.jpg)
Link to completed model at the top.
Que interesante, tengo el modelo en 1/48 que compre por un precio ridiculo en ebay, si armas cosas sin esvasticas el costo del hobby cae notoriamente:D
ReplyDeleteAbsolutamente de acuerdo! ;-)
DeleteWhat a handsome airplane! Looks fast just sitting on the ground! Your usual impeccable research and attention to detail. Bonus points to Dekno for supplying you a new transparency!
ReplyDeleteThanks! Indeed, good customer service.
Delete