


(The completed Valom kit is here:
https://wingsofintent.blogspot.com/2025/08/scottish-aviation-twin-pioneer-twin.html
(The construction article on the Hallam vac Twin Pioneer is here:
https://wingsofintent.blogspot.com/2025/07/hallam-vac-172nd-scottish-aviation-twin.html
If Humpty Dumpty would have a plane, which one would it be?*
Perhaps the Scottish Aviation Twin Pioneer, with its chubby and somewhat cumbersome appearance.
*(The association, given the times that the SA Twin Pioneer crashed, is not arbitrary)
And what is better than a Twin? A Twin with Three Tails!
This one has been in my files for a long time. And to my surprise -given the uncharacteristic aspect of the plane- relatively well covered by the industry:
-Hallam (vac with white metal parts and strut material)
-Valom (injected with P.E. parts and an optional aftermarket set of resins seats)
-Magna Models (resin & white metal)
-Combat Kit (resin & white metal) (this is reputedly an improved version of the Magna kit)
-Welsh Models (1/144th, vac & white metal)
My relationship with Valom kits has been somewhat contentious in the past, although if you are willing to deal with Valom’s ejector towers, somewhat hit-and-miss fit, scarcity of locating devices and a bit of roughness, I would say it’s a good option, as this is a normal kit in injected plastic that is the medium most modelers are familiar with. I bought it as a way of comparison with the Hallam vac, AND, I am very pleased to say that Valom is shoving quick improvement, as this particular kit looks better than others I have built from them. Of the two other Pioneer kits in 1/72nd in resin, what I see on the Net is that modelers find the Magna one also rough, and the Combat better but still with its challenges. Regarding the Welsh Models 1/144th vac kit I know nothing, and tend to stay away from ungodly scales.
The Valom kit offers a detail resin set. By “detail” I mean a cabin interior they omit from the kit and then sell you apart. Like they did with their De Havilland Albatross. The price of these sets is very reasonable, so I don’t understand why they are not included in the kits, forcing the modelers to pay a second S&H fee for the accessories. True, not all modelers bother with an interior, but many do. By the way, there is a set of civil seats and another of military ones. Needless to say I bought the civil.
The Hallam vac according to Scalemates saw the light of day in 1987. Not a spring chicken. Some of the kits in their limited range can be seen built online.
S&M Models offers decal sheets for two civil Twin Pioneers. Good for them, but their prices are a bit salty.
Montex offers masks for the Valom kit. Very affordable, but in the dreaded vinyl that often tends to detach after primer and paint are applied, and they have an adhesive with not very long shelf live. I know it’s a cheap material, but why some manufacturers insist in vinyl instead of using the so-called kabuki paper, I can’t understand.
Vacs are the Cinderella of scale model kits. On this blog you may find 30/40 models built from them. I love them as much as injected kits, and they helped me develop skills that otherwise would have never been acquired. They aided my transition to scratchbuilding, and gave me the opportunity of having on the shelf subjects not cared for the mainstream injected kit manufacturers.
Manufacturers understandably want to squeeze as many types and registrations as they can, so many end up committing the sin of “one size fits all”, as different variants have… well…. differences, often overlooked by the manufacturers. And that’s the case here with Valom, so carefully look at photos for details in the kit not present in your choice plane, and vice-versa: windows, antennas, hatches, etc.
The Valom kit has nice surface detail, provides a small P.E. fret, and (in this boxing) decals for VH-AIS in two liveries. The instructions mistakenly show TWO regs under the wings. One is only needed under the left wing. For he “Twin Pion Air” air colorful livery there are no patterns provided for the very visible background colors decoration, so the modeler is left to his/her own devices. I don’t particularly trust the paint color codes given, same for the interior for which seems they kept the military colors. Valom forgot to include the red on the leading edge which actually curves a little to meet the red wing tips. Again, the manufacturer leaves it to the modeler to check the accuracy of what the kit provides. The alternate scheme for VH-AIS has a minor color indication mistake on the engine cowls, easily corrected looking at photos. The opening closer to the tail on the left fuselage side is not present in either of these civil planes. So again, check the kit against photos of the intended plane. More to come during the build.
.jpg)
.jpg)
.jpg)
.jpg)
.jpg)
.jpg)
.jpg)
.jpg)
Now to the Hallam Vac kit.
A much, much older kit in vacuum-formed plastic of good gauge, with fair white metal parts -considering the age-, with decals (mine were missing) but no interior other than a cabin floor and a cockpit bulkhead. The surface detail is much simplified or not present (for example the corrugated areas of the rudders, elevators and ailerons are not molded, and will have to be created, together with the whole cockpit and -if desired- cabin). For this kit I purchased an aftermarket set of resin seats (not the ones Valom offers in this case), and the rest will be either fabricated or scrounged from the spares bin. Two airfoiled lengths are provided, one (wider) for the landing gear legs and another for the wing struts. Decals will need to be created once I decide which livery to use. This vac kit offers the possibility of relatively easily opening the cabin door and (perhaps) separate and deploy the flaps. It all depends on the workload/time the build in general build may require, as I may not live forever as I once thought.
Bagged vintage kit (1987):
.jpg)
.jpg)
.jpg)
.jpg)

.jpg)
No interior whatsoever is provided, just a bulkhead and a the cabin floor. The airfoiled extruded plastic is for the LG legs and struts. My sample is missing several of those, here is a photo from the Net showing how many they should be (plus the decals missing in my bag):

The kit bag had a hole and maybe they fell, or a modeler needed them for another project. In any case, luckily I still have remnants of my Contrail stock:
.jpg)
.jpg)
Some pages from diverse publications illustrating the type:


Having already presented the two kits and having posted some references, in order to avoid confusion we will continue here with the Valom (Injected) kit, and proceed with the build of the Hallam Vac in a separate post, here:
https://wingsofintent.blogspot.com/2025/07/hallam-vac-172nd-scottish-aviation-twin.html
Parts are separated from their trees. I have to say that I am positively surprised about this particular Valom kit, as it shows more finesse and more precision than previous ones I have built. So far so good. The parts require some minor cleaning, but again less than in previous kits. Here are the parts that I will use as a guide to construct the necessary ones for the vac been built in parallel, which, as mentioned above, lacks any interior other then a floor and cockpit bulkhead:
.jpg)
You have to drill a locating hole that got plugged with plastic:
.jpg)
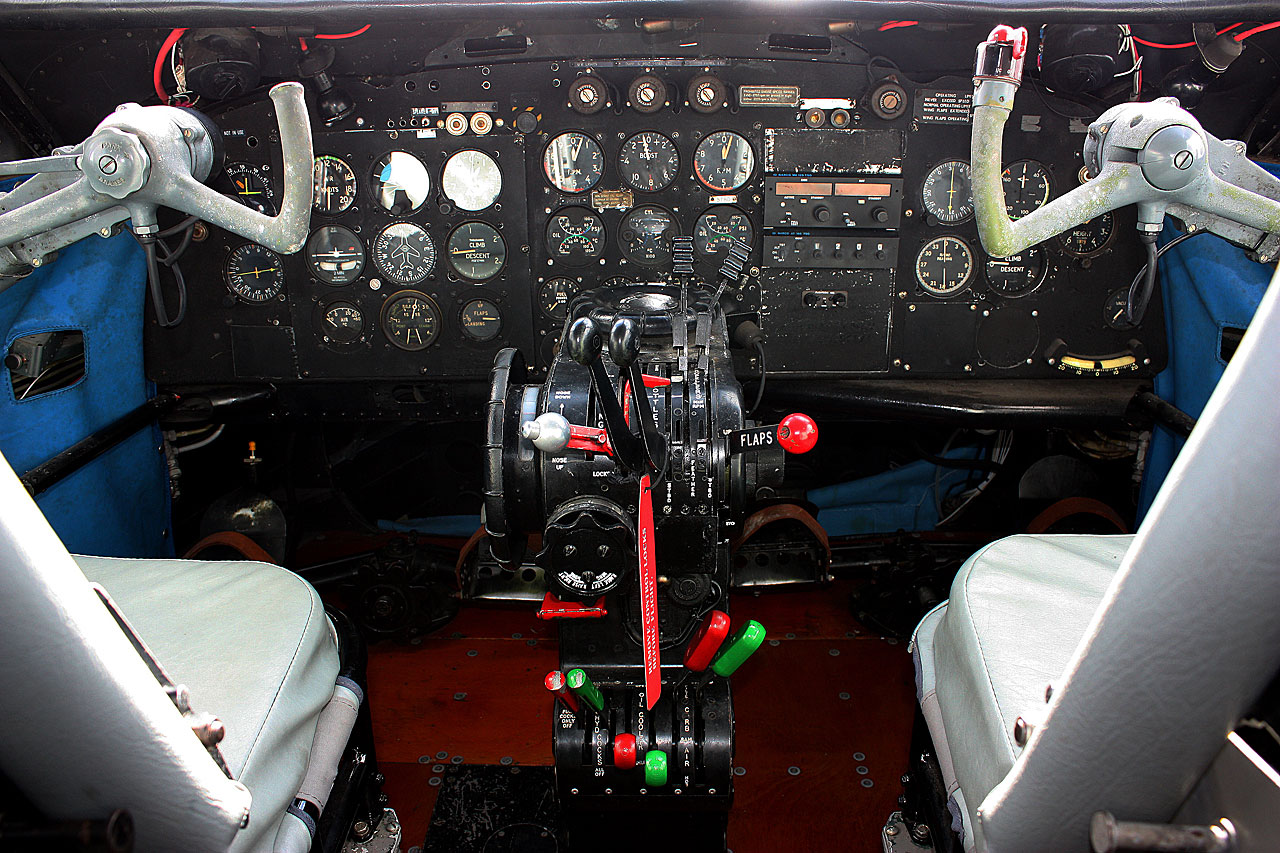
The console is very small, good luck fitting all those P.E. levers:
.jpg)
.jpg)
Here are some photos from the Net describing such console (hope I don't step on anybody's toes, as I don't remember from where I got them):


And now to remove all those ejector pin towers:
.jpg)
And then to rasp all those trailing edges from inside...
This air intake should have been rendered as a separate part:
.jpg)
There is a support for the engine, but its locating hole (if that's indeed what it is) on the engine's back is full of plastic excrescences:
.jpg)
.jpg)
The trailing edges are reduced in thickness using carpenter's scrapers:
.jpg)
.jpg)
All the parts are washed, rinsed and let to dry. Smaller parts are washed inside a coffee mesh filter:
.jpg)
Part 36 is in the parts' tree diagram, but absent from the building sequence schematics. I think it belongs behind that opening that is NOT there for the civil versions. You may use the clear part that closes the opening and paint it over:
.jpg)
(not glued):
.jpg)
.jpg)
Some planes do have that feature, though:

The wing, stab and stub-wings halves are glued. The halves match well:
.jpg)
The locating holes for the fins need enlarging, and the corresponding pips, fuzzily molded, need a bit of refinement to get a god fit:
.jpg)
This is why clear instructions are important. Valom let you guess where the engine supports should be glued, not on top of the lip as I thought, but inside the lips, where I drew the red arrow, trapped between the nacelle halves:
.jpg)
Grossly exaggerated, this is how the fuselage halves meet. The plastic needs to be (carefully) bent and perhaps some tabs installed for a matching fit and avoid hours or work on the seam risking erasing engraved detail:
.jpg)
The engine supports are glued and the air intakes fixed and re-shaped using superglue, accelerator, and files. The wheels need drilling to be able to accept their axles. Instead of using the indifferently-molded seat arms in the sprue, new ones are made of lightly-sanded styrene stick and glued. The poor engineering of the power eggs prevents the engines from being just pushed-in from behind after painting the 3-part assembled cowls, and requires you to install them before gluing the lip on unnecessarily complicating painting 😕. I will remove the molded tab that hinders the more effective approach, and add the painted engines to the painted cowls later:
.jpg)
The props have almost no axle, just a pip. This is not convenient for holding them during painting and besides would make for a week gluing. The engines correspondingly have a very shallow hole:
.jpg)
.jpg)
.jpg)
The seam at the leading edge of the flying surface halves, which was a bit uneven, is very lightly puttied and sanded. The joint at the outer/central wing panels had also little differences in the airfoil. The seam is masked and puttied over, to later be lightly sanded to restore evenness:
.jpg)
NOTE:
Most photos of the Twin Pioneer show the flap tracks protruding from the wing trailing edge when the flaps are retracted. The kit provides those tracks, but they are indicated all the way around (the pointy bit outwards, instead of to be glued underneath the wing:
.jpg)
.jpg)
.jpg)
.jpg)
.jpg)
.jpg)
.jpg)
.jpg)
.jpg)
Interestingly, the two liveries chosen for this boxing for VH-AIS lack the protruding tracks, so in this particular case you may prescind of them altogether -but not of the fairings which are still there.
I am not sure why some planes have protruding flap tracks and some don't. Observing videos of the ones that do not have them, it seems that their flaps only deploy to a minor degree, instead of fully out as in the tracked planes, which makes sense. May be some operators dispense of the extended tracks as they may not need STOL capabilities?
There is a commercial aftermarket mask for this kit:
.jpg)
.jpg)
The build is progressing at a fair speed, considering the parallel projects -also posted on this blog:
Couzinet Arc en Ciel
.jpg)
.jpg)
.jpg)
.jpg)
.jpg)
.jpg)
.jpg)
.jpg)
A few more parts are glued, and others are being prepared for an airbrushing session:
.jpg)
Since an interior is going to be added, and the windows are too small to show it, the cabin door is excised and a new one made of styrene sheet:
.jpg)
.jpg)
Airbrushing started. Valom got wrong the interior color, surprising given that a one second search on the Net shows the interior of the plane attempted in the boxing, and it's not grey:
.jpg)
NOTE:
In a strange twist of the plot, the aftermarket resin seats I bought for the Hallam vac being built in parallel -that have slab, solid sides- are the ones that this Valom kit needs for its specific interior. On the contrary, the Valom's seats that you buy separately and are supposed to go with this kit (VH-AIS) with tube support structure, are actually the ones needed for my Hallam vac kit (that I may finish as G-APRS). All this can be easily verified online. So another casualty of the "one size fits all" approach.
But don't get me wrong, I truly, verily appreciate manufacturers going for civil kits, I do love them and support them buying their kits. But many times I am surprised at how little actual research is done (in some specific areas), even an Internet search that literally takes seconds to find an interior color, details of the livery (missing red L.E. in this case), type of seats, and other details that are "generically" molded in the kit but not pertinent to this boxing.
More painting and priming. The props -that have been painted white- are given the yellow and red colors for tips and spinner. They will be masked to apply the black. The seats, that in reality were multicolored, are also painted (remember that the seats Valom sells are not accurate for this specific plane, but good for other liveries):
.jpg)
.jpg)
Speaking of details. This plane had a beacon on top of the central fin. The box art shows it, and ONE drawing in the instructions shows it, but there is no part for it. One in the form of an inverted cone is fabricated (as per photos) with a red clear light:
.jpg)
Nothing terrible, and if you have generic sprues so be it, you can add or modify parts, no big deal, but why no indication on the instructions of these details?
I can't see anything resembling parts 53 (small airscoops indicated in the inst. as going on the cowls) in any of the photos of civil Pioneers I have. So those are set aside.
A bit more painting preparing the details so they don't hinder the build at the end:
.jpg)
Another little miss from Valom. Instructions have decals for the seat belts, but the decal sheet has none:
.jpg)
.jpg)
If you glue the photo-etched rudder pedals as described in the instructions they won't fit inside the fuselage (they way exceed to the sides colliding with the walls). You will have to separate just the pedals and mount them on a little horizontal bar.
Continuing with the interior, a restroom! A photo shows a dismantled one for this plane (the inst.pan. and console are still missing as they have to be painted):
.jpg)
These parts are now primed, their blemishes fixed, and ready to be assembled:
.jpg)
These are Valom's aftermarket resin seats, but as discussed they do not match photos of VH-AIS, so others were used as per photos above. These will go to the Hallam Vac build, which did use this kind of seat:
.jpg)
.jpg)
.jpg)
The casting support is thick and not easy to remove, plus you have to sand the back of the seat after removal, and it's difficult to hold the part for these operations without breaking more legs:
.jpg)
The nacelles are glued to the wing. Their fit is not particularly good and will need help with putty and sanding. Decals were made and applied to replicate a motif on the fuselage walls seen in photos:
.jpg)
Essentials:
.jpg)
.jpg)
.jpg)
.jpg)
.jpg)
.jpg)
The windows (and I don't think I have said this before in my many-decades long life as a hobbyist), are a PERFECT fit, and have excellent clarity:
.jpg)
In adding the transparency of the emergency hatch to one fuselage side, I realized that I had to remove a section of my added ceiling. The hatch contours, in spite of the presence of the window, are not engraved on the model and it will need to depicted later on the build, perhaps with a thickly painted decal of the correct shape in the same color of the rest:
.jpg)
Igor took the kit to the dungeons:
.jpg)
.jpg)
.jpg)
.jpg)
The canopy and wing are glued. Both required only a light scraping of the contact surfaces to fit properly, but the canopy is slightly smaller than the fuselage, needing later sanding and filler. As the canopy has two vents pointing backwards and these interfere with the job of working on the seam, they are sanded away and later replaced by styrene duplicates:
.jpg)
Now the stub wings are added. Their fit is not bad, but it's not tight. I tried to improve it a little sanding the contact surfaces:
.jpg)
Some filler will need to be used. Their position is clearly marked on the fuselage, which is good:
.jpg)
Ancillaries are also being prepared for priming and painting. The trailing edges of the cowls are thinned down for a more realistic appearance:
.jpg)
To facilitate masking and painting those parts above will be treated separately. The scheme as mentioned is complex and Valom doesn't provide diagrams or patterns. White should go first, then the red leading edges and wingtips, yellow for the cowl lips, then blue, then green, then sand. Quite the ordeal, I suspect.
I am about to add the three vertical tails. I pondered about this step a little, as the external ones need several masks and would have been perhaps practical to also paint them separately, but in my experience later additions risk the finish, so I will deal with them secured in place:
.jpg)
The vertical tail parts do have locating devices, but they all need reworking to get a good fit. The aftermarket masks don't include a very small slit window located after the door, you will have to deal with it with masking fluid or a hand-made mask. I prefer paper masks over vinyl ones ten times over, but this is what the market offers at this point. Sigh.
.jpg)
This plane had some equipment details missing in the kit, so they are starting to be added:
.jpg)
The primer revealed areas that need addressing. As an afterthought, I should have filled the gaps left by the not so good fit with thin styrene sheet, not with putty, which required several passes:
.jpg)
Airbrushing the white base:
.jpg)
I decided to do first the wingtips and red leading edges (the latter missed by the kit's manufacturer in the instructions) so the rest of the model is masked:
.jpg)
Now the masking for the airbrushing of the sand color will follow:
.jpg)
The model is again masked with the wavy edge seen in photos to apply a narrow band of blue on fuselage, nacelles, under the lower external vertical tails, struts and cowls. The separation lines on the cowls must coincide with those on the nacelles:
.jpg)
The blue is airbrushed. Notice that I forgot to do the lower portion of the vertical tails:
.jpg)
In turn the blue will be masked with a wavy tape strip of the desired width, and the green will be applied.
.jpg)
The emerald green is in turn masked and the sand yellow is applied:
.jpg)
Masks off:
.jpg)
The tailwheel frame is given a metal pin as the pip on the part was too small and feeble:
.jpg)
.jpg)
.jpg)
The aftermarket Montex masks were a good fit, but on the other hand were difficult to remove, left quite a bit of adhesive (in turn again difficult to remove) and many teared apart during removal (in spite the fact that the masks were in place only a few days). As I mentioned already to exhaustion, I only use vinyl masks when no paper ones are available, as more often than not vinyl masks are a source of problems (like here). Why do manufacturers insist on such poor material is beyond me, I think it's only because is cheap, transferring the potential issues with the product to the modeler.
The decals are in register, conveniently thin, have solid color, slide easily and apply without a hitch blending to the contours. It should be noticed that at least one number for them is wrong, and that the dotted line around the vertical tail decals is printed inside the carrier and should be removed before application:
.jpg)
The model is completed, but the weather isn't good to take photos, so that posting will have to wait:
.jpg)
.jpg)
.jpg)
(The completed Valom kit is here:
https://wingsofintent.blogspot.com/2025/08/scottish-aviation-twin-pioneer-twin.html
A great subject, Claudio!!
ReplyDeleteIt's a nice plane sprinkled with charm,
DeleteCuanta paciencia 😃
ReplyDelete😂
DeletePasito a pasito...