The Pander S.4 -known also as Postjager and Panderjager- was
a very stylized Dutch trimotor designed by Theo Slot that first flew in 1933.
It was built by the furniture company Pander & Zonen as a high speed mail
plane. Only one was produced and after some mail flights it entered in the
MacRobertson air race, during which it crashed and went up in smoke. The
accident had nothing to do with the plane or its pilots; it was a collision
with a vehicle on the tarmac.
The Pander was equipped with three Wright Whirlwinds and
retractable landing gear, its construction material being mostly wood, and its
lines were advanced for its time. It sported flaps and “park bench” ailerons.
A good deal of research was carried on before attempting
actual modeling. After extensive exchanges with fellow modelers, historians,
aviation scholars and the like, it became obvious that some circulating
representations of the colors of the original plane may not be accurate. There
has been some debate in related forums about a number of issues. The model
presented here reflects the best of my understanding regarding those issues,
and in a couple of items personal choices given the fact that hard data on
certain topics is at this time unobtainable. The color of the markings and the
nature and color of the areas underneath the plane are the main points of
discussions. Photographs represent the plane at different times, and changes
can be observed there too. For example, in some images the fuselage
registrations and rudder marks are absent. In others the fuselage registrations
are there but not the rudder marks. In some images the word Panderjager is on
the side of the nose (in small characters) and in others Postajeger is written
in a bigger font (associated with a prominent antenna, earlier in the life of
the plane). Some images show no nose inscriptions. Some faired bumps that are
present on the lower part of the engine gondola aligned with the LG legs are
absent in later photos.
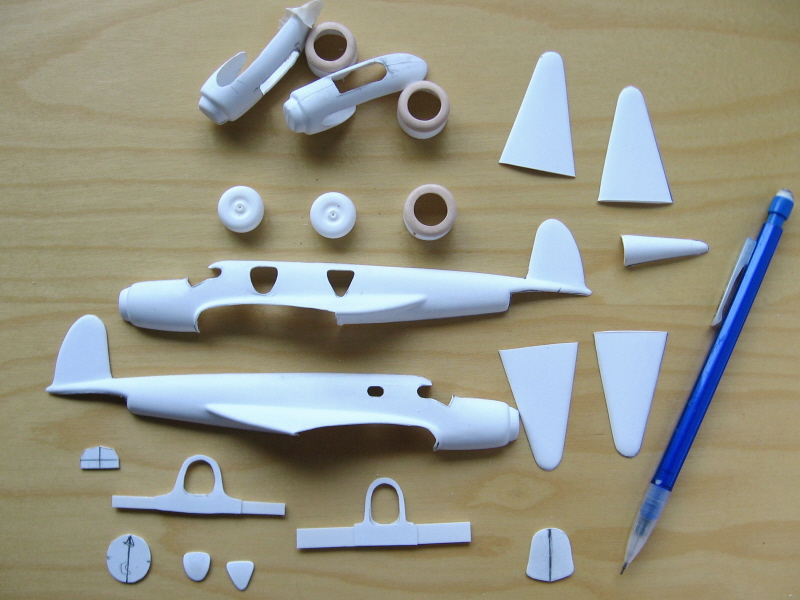
Execuform molds of the Pander S.4 are in line with its
philosophy, simple and robust, providing a starting point for the modeler to
build upon and achieve a nice replica. The kit includes –besides the vacuformed
parts- resin wheels which come in halves, material for the transparencies and
printed references.
As said, the modeler will have to add decals, interior
detail, engines, propellers, tail wheel and external detail at will. Separation
lines for the control surfaces are also to be engraved. All this extra work is
not that difficult to accomplish and the reward will be an unusual and very
sleek reproduction of a pioneering design of the Golden Age of aviation.
I purchased a resin trimotor set from Khee-Kha Art Products
and used a few parts from the spares’ bin, scratching most of the detail
otherwise and printing my own decals. Navigation lights came from the CMR resin
set (item 7031).
Work started by creating an energy field around the
workbench, thus preventing any interference from the exterior, including rays
coming from secret lairs somewhere in Europe. A carpet monster zapping device
was next installed. Then enough Argentinean empanadas, yerba mate, pastries,
Mark Strand poetry books and Edgar Meyer’s CDs were stored in order to endure
the rigors of model building.
Look at the photos and if you have doubts go to Greece and
consult an oracle. Their answers could be vague –to say the least- but the food
is excellent.
Some engineering thought was given and applied to certain
areas. Especially when dealing with vacuformed kits or scratched models
thinking ahead is a must, to avoid as much as possible trouble later on. It is
convenient to build the interior of the model before joining the fuselage
sides, the other way around may prove difficult, but otherwise very
entertaining -for your fellow modelers-. I decided to make new cowls creating a
cylinder with two layers of styrene sheet and a wood part glued to it to carve
the front. I did it three times until I was satisfied. The cowls on the
original plane are divided in quarters, the upper one is wider than the other
three. They are separated by quite visible strips of metal.
There are some details on the plane that you may like to
reproduce: a sort of “stacked pancakes” radiator under the nose immediately
after the engine cowl. The three exhausts exit through the cowls, central downwards and a bit to the left, and
side engines upwards and to the right –from the pilot’s point of view-. Look at
photos. The park bench ailerons align -when viewed from the front- with the
leading edge. Some photos show a Pitot on the left wing. Most photos show no
manufacturer decals on the center prop. Do not forget you have to make the
parkbench ailerons. I used styrene sheet and some modified contrail airfoiled
material for the supports. Notice that they have mass balances in the shape of
rods. Other than control surfaces’ separations I did not engrave other lines,
since the machine was praised for its smooth finish. The tail of the Pander
requires some elements: struts, nav lights, some sort of cable that runs from
mid-fin to fuselage and a conspicuous system of connected elevator horns.
These sort of long-haul projects are better combined with
less demanding endeavors, like climbing the Himalayas or making a fortune in a
week. But, once finished, there is that extra satisfaction knowing that you put
into it a little bit of you.
I would like to thank Kees Kort from Holland as well as
other friends (you know who you are) for their kindness and help.
Modified Execuform vacuformed kit.