
http://wingsofintent.blogspot.com/2013/05/mira-iii-golondrina-172-scratchbuilt.html
Every country and every time has its pioneers, many times unrecognized for one reason or another. Argentina is not exception and the work of Mr. Virgilio Carlos Mira did not get perhaps all the support it deserved. Mira developed its own designs from the remains of an early Bleriot monoplane. These designs evolved into a series of successful machines of which we present here the third iteration, the Mira 3 “Golondrina” (swallow). This plane flew through the 20’s and incorporated some devices that were practical, affordable, functional and clever.
Fellow enthusiast Armando G. enticed me to build a replica
of such important subject, since he had seen and photographed one scale model
at the museum in Aeroparque airport, Argentina, many years ago. The photo shows
a decent effort, but with some minor inaccuracies, again evident when compared
with photos of the original.
Some information can be found mainly in “Historia de la
Industria Aeronautica Argentina”, by Francisco Halbritter, in
“Los Registros R 1928-38” by Gabriel Pavlovcic and the A.A.H.S. Journal of summer
1968. It should be noted, though, that as it is common with obscure types,
some data found in these sources is not totally correct, and that there is some
mislabeling regarding the five or so versions that were built. The first
reference contains a plan that is absolutely off the mark for the stated
version, the third. When compared with actual photos of the Mira III the plan
is almost useless. The deviations are so many that it would be impractical to
detail them all here.
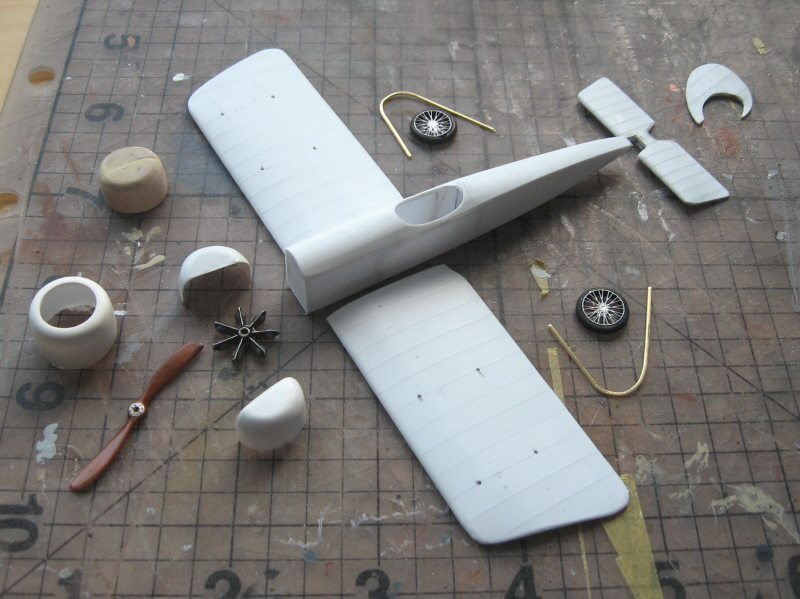
I started after gathering references by
correcting the plan to provide for a better base for scratchbuilding. A few
items as you can see in the photos are from my ever-dwindling stash of Aeroclub
white metal aftermarket details. The rest of the model follows more or less scratch
techniques that I have presented already many times, the images anyway tell the
story.
A special mention of the dreaded white decals
should be made. As you all know standard printers can’t print white, and I don’t
own an ALPS printer, so one solution is to hand-paint the motifs on clear stock
and then apply them as normal decals. Normal white enamel applied with a brush
did not do the trick, the lettering being small and convoluted. Enamel pens of
fine point did not provide the level of precision needed, so I printed the
fuselage background color on white decal stock leaving the lettering “hollowed”
(thus white). Of course I first had to create the lettering image, find the
correct font, etc.
The rigging is relatively simple and the
colors are based on a model that used to be at Aeroparque airport in Buenos
Aires of which Armando took a photo.


The interior is already in place. Two "ears" were added to the cowl to blend it with the fuselage sides as per original:


Painting session:


Home made decals as a negative on a white decal sheet, surrounded by color to match fuselage and rudder.
This is one approach, the other is enamel white micro-tip pen on clear decal:

The time-consuming job of adding the "wires" is in process:

Hmm. When this is finished it could be a candidate for conversion to S.E.5 maybe.
ReplyDeleteThe last picture with those thin wings surely never flew?? Biplane - a new definition.
salute
Andrew