
http://wingsofintent.blogspot.com/2015/09/ded-havilland-dh88-black-magic-racer.html
When beauty flows like the wind


A handful of iconic planes in the history of aviation can be categorized as design classics, and surely the De Havilland D.H.88 racers belong to that group. I have built three of them in my life so far -the first when I was a little fellow- all from the truly despicable, outmoded, outdated (thus slightly venerable) Airfix rendition.
It was time, dear airplane manufacturers, to make available
to hordes of avid modelers a better version of it. But behold, no mainstream
manufacturer will stain their hands with a civil, brilliant plane (with no
bombs! no machine guns! mind you!) so a small resin manufacturer from Hungary had to
produce one. Sad state of things for this hobby, where no blood = no monetary
gain, subject-wise. And how sad, again, as it speaks volumes about the choices
of the modelers they cater for too.
Like any other modeler with decades of experience, I have
seen and built my share of kits, and so far I hold high up three things: the
extremely short run resin 1/72 kit released by Matias Hagen of Argentina
(Ayacucho Maquetas) in 2009 of his Yakovlev Air-7, the unbelievable 1/72 aero
engines of Small Stuff, and this kit, by SBS, the D.H.88.
SBS Model from Hungary should be commended for
focusing in attractive and significative civil aviation subjects. They had released
before a kit of the Latecoere 28, that although well cast and detailed, sadly
has a wing with a not very good airfoil (a slightly blunt leading edge and
somewhat flat on top), and a not totally accurate nose. This, their second
release, seems to be much, much better, spot on.
It is worth noting that the kit has a system of peg/slot
assembly throughout, and -fortunately!- not the usual resin and short run
method of butt-gluing, which can be a curse some times. So once again, well
done, SBS!
They offer several boxings of the D.H.88, according to the
specific version of the racers you want to build. The package is comprehensive:
you get beautifully cast and blemish-free parts with lots and lots of good
detail, well printed decals, photoetched parts, clear (indeed!) resin parts,
separated resealable bags for groups of the parts, a sturdy box that is not
threatening to collapse at the least provocation -thus preserving the integrity
of its contents (what a concept, kit manufacturers!), and color leaflets and
comprehensive instructions. All that for a price that is reasonable, not the
stack of bills asked by some other resin manufacturers offering much less than
this and dubious quality, and let's not even mention despicable short run
injected kits that cost a lot, and then another lot...of work!
Well, enough said. I wrote a bit about the D.H.88s -in case
you are curious- in my latest resurrection of the Airfix kit:
And so without further ado we start with the enterprise at
hand:
There are many very good photos on the Net of this kit, so I'll post here the necessary to convey information.
General view of the contents:


Assembly carefully begins. A few delicate parts are glued to the floor before airbrushing with the general color, formers are glued to one fuselage side also in preparation for painting (actually the front bulkhead should be glued to the cockpit floor):
 Brown (wood) paint is airbrushed. Details will be picked-up in black and other colors later on by hand, as well as a general lighter dry-brushing:
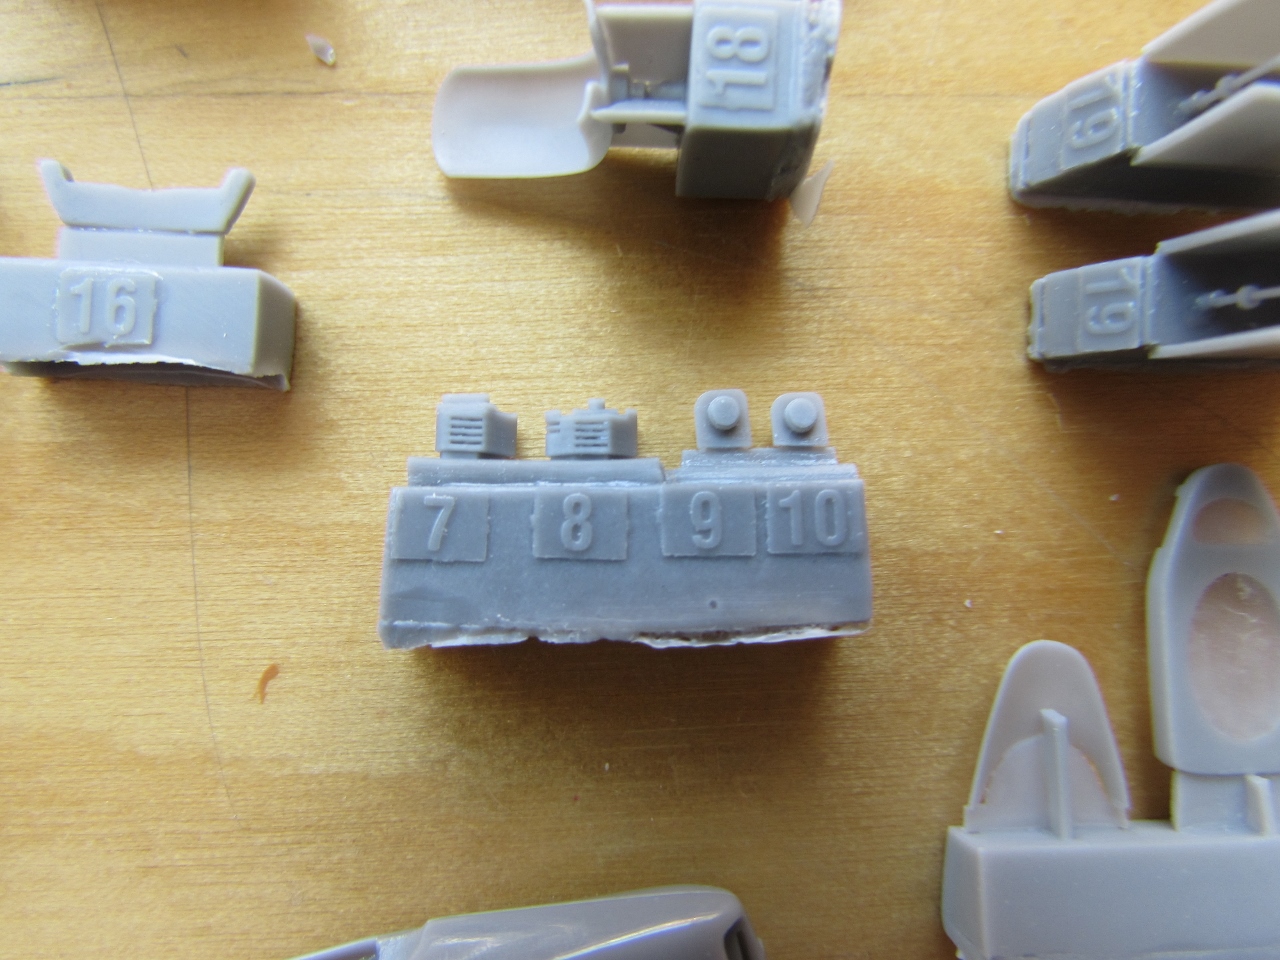
 The cockpit "pan" continues to be detailed. On the right the separated throttle quadrants. :
 The photoetched fret and associated film:
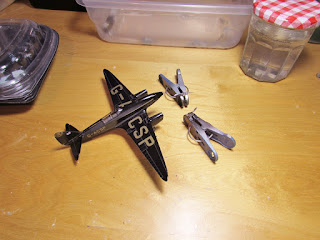
 The smaller than minuscule throttle levers. Sigh....:
 The throttles are completed and glued to the fuselage side. The compasses are painted and will receive a home-made punched-out decal:
 The photoetched parts are painted in situ. The instrument panel resin part is painted:
 A few instrument faces are punched out to select dials for the compasses:
 The decals are applied to the compasses:
 A trim wheel from the PE fret is glued in place, previous insertion of a very short and small shaft:
 The white metal parts that constitute the landing gear are above average, but require some minor cleaning. A couple parts had a very slight mismatch:
 The resin wheels are, like the rest of the kit, superbly cast, even the tire logo is there. We can also appreciate in this image the well, which has some structure depicted and slots for the metal parts, and as all other parts flawlessly cast:
 The metal part fit perfectly in their slots (dry-run here):
 Meanwhile both instrument panels are assembled, using the resin, film and PE parts. Seat belts also in position:
 The fuselage sides are glued together:
 The cockpit pan is glued to the fuselage. Watch out as you insert it to properly clear parts already present in the fuselage assembly:

 Dry-run with the wings, good fit:
 Dry run with the tail feathers, needed some very slight touch-up of the tabs:
 The coaming dry-run, again good fit:
 The wings are glued. Some little work is needed to make the seams as inconspicuous as possible:
Some Mr. Surfacer and Alclad primer are brushed over the fuselage seams:
 The primer excess is removed with a cotton swab with acetone, and later very carefully sanded away with progressive finer grits and then re-polished:
 The flaps/airbrakes have a seam line -due to the kit's parts' breakdown- going through them which has to be erased. These two airbrakes could have been separate parts either in resin or P.E., but no complaints, this kit is a jewel anyway:
 Coaming in place, and canopy bathed in acrylic floor polish:
 The engine gondolas are glued in place, and the upper seat belts are added:
 The three-part props are assembled, they have excellent detail, as the rest of this kit. Be sure to check the prop blades angle of incidence -and thus the direction of rotation- before you commit:
 I separated the elevators from the stab halves since this is the position seen in most photos. It is not difficult to do, but care is needed. Try to score the hinge groove and carefully bend the surfaces down and then run by capillarity some superglue, without separating the elevators. I got one loose and had an -unwanted- interesting time re-attaching it:
 The tail feathers in my sample needed some small adjustments to fit properly, and the parts' sockets in the fuselage must be washed well (as the rest of the parts BEFORE starting construction), still, since superglue is wonderful but almost unforgiving, check the angle and position of the tail feathers very quickly before the glue really sets, since the fit -at least in my sample- is kind of loose:
 The tailskid provided has very little resemblance to the ones in the original planes, and it is closer in appearance to the restored plane now flying. That restored plane is a wonderful feat, but has many points where it is clearly off regarding perfect replica accuracy.
I made a new tailskid with a plastic faring and airfoiled brass material, which in any case will stand stresses better than a resin part anyway:
 A coat of primer is applied. This usually reveals spots that need attention, and provides a better base for the paint, although at the beginning I airbrushed the wood color directly on the resin cockpit floor with excellent results:


 I decided to glue the landing gear part in place at this stage. You should glue before anything else the wheel front covers. I did not, and had a hard time positioning them later on. The gear was also painted black, but the wheel, since it is trapped between the legs, will have to be hand re-painted later on. It would have been -for me- more difficult to add those four components (three white metal, one photoetched) and the wheel later one, risking to make some mess on the painted model. This way I can still fix boo-boos before painting. As said before, those metal LG legs have a very good fit and positively lock inside the well:
 Finally the paint is airbrushed to main body and accessories:
 Things to do: paint the props, attach the front light, paint and attach exhaust, attach and paint Pitot, attach LG covers, paint tires and wheel hubs, cut and attach decal strips for canopy frames, add decals:


 The frames for the canopy are made -as said before- with narrow black decal strips, I prefer that to masking:
 The exhausts are painted a correspondent Model Master buffing metalizer:
 The decals are very good. I trimmed the carrier of mine to individual subjects. They are opaque, loosen quickly and adhere very well. Watch out, because they are very thin (which is good), so they will not stand too much hesitation, re-positioning, rubbing and the like, and you have to avoid fold-overs. They are forgiving enough, and not fragile (will not shatter if you treat them well) but need proper handling. The gold color is there, but to my taste is a tad "old gold", a bit dull, instead of a brighter shade. In any case, nobody knows how "goldy" was the original color:
 The props' blades' backs are masked and polished aluminum paint is airbrushed (the back was anti-glare black):
 Metal paint is brushed on the wing nav lights, and then clear red and green. The coaming is painted matte black:
 The canopy framing is completed:
 Top wing decals in place, also clear nose light:

 The remainder of the decals is applied:
To be continued.....


Some Mr. Surfacer and Alclad primer are brushed over the fuselage seams:


I made a new tailskid with a plastic faring and airfoiled brass material, which in any case will stand stresses better than a resin part anyway:


To be continued.....
Very inspiring build !!!
ReplyDeleteThanks!. It is fun too, which is always good.
DeleteHow competent a modeler do you think you have to be to get a flush build with this kit?
ReplyDeleteSorry John, English is not my first language, what is a "flush build"?
DeleteThe kit in my humble opinion is one of the best in the market, but it's resin, so it requieres perhaps certain familiarity with the media, and a modeler with moderate experience.
Not sure what you are asking, but hope that what I wrote above helps.
a smooth build, a neat build. A better question might be, how hard is this kit to make?
DeleteThat's too subjective to have a sure answer.
DeleteIt wasn't hard for me, and other modelers that built it. You have to have some experience, and specifically on resin kits. Other than that it depends on your skills, patience, motivation, etc.
OK thanks.
DeleteIts such a pleasure to see a thing of beauty come together in the right hands. Thanks!
ReplyDeleteThanks Billy!
Delete