

(This is the construction article, for the completed model please go here:
The BFW M.20 (Or Messerschmitt M.20) was a passenger plane
of the 30's built in several versions and used extensively by Lufthansa and
subsidiaries.
The version here (M.20b2) was able to carry 10 passengers in
comfort, even providing a restroom with toilet and sink, necessities always
appreciated on board.
A monoplane of metallic construction and elegant lines, it was a truly modern plane, considering its contemporaries.
Another resin kit from Planet of a very graceful civil plane, along the lines of the similar ones the firm released long time ago.
Although I find commendable that Planet took a step in that
direction, this is the same case as the F.W. 19a Ente I already built, that is,
a reasonable platform, but with a number of inaccuracies that have to be dealt
with. Most of these are quite obvious and frankly evident after just 5 minutes
of looking at photos, easily accessible online.
I will cite just a few: the top of the cabin door on the
fuselage side is angular, with three sides, and not rounded as depicted on the
kit. Part of the exhaust goes inside the fuselage nose, not completely outside
as wrongly depicted in the kit parts. There are three ventilation devices and a wind-driven generator on the back of the plane, but the kit provides less
parts, and one in the wrong position. The model has decals for a Lufthansa
plane, D-2026, and a Brazilian plane, PP-VAK "Aceguá". Whilst some planes had a two-blade prop, Aceguá had
a four-blade prop -actually two props set one across the other- and so did
D-2026, but the kit has just one two-blade prop. So you have to concoct your
four-blade prop yourself.
It is not that hard to use a computer and do a simple
Internet search and find all these inaccuracies before you commit to
production.
Needless to say, most of these mistakes come, as usual, from
basing the kit on drawings, and not cross-referencing with photos, a vice many
manufacturers can't be cured of.
Flare dispensers are seen in many photos at the wing tips
too. The kit omits little details like aileron linkages and such, easily
scratched by any modeler with a modicum of experience.
These Planet kits fetch now pretty high prices, mainly due
to their scarcity.
I always welcome civil kits. And they many times entail a
risk for the manufacturer, as they apparently tend not to sell as well as the
killing machines (a side note on humanity's general proclivities). But this
effort, as meritorious as it may be -as with the Ente-, has its little
shortcomings, some of which are quite evident.
Still, onward we push, as there is no other game in town to
depict these significant and rather appealing machines of the Golden Age of
aviation.
Planet kits, compared to some offers from other resin
manufacturers now on the market, feel chunky, a bit rough, and heavy. And heavy
this one indeed is, no doubt, with solid thick wings and solid nose.
Fortunately the manufacturer provides the relief of landing gear white metal
parts, but still the tailskid is resin.
A full interior is provided, cockpit and cabin with nice
seats, with even the -almost unheard- luxury of a toilet and sink. All
doors and hatches are closed, though, internally and externally, therefore they
will have to be opened if you want to show all the goods inside.
Whoever thinks that scale modeling is a passive hobby that
has little to do with physical effort, is sorely misinformed.
Resin kits offer plenty of gymnastic opportunities, starting
right away with that strenuous discipline called "Sawing the Very Chunky and Hefty Pouring Blocks", soon
to be included in the Modeling Olympics event that is schedule to be celebrated
at Telford this year.
To that follows the endurance discipline named "Sanding the Mating Parts" and
the sister activity "Sanding the
interior parts that never fit". If we add to that the stamina tasks
like "Picking the Smallest of Parts
from the Dark Space Under the Building Area" , we see that the life of
a modeler is anything but about being inactive.
It is necessary to add that some of these activities, in the
case of resin models, are performed in the "Modeling Water Sports
Area", namely the kitchen, laundry room or restroom sinks.
As another water sports sub-discipline, performed in the
heated-pool area, we should also mention "Straightening the Bent Parts Under Hot Water".
Sturdy box, welcome, and contents:
Sturdy box, welcome, and contents:


(From Varig-airlines.com):

Same goes for underneath PP-VAK wings, the regs were separated, and not together as the instructions wrongly indicate.
From the Net


Amazing the things that pop on the Net by just doing a search for the
type you want to represent. Instead of guessing or following inaccurate
drawings.
Sigh..........
From the Net


Sigh..........
The instructions have the wrong nose color pattern, look above and to instructions:
 Furthermore, the registrations for PP-VAK are the wrong font, as the real thing has letters with rounded ends, not the ones on the decals with angular ends:
 If you are choosing D-2026, the instructions are also wrong, it had a reg on each wing, above and below, so you will be two regs short:


The decal sheet provides a circular Varig logo that I could not verify, but here is the logo that should be on it, that corresponds to that time frame:
 The nose had some air intakes, so those are drilled:
 A scratch seat is made to replace the one missing in the kit:
 A funny story about Aceguá that I translated from here:
http://cmtebordini.blogspot.com/2012/06/8-o-vazamento-dagua.html
Supplying the radiators of these planes with water at each stop was a common and expected thing. One day, however, I took off from POA with Aceguá, having as co-pilot the “old” Greiss and ten other passengers. In the first ten minutes of the flight, I noticed that the indicator of the amount of water in the engine, which was located over the nose of the plane, was showing that we had a large leak and that the radiator was almost empty. I needed to land as soon as possible, otherwise the engine could seize and force me to make a critical emergency landing.
It was close to the small town of Tapes, on the edge of Lagoa dos Patos, where, I knew, there was an old and small airstrip built at the time of Military Aviation. I headed straight there, as it was the only landing strip, even precarious, that existed, in addition to the advantage of the existence of water in the lagoon.
I located the strip, landed the Aceguá without any problems and touched it near the edge of the lagoon. There was wind and it was cold, but there was no choice but to go there to fetch water in person, as Greiss was too old for these adventures and preferred to stay on the plane. I left my post, went to the cabin to explain to the passengers what was happening, which they accepted patiently and with the courage and goodwill that characterized the passengers of those heroic times. There was a single vessel on board: a bucket that sometimes served as a latrine in the small compartment at the tail of the plane that served as a pseudo-toilet. I picked up the bucket, took off my clothes, leaving only my underwear in front of the tolerant passengers, and went out into the lagoon to the waist to wash and fill the bucket. Then I went up with some difficulty to the radiator cap and poured the bucket as best I could. I had to make about three trips to complete the water level and finally dry myself out as I could, to finally start the engine and take off towards Pelotas. Just ahead, however, the radiator was again almost empty, and I had to make another unexpected landing in another improvised strip that existed on the bank of the Camaquã River. Finally, after these two unforeseen and dangerous scales, we arrived in Pelotas, where we were able to fill the holes in the cylinder water jackets in a precarious way, in order to be able to return to POA in a flight “without stopovers”.
In Porto Alegre, with the company's Board of Directors, I made a tremendous din against the dangerous use of that old and rotten plane, which put the lives of passengers and crew members at constant risk. The "tantrum" paid off and the old Aceguá was sold to a junkyard, certainly turning into aluminum pots and pans, in which it did not offer life risk to its users.
The metal parts did not have pins, so these are added:
 Photos show a fire extinguisher attached to the instrument panel pedestal, thus one is fabricated:
 The door that separates the radio/navigator station is also carved on the kit's part, thus completing the interior dividers. Because what's the point of that interior if you can't see it. This way at least some peeping can be done, leaving all those doors and hatches opened:
 I have mulled and searched wide and far regarding this radio operator/
navigator position. It was present only on the M.20b2 version, and can be
found in some drawings. It has two bullseyes, one at each side of the
fuselage, and its own door.
I have mulled and searched wide and far regarding this radio operator/
navigator position. It was present only on the M.20b2 version, and can be
found in some drawings. It has two bullseyes, one at each side of the
fuselage, and its own door.
The kit supplies a wood table for it. My guess is that it was used mainly as baggage stowage.
This position is absent in the the M.20.
I guess at this point is necessary to clarify which were the differences between these two versions, in order no to be fooled by references and the usual mislabeled photos (which are an Internet plague).
The M.2O had a flat top that started at the wing trailing edge, a different engine with different exhausts, a different vertical tail, a two-blade prop, and the windows start immediately after the cockpit, no "radio/luggage" space.
The M.20b2 had a slanted top that started at two thirds of the chord, the windows start after the above-mentioned additional space, usually a four-blade prop (and different engine and exhaust), a particular vertical tail.
Other details differed too.
A laminated wood prop is carved (two two-blade props across each other) as per original:
 Another note on accuracy:
Neither D-2026 nor PP-VAK has a mast antenna and wires as described on the box.
It is very likely that D-2026 had colored wing and stab tips, possibly red. Other M.20s had them, and I see a faint change in hue in photos that seem to indicate that.
The seat positioned at the access cabin door is of a different type, made so to facilitate access:
 Interesting notes on features that corroborate some of my guesses can be found here:

 A mentioned before Planet has the exhaust going outside the nose, whereas it goes partially into the node and discharges a bit back at the fuselage bottom:
 That's how it should go (I cut a portion):
 I wasn't completely satisfied with the first prop, so another one is being made (these two below will go one across the other):
 Better now:
 For a more realistic look I decided to do away with the kit's exhausts, and use tube and rod for a tidier, more convincing installation (not to mention true to reality):

 Also the newly made stacks will later be positioned accurately, at the fuselage belly, behind the firewall:


The decal sheet provides a circular Varig logo that I could not verify, but here is the logo that should be on it, that corresponds to that time frame:


http://cmtebordini.blogspot.com/2012/06/8-o-vazamento-dagua.html
Supplying the radiators of these planes with water at each stop was a common and expected thing. One day, however, I took off from POA with Aceguá, having as co-pilot the “old” Greiss and ten other passengers. In the first ten minutes of the flight, I noticed that the indicator of the amount of water in the engine, which was located over the nose of the plane, was showing that we had a large leak and that the radiator was almost empty. I needed to land as soon as possible, otherwise the engine could seize and force me to make a critical emergency landing.
It was close to the small town of Tapes, on the edge of Lagoa dos Patos, where, I knew, there was an old and small airstrip built at the time of Military Aviation. I headed straight there, as it was the only landing strip, even precarious, that existed, in addition to the advantage of the existence of water in the lagoon.
I located the strip, landed the Aceguá without any problems and touched it near the edge of the lagoon. There was wind and it was cold, but there was no choice but to go there to fetch water in person, as Greiss was too old for these adventures and preferred to stay on the plane. I left my post, went to the cabin to explain to the passengers what was happening, which they accepted patiently and with the courage and goodwill that characterized the passengers of those heroic times. There was a single vessel on board: a bucket that sometimes served as a latrine in the small compartment at the tail of the plane that served as a pseudo-toilet. I picked up the bucket, took off my clothes, leaving only my underwear in front of the tolerant passengers, and went out into the lagoon to the waist to wash and fill the bucket. Then I went up with some difficulty to the radiator cap and poured the bucket as best I could. I had to make about three trips to complete the water level and finally dry myself out as I could, to finally start the engine and take off towards Pelotas. Just ahead, however, the radiator was again almost empty, and I had to make another unexpected landing in another improvised strip that existed on the bank of the Camaquã River. Finally, after these two unforeseen and dangerous scales, we arrived in Pelotas, where we were able to fill the holes in the cylinder water jackets in a precarious way, in order to be able to return to POA in a flight “without stopovers”.
In Porto Alegre, with the company's Board of Directors, I made a tremendous din against the dangerous use of that old and rotten plane, which put the lives of passengers and crew members at constant risk. The "tantrum" paid off and the old Aceguá was sold to a junkyard, certainly turning into aluminum pots and pans, in which it did not offer life risk to its users.
The metal parts did not have pins, so these are added:


The kit supplies a wood table for it. My guess is that it was used mainly as baggage stowage.
This position is absent in the the M.20.
I guess at this point is necessary to clarify which were the differences between these two versions, in order no to be fooled by references and the usual mislabeled photos (which are an Internet plague).
The M.2O had a flat top that started at the wing trailing edge, a different engine with different exhausts, a different vertical tail, a two-blade prop, and the windows start immediately after the cockpit, no "radio/luggage" space.
The M.20b2 had a slanted top that started at two thirds of the chord, the windows start after the above-mentioned additional space, usually a four-blade prop (and different engine and exhaust), a particular vertical tail.
Other details differed too.
A laminated wood prop is carved (two two-blade props across each other) as per original:

Neither D-2026 nor PP-VAK has a mast antenna and wires as described on the box.
It is very likely that D-2026 had colored wing and stab tips, possibly red. Other M.20s had them, and I see a faint change in hue in photos that seem to indicate that.
The seat positioned at the access cabin door is of a different type, made so to facilitate access:


A brief culinary interlude:
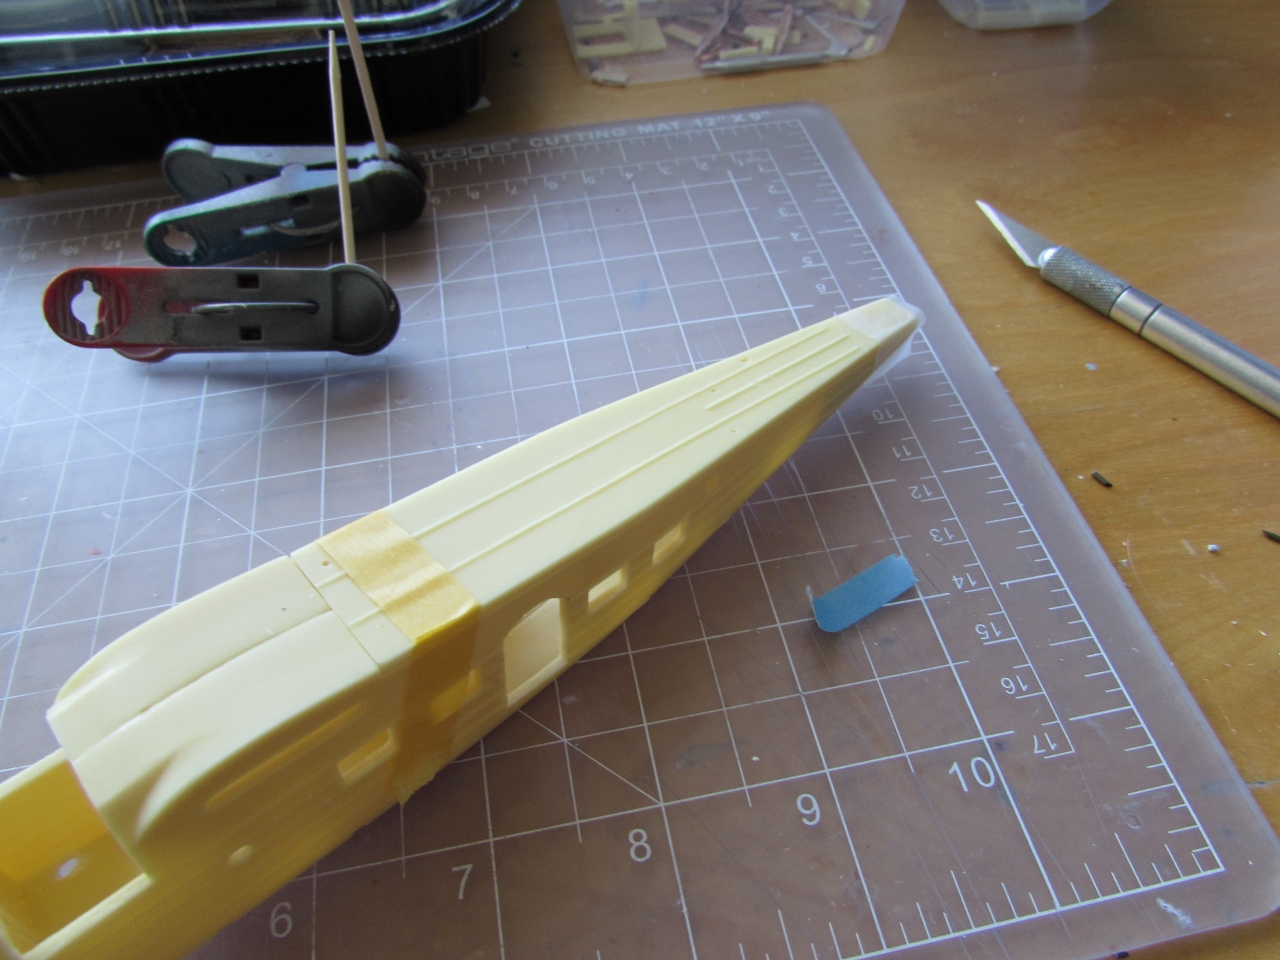
 Good news: the fit of the sides, nose and tail is very good:
 Some sticks are seen in photos protruding from that position, they are marked in the kit, so I drilled to get a firmer grip for them:
 The roof is also a very good fit:
 Adding the aileron control horns and lead entry, absent in the kit. Drilling the position for the Pitot, absent in the kit, Repairing some crumbling of the resin on a center batten on the fuselage top. Drilling the new (correct) exhaust locations. Drilling the anchoring point for the (now pinned) landing gear legs. Enhancing the location of the tail struts, marked in the kit but a tad faint:
 You need three bean can ventilators, but the kit provides only two. And the instructions are inaccurate regarding the position of the elements on the fuselage back. Three ventilators are made:
 We saw that the cabin access door chair was different, and so was the one barring the access to the restroom. Those are made:
 A new ceiling is made that will have lights, thus hiding the seam of the union of the fuselage halves:
 Parts being prepared for a priming and painting session:
 Making a step ladder:
 Et voilà:
 Primer coat:
 Different colors are applied:
 Photos show battens where the fuel tanks are, so those are added:
 The interior in progress:
 The interior of the cabin and doors is given a soft leather touch:
 And checking photos continues top pay off: the tail skid had two securing struts forming a V, not just one like the kit's part:
 The wind-driven generator is given a pin to make its gluing more secure. The replacement ventilation cans are ready, and the toilet, sink and table (all provided by the kit!) are being painted:
 The silber-grau is tried out on the external side of the doors:
 Instead of using the provided bulk clear material, which felt too thick and a flexible, I am using my own. Individual panes are cut and will need to be adjusted in situ:
 The windows are now all in place, that will allow me to keep working on the interior:
 The luggage net racks are being built:
 The landing gear struts are given pins, and their locations are drilled, because the kit will have you butt-join them, which is ridiculous for a model of this hefty weight. In the interim, curtains are glued in place and the luggage nets painted:
 The numerous parts of the interior are being installed, plus other parts I scratched to contribute to the effect. All internal and external doors and hatches are open. Care must be taken not to cause hindering or interference between these parts.
As in every single freaking kit I have built in my life, some of the kit parts for the interior are too large and will prevent the fuselage halves to close, so out it is with the sanding stick, and then struggle to remove the dust from inside.
The story of our modeling lives! 😊

 I decided to add a postal station in that compartment that divides cabin from cockpit, since that door will be open too:
 Restroom in progress: toilet (I added a lid), sink (I made the tap and added a mirror), and on the other fuselage side the magnificent, irreplaceable, glorious toilet roll:
 Ready to close now:
 The fuselage sides are united:


 The skin of the fuselage top is glued on. The fit of all these parts was good:
 Now a general view:
 The vac canopy is a bit thin, but of good transparency, and of near perfect fit if you are careful trimming it bit by little bit.
I will be gluing a support flange where it seats, to add strength. The panes are flat enough, but their number, the thinness and flimsiness, could make masking challenging.
As you can see in the photo above, two canopies are provided, an excellent decision on part of Planet:
 The windows are masked and the openings stuffed to proceed with the second stage of puttying/sanding and priming:
 You may remember that the wings arrived bent, so they had to undergo the hot water treatment.
I was preparing them now for eventually gluing them to the fuselage, when I noticed that those cheeky-monkey wings had sprang back to their default warped state.
So back to the Turkish Bath it was. I hope this stubbornness doesn't repeat, and a month after completion of the model I am not looking back at warped wings again. One of the many delights of resin:
 The fin has no locating device, therefore a metal pin is inserted. The position of the tail struts (unmarked in the part, unlike the stab) is established and drilled:
 A coat of primer to reveal surface blemishes:
 Wings and tail are on:
 A coat of primer to spot the blemishes:
 Among other things, the primer revealed the dreaded leading edge pinholes, common in low and medium quality resin kits:
 More little blemishes are fixed:
 The cockpit edges are given a sill against which the transparency can find more of a firm seat:
 Because details usually enhance the perception of the model, a Pitot is made:
 The canopy is glued, and them masked, measuring, cutting and applying each single panel:
 A last (hopefully) coat of primer before applying paint:
 Black is airbrushed:
 The areas that will remain black are masked:
 The commissioned corrected decals arrived, and right in time!:
 Alclad pale grey laquer base is airbrushed, in an attempt to re-create the typical German silber-grau of the time, something I usually do by mixing enamels. So far I am pleased with the results, next would be a mist of Alclad aluminium:
 The Alclad aluminium is airbrushed, to a pleasing result. Photography of this slightly metallic shades can't sometimes render what you see in reality, hopefully the completed model photos will show the silber-grau to good effect:

 A combination of different hues was used for the exhaust parts:
 The masks that covered the black are off, but I left the ones covering the canopy until after I apply a clear coat as a base for the decals. A long painting process:
 Some images to appreciate the silber-grau compared with polished aluminium (tank on other model) and raw aluminium (cutter handle):


 The canopy masks and stuffing of the openings is off. Decaling begins:
 As usual, the Arctic Decals set goes like a glove, provided you treat them well and with respect (they are thin, which is a plus, since the carrier is virtually invisible). The multicolored Varig logo of the time that goes on the fin (not the wrong one provided in the kit) has a separate white background that you have to apply first:
 Landing gear, tail struts, radiator, exhausts and tail skid are added:
 Still to go: aileron linkages, Pitot, four doors and hatches, three ventilators and wind-driven generator, propeller, curved exhaust pipes at the front of the cowl and their sleeves in the nose.
The plane had a device only before the left side of the windshield, most likely related to keep the pane clear of ice, sleet, rain, oil or the like:
 The device has been added (it's not present in the kit):
 Aileron linkages, Pitot, all the devices on the aft fuselage top, two small sticks visible in photos over the engine banks, the remaining exhaust trunking, are added:
 Still to go: all doors and hatches, prop, some very subtle weathering.


As in every single freaking kit I have built in my life, some of the kit parts for the interior are too large and will prevent the fuselage halves to close, so out it is with the sanding stick, and then struggle to remove the dust from inside.
The story of our modeling lives! 😊


I will be gluing a support flange where it seats, to add strength. The panes are flat enough, but their number, the thinness and flimsiness, could make masking challenging.
As you can see in the photo above, two canopies are provided, an excellent decision on part of Planet:


I was preparing them now for eventually gluing them to the fuselage, when I noticed that those cheeky-monkey wings had sprang back to their default warped state.
So back to the Turkish Bath it was. I hope this stubbornness doesn't repeat, and a month after completion of the model I am not looking back at warped wings again. One of the many delights of resin:


The plane had a device only before the left side of the windshield, most likely related to keep the pane clear of ice, sleet, rain, oil or the like:


To be continued....
No comments:
Post a Comment