

(The completed model can be visited here:
https://wingsofintent.blogspot.com/2021/08/avro-643-cadet-mkii-72topia-resin.html

I just acquired two of the newest releases from this truly talented Argentinian kit manufacturer.
I have previously built his Yakovlev AIR-7 (released under the previous manufacturer's incarnation, Ayacucho Maquetas) and the FMA IAe.20 "Boyero" (72T-001), both on this blog.
It seems that in every new kit Matías Hagen -the sole person behind this fascinating and fantastically cast kits- can go yet another step higher and further on the road to perfection.
Sincerely, there are no words that can praise enough his meticulous work. We are talking here complete cottage industry, but instead of a cottage, a small table in a room, and all under the severe economic limitations imposed by the local policies, which implies extremely restricted and expensive access to imports, and difficulties to deliver and distribute a product.
I see Matías Hagen a little bit as Jorge Luis Borges envisioned the philosopher Spinoza: a man that in solitude, with infinite patience and skillful art, humbly creates wonders.
If one word has to be used to define those wonders, it is "exquisite".
Kits packed in a sturdy cardboard box and padded:


Stay tuned for the build, there are a few ongoing projects that I want to complete before continuing to build these kits, but hopefully I will be posting more soon.
There is a link on the sidebar to the right to 72Topía's website. Disclosure: I have no financial interest whatsoever or in any way I am compensated; I pay for all I buy from this vendor. My only wish is to help this very small company to be appreciated by fellow modelers, as it is exceptional and deserves the best.
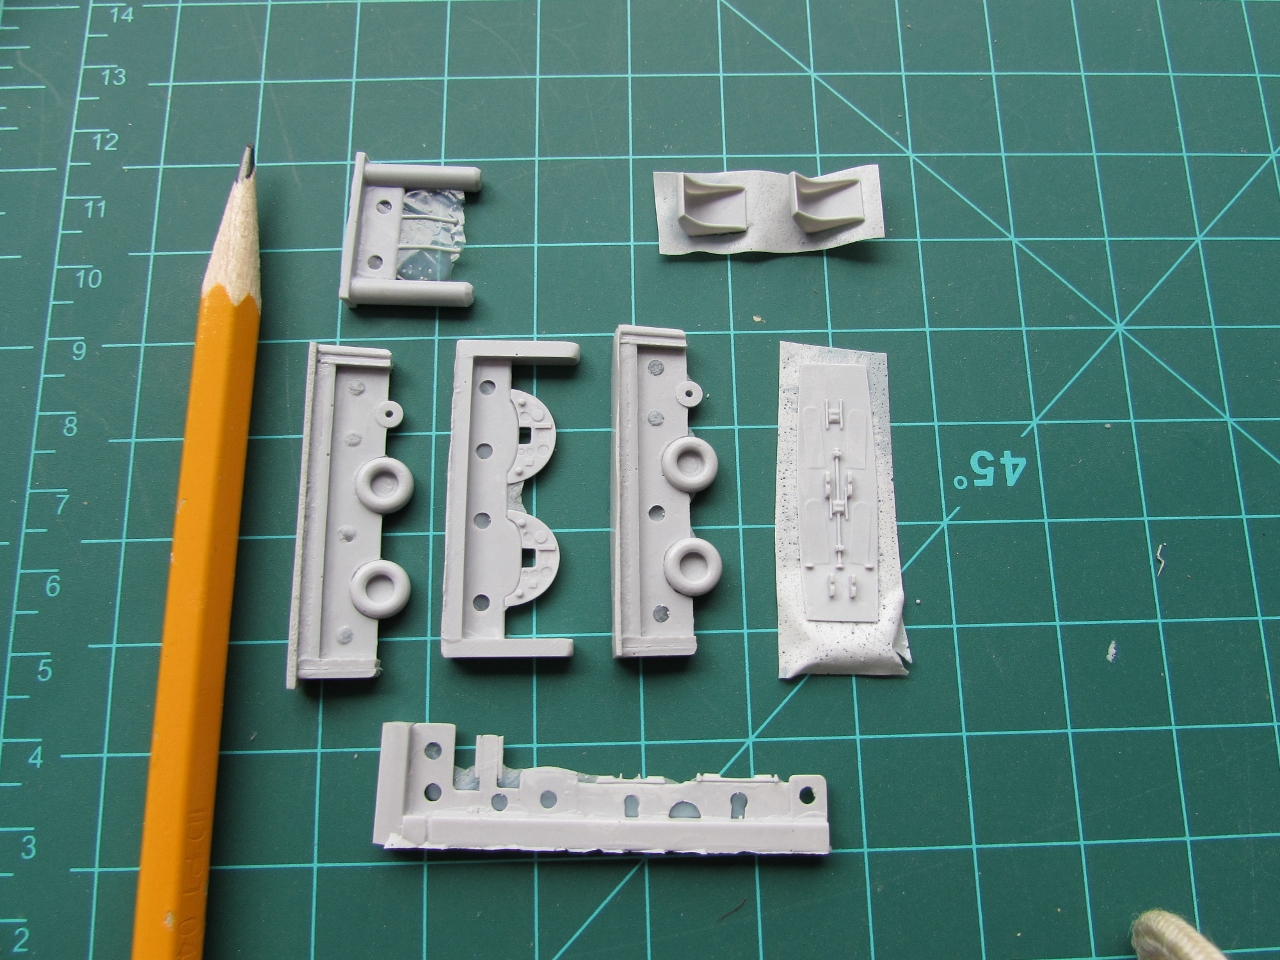
Parts being washed with soapy water, rinsed and let to dry, in batches. First the smaller components, and then the larger ones. DO NOT lose parts, many are really small. If you are careful and proceed slowly, all will be good. I use a very fine mesh coffee filter and a very soft brush, watch out that small bits don't get adhered to the brush of mesh (and therefore missed) when you take them out to dry:


Nice surface detail:


Liquid putty is laid down:

Exquisite detail, again:


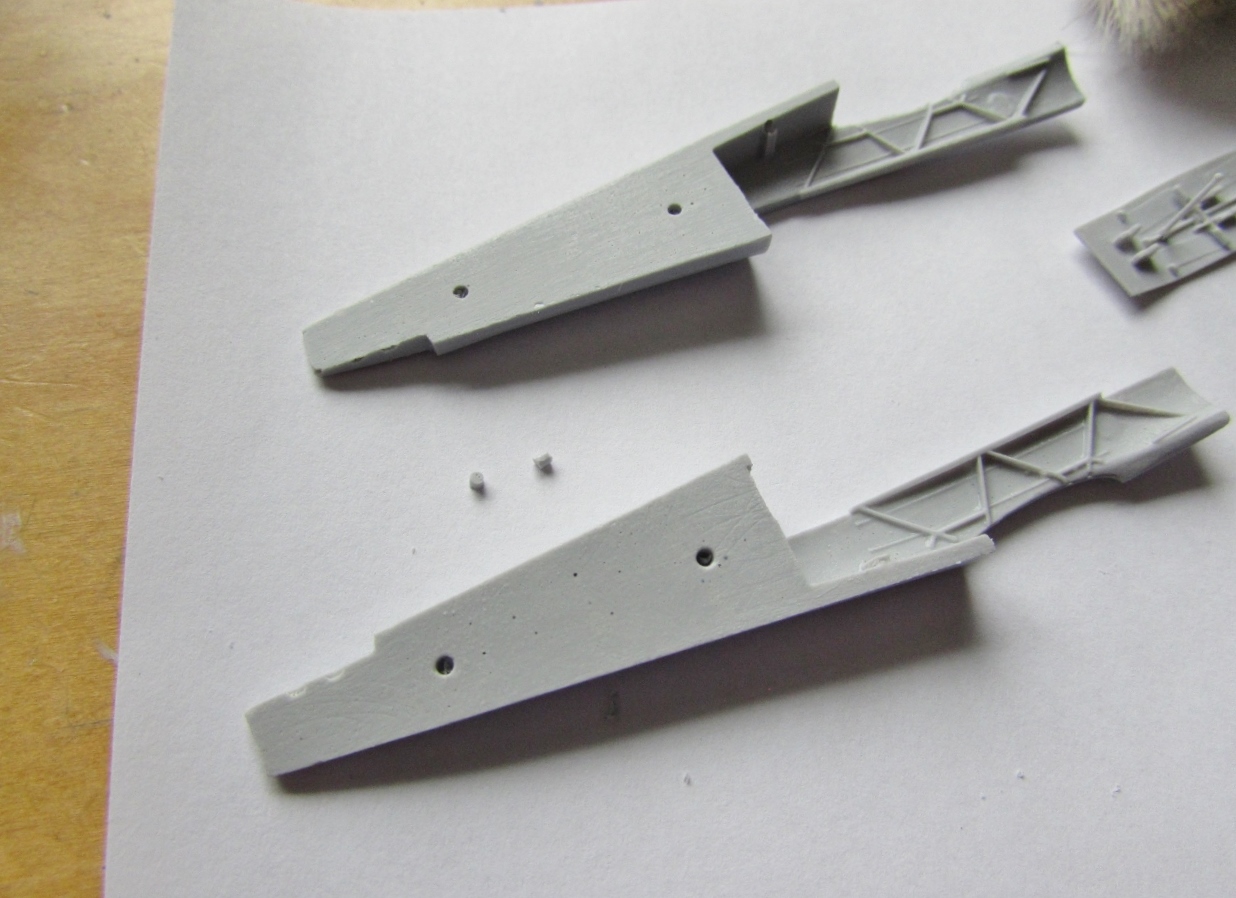
The struts are removed from their casting web. They are very to-scale, thus very thin, therefore do this carefully and take your time cleaning them. Parts marked L/R can be lightly taped to a piece of cardboard labeled so, in order not to lose track. Most have very clever reinforcement wires embedded in the resin, thus conferring the needed strength. One of the N struts has molded a double-pronged Pitot, pay extra attention there during cleanup, but if unwanted mishaps occur, there are commercial P.E. Pitots available:

Painting of many components, each in its color -or base coat in case of the metallic hues- ensues. The clever engineering of the kit helps a lot with this task:

Look at the detail in that minute engine (actually 1 of the 4 components of it):


The rudder control horn is installed in its slot. Notice the detail and the nav light:


Second movement of the Airbrushing Suite: the metal color is sprayed over the gloss black, different metallic hues for different parts, and the top wing is coated with primer to check the work on those leading edge pinholes, all looks right:

The very tiny and very sharp oil cooler:

The cockpit floor is ready to receive the seats:

The engine follows. This is a very clever and nicely detailed mini-kit. Notice how the intake manifold will self-center:


And presto:

Using aftermarket circular masks the hubs are protected for the airbrushing of the tire color:

What a thing of beauty, modelers will be so grateful for this jig included in the kit:

Just consider the nightmare I had to concoct for my last model (in this case to rig floats and lower wing):

The cockpit floor goes in:


Not bad for a three-day work:

Attention to detail: the carb intake with its mesh filter:


The slats once again show the delicacy and precision of the castings:


Looking at photos of planes (G-ADTU and G-ADTY) from the same batch of 20 planes that went to Air Service Training Ltd. that had slats, I concluded that my chosen reg, G-ADTG, also had them, and therefore added them to the wing. Today I got the 2nd dose of the covid vaccine, and depending on how I feel, I will proceed to airbrush (or not) the black that is the fuselage color and at the same time will be the base for the Alclad aluminium.
Black is airbrushed:

Starting to apply the aluminium color over now:

The masks are removed after spraying the wings and the leather guards are painted, the seats (outside to the right) are dressed:


The upper wing has the pips that represent the nav lights provided as tiny resin parts, but I fabricated tiny lenses for them made of stretched clear sprue rounded at one end and cut off:


The windscreens are cut. At their base they are slightly scalloped to be able to follow the curvature of the fuselage. I got close with the scissors and then very carefully -and at low speed- finished the curves with a rotary tool. These parts are small, take your time and handle them carefully, avoiding scratching them:

If you can't do this, or used up all the parts and are still unhappy, there is always another path: taking the measures and the shape from the kit's parts, they can be made of thin flat clear sheet. I made a few, just to demonstrate. Always make more than you need, to chose the best:

The frame is out of the jig now:


The fact that you get locating devices or sockets for all components makes for an easy assembly and a very welcome departure form the carelessness of many manufacturers that do not provide them, passing the buck the modeler with the all-too-sad and ubiquitous butt-joints.
As the kit provides home-made, varnished ink-jet decals, and I wanted a different registration, a custom set was commissioned from Arctic Decals. You may notice (my mistake) that the last two registrations letters are transposed (it should be "TG"), easily corrected changing their order, same for the white regs on the fuselage. Another mistake I made: the vertical tail is black, not silver, so before applying the decals I have to paint it:

Vertical stabilizer painted and decals' application begins:

To be continued....
Can I have it?
ReplyDeleteCan you put it into your Expander2000 and make me a 27" span rubber version?
Why are you so good at this?
Can I have it?
;-))))
DeleteThe perfect combination, a perfect kit produced by a determined and gifted constructor meeting with a gifted and determined kit builder. Your only problem will no doubt be to "improve" on the original. Andrew
ReplyDelete;-)))
DeleteNo improvements here!
Cheers!
Muy bueno. Espero ver la nueva coloración. Saludos. ARMANDO GIL.
ReplyDeleteGracias Armando
DeleteLas calcas van a llegar pronto.
Saludos cordiales