
.jpg)
And now for the High Planes "Conquest 1", a modified F8F-2 with custom decals already provided.
(The completed model is here:
https://wingsofintent.blogspot.com/2024/02/high-planes-172nd-grumman-f8f-2.html
I truly love that some manufacturers make a great effort (usually without any meaningful personal financial gain) to present to civil modelers kits of planes that otherwise have been ignored by mainstream manufacturers. I buy and build their products even when they may be a bit challenging, although many are very nice and a pleasure to build. But there are cottage industry kits and cottage industry kits. This one I deem borderline, because it will be really difficult for anyone but the experienced modeler willing to solve many problems, do some basic research to solve the accuracy issues, and with sufficient will to endure the hard work and no little frustration ahead.
My, oh, my. I have built a not small number of rough kits, but this one it’s undoubtedly among the ones that will make you sigh, again and again, during the build. I would have never chosen to build this kit, but very kind friend and fellow modeler Luis S. sent it as a gift. In fact upon opening the box and evaluate the contents, I told Luis that I was not keen on building it, and offered to return it to him, apologizing for what could be seen as ingratitude, but was actually honesty, as it wasn’t right to toss the kit in the garage an forget about it. As I slowly advanced in the build of another (less) challenging kit, Pegasus' XP-40Q racer
https://wingsofintent.blogspot.com/2024/02/curtiss-p-40q-racer-converted-pegasus.html
I decided to give this other kit a go, knowing this was a build I wouldn’t really enjoy, but aiming to put a smile in Luis’s face.
I have seen actually a fair amount of High Planes racer kits built online. I wouldn’t say they look to me as particularly great models, save a remarkable few (Alex Bigey's and Patrice Roma's come to mind as great examples of beautiful builds of High Plane racer kits). It’s really, really difficult to come to a good ending starting with what comes in the box.
.jpg)
Somewhat crude moldings, big sprue gates, inadequate fit:
.jpg)
What is that weird blurb about the lottery?:
.jpg)
I mean...
.jpg)
The spinner was molded wonky like this (higly exaggerated) sketch:
.jpg)
.jpg)
.jpg)
For some F8F racers -including this boxing- the intakes on the leading edge will have to be filled and blended smooth with the wing. As you can see this sandwich has too much ham and cheese, and the halves won't close at all:
.jpg)
Even after reducing the thickness of the wheel well roof to a wafer, the wing halves won't close properly, so the upper wing half will have to be ground:
.jpg)
The kit bears a certain resemblance with the old Monogram issue regarding that wing-through-fuselage weird arrangement. Once again, take a wild guess about the general fit. A feature of the Bearcat wing was a reinforcement of the intrados. Maybe this is an attempt to it? Notice that the ducts that originally go from the intakes into the fuselage have been eliminated, but not the intakes themselves:
.jpg)
After some boring time all parts cleaned up. Some parts will benefit from replacements.
.jpg)
As with the Pegasus kits, it must be said that these series of racers can still be built, given time, skill and a lot of patience -as often seen on the Net- sometimes to fair results.
The racer didn't have the side consoles. The seat is not accurate. You can see a modified new seat from the spares and a cylinder to its right, which was in the actual racer. The inst. pan. can be adapted:
.jpg)
.jpg)


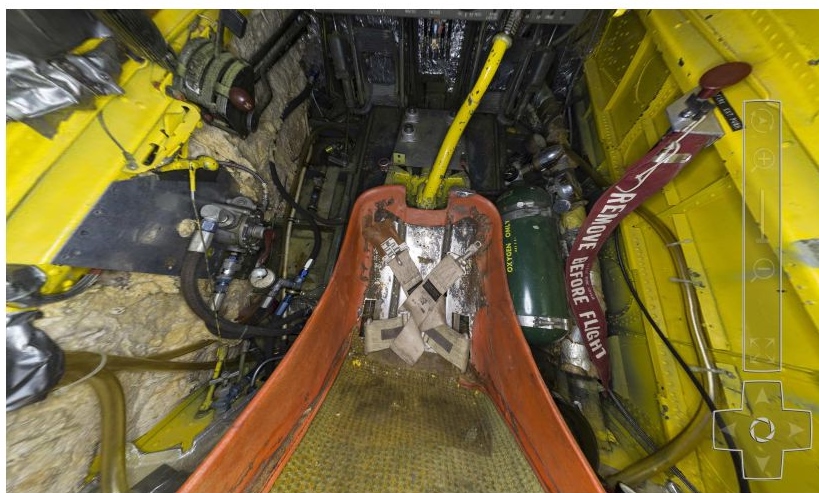


The cockpit as photographed above belongs to the later all-yellow version of this racer. For the earlier white scheme it was maybe also white or grey. I will go for grey.
Friend and fellow modeler Michael D. just sent this very valuable link regarding refrigeration on this and other racers:
https://www.enginehistory.org/Accessories/EvapCooling/EvapCooling2.shtml
The white metal landing gear legs provided are well molded and sturdy:
.jpg)
.jpg)
The decal sheet on this kit (more than 20 years old and apparently too well-traveled) doesn't look good at all, so just in case -and so you know- during the failed 1968 speed record attempt, the plane was all white, with no marks other than a small red registration in italic font (that is "inclined") on the fuselage sides, that can easily be printed at home if needed. The plane finally broke the world speed record in 1969:
https://www.youtube.com/watch?app=desktop&v=Bnx1gPeko-k


If you are building this kit, firstly, my condolences; secondly, regarding the cockpit interior: most modelers may not need to concern themselves too much about accuracy or detail, as the canopy is minuscule and not precisely a miracle of transparency. Of the few mods I made, nothing really can be seen. It's better perhaps to concentrate on fixing the various fit and surface issues.
.jpg)
Let's try to make a round opening of that:
.jpg)
The black "firewall" to the right will need energetic reduction of its diameter to be able to fit inside the fuselage:
.jpg)
The modified cockpit, now at resembling the real thing better:
.jpg)
The prop is painted white, the narrow band masked, then the tips painted red, and in turn masked to apply the medium blue:
.jpg)
.jpg)
.jpg)
This surely is among the most ill-fitting kits I ever built:
.jpg)
.jpg)
And now the Karmans, also needing refining:
.jpg)
.jpg)
Time to work on the little vacuformed canopy. A bit at the time the surplus is trimmed back, testing as one goes. The edges of the opening -where it seats- are as undefined (not sharp, not crisp) as the rest the rest of the kit, so perhaps I will have to glue some flanges around the opening to help secure the transparency:
.jpg)
Prop. As a building strategy I try to complete what I can of the ancillaries (wheels, prop, canopy, etc.) while I wait for glue, paint or primer to set, so as not to be delayed by them at the end:
.jpg)
The stabs are added. Some preliminary work is done on the seams:
.jpg)
.jpg)
The two models (the other is Pegasus' P-40Q) in progress. I feel more like a mason than a modeler, chiseling plastic away, grinding and polishing). Hours and hours invested, and yet so far from a good surface:
.jpg)
First coat of primer, and the work has just began:
.jpg)
As I had to grind the cowl mouth to make it round augmenting is diameter, I glued from inside a styrene strip that was blended with the rest. This had the benefit of producing a more realistic, narrower gap to match photos of the real plane:
.jpg)
.jpg)
The transparency is glued:
.jpg)
After some touch-ups, the landing gear is glued and a final coat of primer is applied. The leg metal parts do not fit well in the wells, and have to be tweaked a bit. Also a missing brace needs to be added:
.jpg)
White paint:
.jpg)
Well, as I suspected, the decals are actually confetti. Yes, I know you can try to rescue them with a coat of varnish and then cutting the individual subjects as close as possible, but you end up with a thick pancake decal, so thanks but no thanks:
.jpg)
As I feared this, concurrent with every aspect of this kit, I took some precautions:
.jpg)
The area surrounding the exhausts is masked and painted a steel color to match photos:
.jpg)
Almost there:
.jpg)
.jpg)
To be continued...
Oh, my! What a horrible kit- even for a short-run, it is pretty bad. That being said, this radically modified F8F looks like it was thrown together after the cockpit, accessory section, and wheel bays were gutted. I was wondering where the two oil coolers were located, as there are no intakes visible to supply cooling air to them, so I had to do some research. It's amazing how fast a radial engine airplane can go with some radical modifications!. You will have enough models at this rate for an unlimited class racing aircraft museum!
ReplyDeleteI posted above the informative link you sent regarding engine cooling. And yes, these kits are not for the faint of heart.
DeleteHmmm... a bit of a horror story for sure, Claudio! I’m sure, though, that you came tame her :)
ReplyDeleteTrying, friend, trying...
DeleteI fell for the hype in about 1992 and bought their Boomerang kit. My experience wasn’t dissimilar to yours. Does the Bearcat have those awful mould channels on every interior surface? The Boomerang was also moulded in a strange plastic that was as brittle as heck so any attempt at trimming made it shatter. It was really accurate shape wise, but that was as far as it went.
ReplyDeleteYeap, the same, hard plastic and big and difficult to remove sprue gates.
Delete