
The Case of the Merlin Kit
A Dark and Stormy Night Modeling Horror Story
From the deepest, murkiest, most haunted black lagoons of modeling
history comes this...I hesitate to call it "kit". It is as much as a kit
as the Frankenstein Monster is an adorable young human being.
Old are its years, obscure its origins, wrapped in shadows the unspeakable method used to create it.
(The completed model is posted here:
It wouldn't be out of place in a séance as an ectoplasmic apparition that would certainly make the hairs of your nape raise.
How far should a modeler go to prove that his heart is stout, his hand firm, his will unquenchable?
Oh, the humanity.
It has been said that Merlin models were given that name because you have to be a wizard to be able to build them. I disagree. You have to be a mad wizard to even want to build one.
But suffer one must, it seems, when friends kindly ask you to build their old kits. Sigh...
Contents. For what I can see online the engine was lost in transit:


A strange composite material, with reinforcement black particles embedded in the plastic (Igor's ashes?):


But when it happens that the worse clarity is obtained exactly at the windows, well, Houston, we got a problem:


Must be replaced, preferably with brass Strutz for the wing:


The geometry of the kit's wing is not precisely there, but what is on this kit anyway.
Nor drawing of the interior, neither parts for floor, bulkheads, firewall, landing gear legs or instrument panel were include:


An interesting fact is that NR7955, the kit's subject, did not obtain the continental record in the guise depicted in the kit. That scheme is the one applied by Texaco once it purchased the record plane. Corporations, once again, demonstrate their ability to cash in prestige and money at the expense of individuals.
In any case, the kit's decals are not quite there (in case they were usable, which are not). The map of the US is missing for that decoration.
At the moment of the record, the plane had a very different paint scheme.
For those interested in the paint scheme at the moment of the transcontinental record by Frank Hawks and details about that flight, here is an online PDF found in DM Airfield (https://dmairfield.com/):
Of note is that the NACA cowls were still more or less experimental then:
https://dmairfield.com/people/hawks_fm/192904_PopularAviation.pdf I spotted several important changes during the life of NR/NC7955, so as always, if you are aiming for this particular subject -hopefully using the Planet kit- consult photographs to establish what is correct, and at what moment in life, for your intended model.
Since this is being made for a friend that is fond (for whatever reason I can't understand) of the kit and livery, I will be doing the kit's intended decoration, using commissioned decals, if I ever reach the completion of this build.
The livery is very well document and well covered in photographs, so that helps.

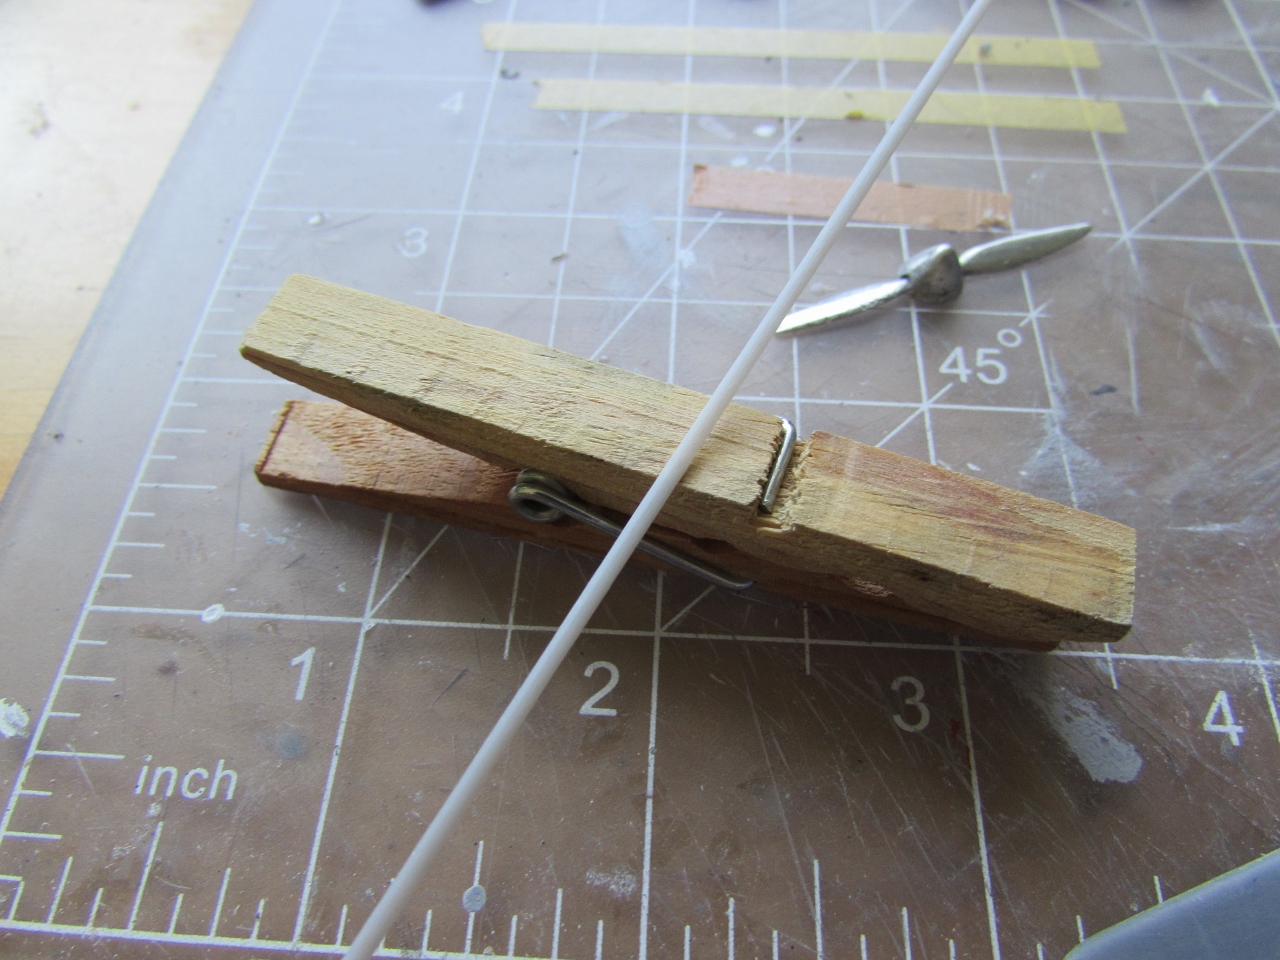
But I thought, what if other modelers have to fix one? So I set to fix it, putting some little putty on the pitted areas, and adding a little piece of styrene with superglue to make for the missing blade tip.
All went well, until I noticed that the spinner of the prop had its base slanted.
Really, how bad can this kit be?:

I declare this the most disgraceful kit I ever built, surpassing the Zeppelin Staaken E.4 20 that held that place until now.


Here is another problem with the dismal quality of this "kit": the fuselage walls are so thick that the interior (seats) won't fit as they should, since now in scale the excessive thickness of the fuselage has reduce the interior to a tube. Far from me to start now removing material from the walls, and have to re-polish the windows area. Instead, a new, slimmer interior is made, since the only real view will be from the opened door:


And now look at how the cowl is smaller than the fuselage front it is supposed to overlap:

The vacuformed shell meets the fuselage front, so the latter will be slightly sanded (we know there is plenty of surplus wall there) to make for a pleasant overlap:

In fact, this is the kit they give you to build as the Last Trial in the Shaolin Modeling Monastery. If you can build it, you graduate as Modeling Monk.
"-Little Grasshopper" -used to say Master Sprue- "When the cranes fly towards Middle Earth, it will be time for you to look at the mirrored image of the Styrene Moon on the Liquid Cement lake"
The tail feathers, of course, have the wrong angles where they meet the fuselage, so they needed adjustment:

The fuselage is primed, revealing many areas that need attention, as it was expected:


And now a bit of a proper look at the details associated with
the airframe throughout its life:
Record:
With arrow on fuselage associated with individual exhaust
stacks
Without arrow on fuselage associated with the more
conventional two exhaust pipes underneath the cowl
The landing gear legs and associated struts do not have the
teardrop fairings where they attach to the fuselage, seen on the plane later in
life.
As owned by Texaco (bought post-record)
Also different types of exhaust stacks, direct individual
pipes or two bigger ones coming off the cowl underneath
Wheel pants (or not)
Small Texaco logo on cowl (or not)
Diamond on cowl (or not)
No image on cowl (just white stripes)
NR7955 registration
7955 registration
Mast on fin (or not)
Oil cooler under the fuselage
Oil cooler on top of fuselage
Wind-driven generator (or not)
Small mast for induction compass with "merry go
around" small device on top (or not)
Small teardrop fairings where the landing gear struts attach
to the fuselage
Venturi
So watch out if you model this despicable attempt at a kit
(or the Planet kit) with this registration, and be sure you got the right
features or on (or off) for the given time you are representing the plane.
The list above may not exhaust all details, so check photos.
I don't see any of the bumps commonly associated with the
top of the wing on this or the Vega types, but who knows, could be the photos'
quality.
Tail feathers and nose extension to support the engine and cowl>

If you do not like to make the main legs with two Contrail strut sections as was described somewhere above, here is another way: wrap aluminium sheet around an airfoiled section of strut to resemble the slightly wider area that slides on seen in photos:


Get a piece of styrene rod. Make a tail at one end and head at the other:


In case I use it with this model to replace the kit's, I lowered the dihedral, filled the cavities, and overall refined the surfaces. Just in case. I should probably have taken this path from the very beginning, but I enjoyed defeating the distorted and malformed kit's wing into shape anyway.


There are no words to describe how much I hate this kit:

Easier written than done:


Claudio:
ReplyDeleteJust say NO!
;-)
DeleteI see it as penance and atonement, John.
Now - to get you building a Unicraft kit!
ReplyDeleteNevah!
Delete;-)
A real orkish kit from Mordor, eh???
ReplyDeleteMy highest appreciation to you!
George F.
Most definitely, George. An evil kit.
Delete