

(This is the step-by-step construction article. For the completed model please go here:
https://wingsofintent.blogspot.com/2020/07/republic-seabee-highly-modified-mach-2.html
As we all know, there is a dark side to model-making. I am talking about the modeling horror stories that adult modelers tell their kids or small relatives in those dark and stormy nights, in front of the fireplace, about kits that are evil, produced by manufacturers in damp and cold dungeons or scary-looking towers with bats whirling around.
We know the dreaded names, and I would add just one: Mach 2.
I am still traumatized by the vision of the pair of their
kits that I had the misfortune to look at close by. I can't describe the moment
but as a crime scene, with the opened boxes and the parts lying around, like
misshapen model guts surrounded by flash.
But, in spite of the fact that somewhere else I promised to
myself no more Merlin or old Dujin kits, it seems that Mordor is attempting to
cast a shadow on my modeling again, in the form of what is reputedly one of
Mach 2's better kits, the Republic Seabee.
I saw it on a dusty pile in a hobby store in the Palm Springs desert;
apparently harmless, lying still, quiet. I cautiously approached, which was a
mistake. It bit me and will not let go. I had to carry it home. Mind you, I
even had to pay for it! Yes, I wasn't bribed or paid a big sum to take it -as
it should be with this kind of kits-, I paid!
Anyway. Gathering all the courage I had laying around -in
the form of a pithy liquid made in Isla contained in a bottle-, I muttered the
Expecto Patronum spell and opened the box.
To my surprise, no dark cloud of evil came forth. Just a
couple of sprues, that, if not obviously cursed or badly mutated, still had
some flash, no locating devices, and what looked like not perfectly molded
parts. But nothing, so far, that screamed hasty retreat, or calling for the
help of Dumbledore. Accompanying the sprues was a dubious transparency, like
the fogged eye of a hissing monster, thick, milky, evil. A one-sided instruction
sheet (that to my surprise was not scrawled on parchment) containing "some"
(never better said) guidance and a small decal sheet. I believe the caldron and
iron tongues have to be purchased separately.
In any case, who else would make a Seabee, you may
rhetorically ask yourself. Well, there is a Glencoe 1/48 (excuse my language)
kit of it, and what seems even more ancient versions of it. I have spotted what
looks like a resin CMR kit box (72-183 and CMR1083), but no more info on that
anywhere I looked.
So I guess we should thank Mach 2? We will see.
The plastic has fair engraved panel lines and some detail,
the flying surfaces have the necessary corrugations, and the surface is a bit grainy. Some of the relief is
overstated (especially the stiffeners on the hull). The detail is what you
would expect from a kit of this nature. An interior is provided with a cockpit
pan and bulkhead, seats, a separate instrument panel, console, control wheel
and a little stick. The only part that so far calls for an exorcist is the
propeller, that deserves its own paragraph.
It's poorly defined, which is something you expect, but both
blades are pitching more or less toward the same side, one more than the other.
To be clear: if you look at a prop from blade tip to blade tip, you should see
an X. Here you see (exaggerating)
just /. Of course the blades can be cut off and re-positioned, no big
deal...but: The pitch has to be reversed, as it is wrong as molded on the prop.
Looking from behind, the prop should turn anti-clockwise. I guess the prop is better
replaced.
So far no terrible things, just a very poor transparency (vacuum-form
a replacement may be?) and a discardable prop.
Contents:


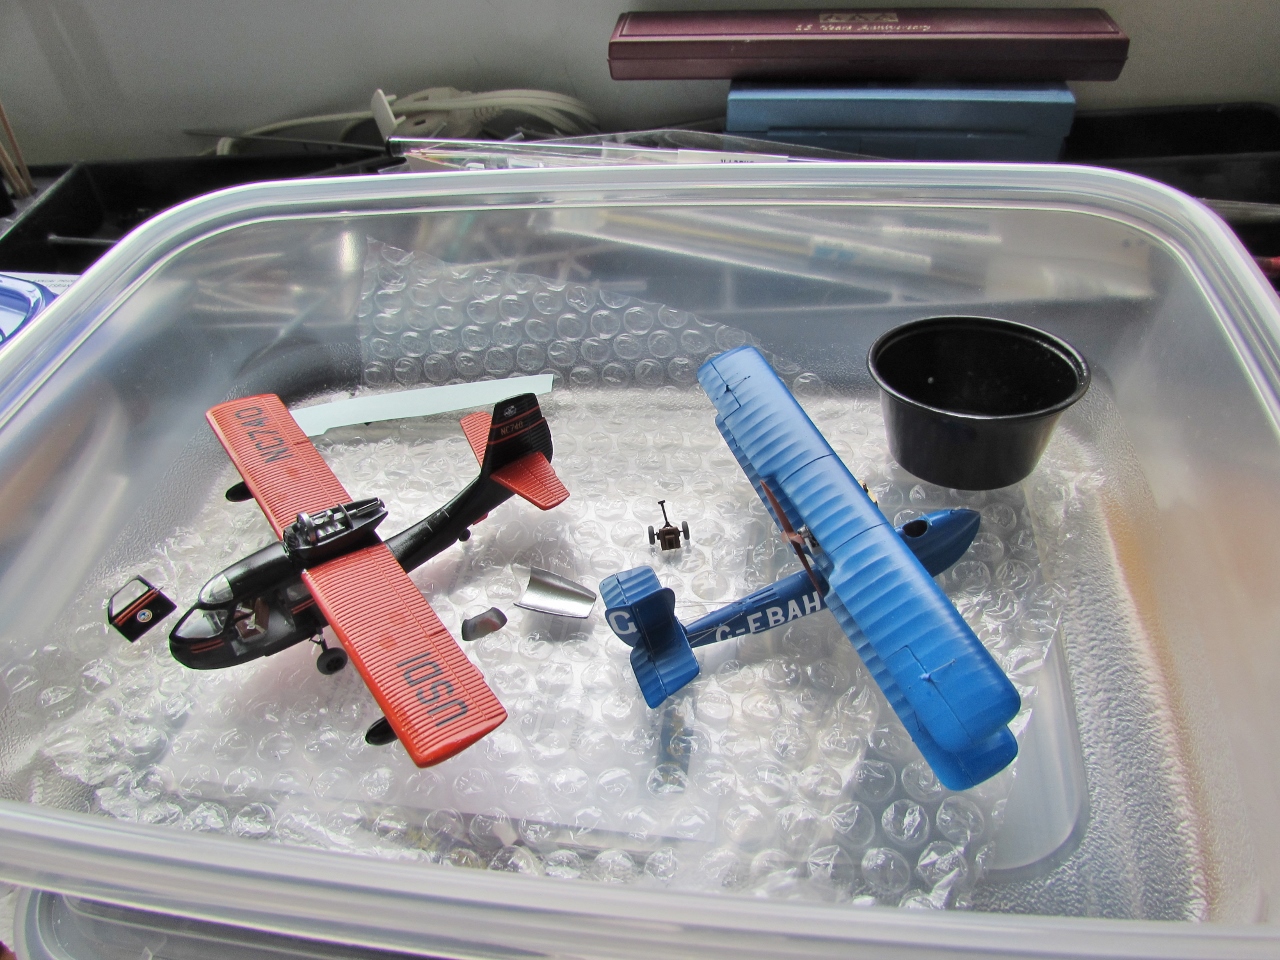
A photo that future teratologists will study:
 All parts but the smaller ones off the sprue:
 Lots of flash removed already, still have to get rid of those ejector towers:
 There, better:
 All parts have been cleaned up:
 The wing floats:
 In the original, they were made of stamped sheets of metal, so there was a visible flange present.
I will replicate it by gluing the part without the strut to a very thin profile exceeding the float by a fraction, and then glue the parts together:
 The canopy, which is as explained irredeemably despicable, is given a metal polish and then plastic polish treatment with a nice cloth.
Now at least you can look at it without crying, but no hope of getting a good, clear, clean look:


I will replicate it by gluing the part without the strut to a very thin profile exceeding the float by a fraction, and then glue the parts together:

Now at least you can look at it without crying, but no hope of getting a good, clear, clean look:


The Seabee is the product of one of many post war big contractors (Republic) trying to keep their satchels full as they were doing so far by injecting new products into the civil market.
Indeed during research I have seen ads published before the was even ended, singing the praises of this little touring.
This time zone is outside my accustomed envelope of earlier endeavors, but its unusual appearance merits its inclusion.
This four-place amphibian was their bet, being marketed as... well, as all the truths and lies marketers always come up with.
Many were made, and many are still flying, which I guess it's a testimony to some sort of acceptance, if not the resounding success their creators may have hoped for.
Powered by a six-cylinder, horizontally-opposed Franklin, it was a design aimed to low cost while keeping quality and performance reasonable.
The design has a much more complex history than it would appear, being first built as a former model made of wood, the Spence Amphibian Air Car, and later on evolving into a twin-engine type (the Twin Bee).
Photos show many changes, some cosmetic and some important, so, in the very unlikely case that you may build a Seabee, check, as I always say, photos. Plans and kit instructions are mere resemblances of reality many times, look at them with a healthy doses of skepticism.
But ultimately what attracts me to a specific plane is not success, how popular it was, how many were built, and not at all how many people they killed, but its aesthetics, in a very broad sense of the word (I love the Farman Jabiru, that gives you a clue).
And so we continue.
Ok, thinking out loud:
The Seabee had three doors, two on the sides and one smaller, mooring hatch, at the front of the cabin to the right.
I like to open things in models, to me it lends some sense of business, activity, complexity.
Here I could open a door or two (for example the left side door and the mooring hatch), for which I would have more likely to use the transparency as a plug to vacuform some clearer-thinner ones. That means of course that I would have to cut into the fuselage sides too.
Or I could open the engine top faring to show a scratchbuilt engine (there is one modeler on the Net that did just that).
Still I have to bear in mind that due to the semi-beastly nature of the kit a lot of work elsewhere is also needed, consuming time and energy, so I can't get easily carried away.
For example, I would like to replace, if possible, the poor landing gear legs and the absolutely dismal prop, plus the water rudder and other small things that look chunky and coarse.
Some pondering and planning is required, out with the Laphroaig and the sketchpad then.
The horizontal tail members lack hinge lines:


The kit's attempt at an instrument panel is substituted by a piece of styrene, later to be detailed:


Left door and mooring hatch are opened (at least the parts that are in the fuselage side of things).
The plastic cut easily, but feels somewhat waxy.
This means, of course, that I will have to cut sections of the clear part, either the kit's or my vac replacements:

The kit itself advises you to cut a section of the console pedestal for it not to interfere with the canopy. But we'll see how it plays here.
Surprisingly, the sides and engraved detail matched perfectly:

In another unexpected surprise, the kit correctly depicts the uneven chord of those, shorter above (about 5.5mm) and longer below (about 6.5mm), so be careful and cut diagonally:


The engine cover replacement vacuformed part is also divided in its components.
The excised clear parts will later be attached to the kit plastic parts, and some little framing is going to be added to the clear parts and on the seat of the canopy to keep things a bit more rigid and aligned.
What can I say: Pheeeeew!!


Now comes the time when a color scheme has to be chosen.
With more than 1.000 built, and the successive changes of ownership and repaints, there is plenty to chose from, and fortunately there are a large number of color photos of Seabees online.
However, as a first step, we need to weed out, for the purpose of this build, the ones that have droop wingtips, end-plate wingtips, and different engine installations, which results in a severe limitation of the available options.
I have also discarded plain all-silver ones, that although classy and sober in reality, offer little interest as models (especially since I already have a number of silver models).
Also discarded are those color schemes that look too vulgar, the ones with color combinations that hurt the eye, and those that have the stiffeners on the hull painted another color (since the kit's representation of them is quite poor and will hinder painting).
Therefore little remains, which is, in way, a comfort.
I will represent any of the three identical Seabees own by the Fish and Wildlife Service, in contrasting black and orange (Thanks Christos Psarras!): (Link to Seabee website)
http://www.seabee.info/rc3_758.htm
like their bigger cousin this Grumman amphibian:
(Link to photo on flickr)
https://live.staticflickr.com/1812/29198082097_98ae0721b2_h.jpg
The plane I selected had a distinctive Hartzel propeller, with a sort of inverted scimitar blade and an mildly unusual hub, therefore I discarded the prop I had made and built another using the kit's prop blades, with a new hub and details, following photos on the Net:


 Another difference is that the Fish and Wildlife plane did not have wing float braces, a feature otherwise present in most Seabees.
The engine pan is glued onto the wing:

 More elements are created for the resemblance of the engine:
 The air intake in the kit is ill-defined:
 So it is sanded down and a new frame is being glued on with stretched sprue, not easy. I wish I could have created just the frame, eliminating the kit's part, or find a photo-etched part that could have fit the bill, that way the engine fan would have been visible from the front, but you can go so far, and there is detail enough:
 The vertical members are added:
 Some priming and basic painting:
 Meanwhile other parts are being prepared for the same treatment, including a little anchor:
 Some more painting:
 And the new air intake previous to the black wash:
 Details are worked on:

This kit is so interesting from a philosophical perspective, or even an epistemological modeling perspective.
You can tell that there was a lot of effort put on the masters, the seats have detail on the cushions, their backs have structure, the surface of the of model has some convincing detail, and the engineering is sound.
We all know that small companies can't afford certain technologies because of the cost, and this is patent with Mach 2, with the flash, ejector pins, and the like.
Still, this kit has more detail and better represented that much modern examples that use better technology, but fall short of detail, rendering slab seats and panel lines that are still, after all these years, dismal trenches.
When I work with "frontier" (no mainstream) kits, the build either turns into a ever-deepening hole of frustration and lots of effort and time exchanged for a poor result (Merlin, Old Dujin) or the atmosphere gradually clears and you enjoy a relatively pleasant build, like in this case. I repeat that I have seen other Mach 2 molds that did not tempt me at all, but this little "frog" (pun not intended) from the French manufacturer is turning into a (so far) nice build, and I would build another in a snap.
Yes, it takes time and and things need replacement or alteration, but all told (and again, I hope this still stands at the end of the build) I am pleased by my acquisition.
While surface blemishes are being fixed, a few more details go to the interior:
 More airbrushing ensues, for the other side of some parts, the interior color, a partial coat of primer on the aft fuselage, the tires, the interior of the engine covers, and even a minuscule fire extinguisher attached to a little blob of bluetack on a clothes peg.
 I use the heat-curled tip of a clear stretched sprue painted with a permanent marker to slice the very tip of the curve in order to obtain the minute nav lights for the Seabee:
 The transparency is given a bath in acrylic floor polish, and minor parts of the cockpit/cabin (fire extinguisher, anchor, pedals) are readied to be glued in:

 The bits go in:

 The clear sections of the canopy are glued to the doors:
 Masking material is prepared:
 One by one, this way or the other, the windows are masked:
 For the front ones I used the discarded kit's canopy, since this area had a consistent relief, easy to follow with a toothpick and then with a blade:
 All set:
 Wing and canopy are now glued on:
 Ready for another thin layer of primer previous to paint:
 More primer and more tide-up, together with other projects:


One of the colors of the scheme is orange, therefore a gloss white coat is given to the model as a base, since grey is not adequate and will dull the result. Let's not forget the little parts:
 The first color is airbrushed in the corresponding areas. It will eventually be masked to apply the black:
 One of my building strategies is to work during the pauses -imposed by drying of cement, primer or paint- on the little things that many times delay the completion of a model, thus after painting the major assemblies it's a matter of decaling and adding those bits.
I am waiting now for the orange paint to completely cure, since there is some big masking ahead:
 Masking of the orange to airbrush the black:
 Black airbrushed:
 Masks off, with a sigh of relief, seen that the most sensitive bits, the fuselage and door battens, came out ok:

 Some little touch-ups will be needed, but the airbrushing sessions seems to have worked:

 The window masks are removed.
Now it will go to the waiting area, joining the Vultee V-1, until the decals arrive.
After the decals are applied, the remaining details will be added:

 Nope, I didn't forget, I am still waiting for the decals:
 Yeepee! Decals arrived!:

 Can anyone remind me of what I was supposed to do with all these bits? 😊:
 The decal set was caught in the International Mail Maelstrom on April 14th, and just arrived today.
 Wing floats, wheels, as well as the home-made grille, fan, and engine are glued on:
 Almost there for the photo session:


To be continued....


The engine pan is glued onto the wing:


This kit is so interesting from a philosophical perspective, or even an epistemological modeling perspective.
You can tell that there was a lot of effort put on the masters, the seats have detail on the cushions, their backs have structure, the surface of the of model has some convincing detail, and the engineering is sound.
We all know that small companies can't afford certain technologies because of the cost, and this is patent with Mach 2, with the flash, ejector pins, and the like.
Still, this kit has more detail and better represented that much modern examples that use better technology, but fall short of detail, rendering slab seats and panel lines that are still, after all these years, dismal trenches.
When I work with "frontier" (no mainstream) kits, the build either turns into a ever-deepening hole of frustration and lots of effort and time exchanged for a poor result (Merlin, Old Dujin) or the atmosphere gradually clears and you enjoy a relatively pleasant build, like in this case. I repeat that I have seen other Mach 2 molds that did not tempt me at all, but this little "frog" (pun not intended) from the French manufacturer is turning into a (so far) nice build, and I would build another in a snap.
Yes, it takes time and and things need replacement or alteration, but all told (and again, I hope this still stands at the end of the build) I am pleased by my acquisition.
While surface blemishes are being fixed, a few more details go to the interior:


The doors are among other parts being primer here:

One of the colors of the scheme is orange, therefore a gloss white coat is given to the model as a base, since grey is not adequate and will dull the result. Let's not forget the little parts:


I am waiting now for the orange paint to completely cure, since there is some big masking ahead:


Now it will go to the waiting area, joining the Vultee V-1, until the decals arrive.
After the decals are applied, the remaining details will be added:


To be continued....
No comments:
Post a Comment