
https://wingsofintent.blogspot.com/2020/07/junkers-f13-revell-172-kit-with-minor.html

Just think of it for a moment:
An all-metal, cantilever monoplane passenger
"airliner"... in 1919.
Derived actually from other Junkers designs of WWI that
followed the same principles: all-metal monoplanes, using pioneering techniques
that will later spread to other manufacturers ("corrugated" metal plane
examples exist by the bunch in later aviation history) and spearheading the
future of aviation as it is today.
This is a plane that had the great honor of carrying Sigmund
Freud:
and Albert Einstein:
It seems truly incredible that aviation conservative -when
not plain retrograde- thinking would insist with braced biplanes of wood and
canvas for many, many years to follow.
In any case, the Junkers F.13 is a plane that was built by
the hundreds and was sold to and operated in many countries, including Bolivia, Colombia
and Argentina
among the first.
I would like to thank friend and fellow modeler Sönke Schulz, who is always willing to lend a research hand.
The Revell kit has been around for a while, and indeed
Revell should be commended for releasing a kit of an iconic civil plane that
was used world-wide (even in South America, China, Russia
and Japan)
that also, being corrugated, was perhaps not easy to produce.
I have built the Revell kit before, OOB, but now wanted a
bit more of excitement, therefore I plunged into my F.13e folder, for hours and
hours and hours.
It was obvious from the beginning that the Revell kit, as it
is, covers a very narrow swath of the production, all earlier types, and not
even near all of those either.
Revell has released this kit in many boxings as a landplane
and hydroplane, with many marks. I built the Austrian passenger carrier
version:
I remember from the build that the kit seemed nice, had some
issues regarding accuracy, the fit in general was good but with a few
exceptions (the prop dangled down loose a bit, for example) and the decals were
DISMAL, a thick cake that won't, at any cost, comply with the corrugations. I
have read this same complaint many times after from other modelers.
I got a freshly baked, 2020 boxing, with many fancy Revell
treats: a full color, large, multipage assembly booklet and decals printed in
2020, hopefully better than the despicable decal thick cake of old. The sprues
include the floats and ancillaries, but the clear parts came unprotected in the
same bag with them, fortunately preserving their clarity (I bagged them).


During the research, I was mightily tempted by the Revell
boxing of two planes that went in a South American expedition, D-217 and D-218,
but ultimately refrained because I was looking for something with more color
and pizzazz.
There are some resin aftermarket sets out there that allow
the conversion of the Revell kits to cover more subjects. I tried to follow on
that matter but all came to naught. In any case, I can make the necessary
adaptations.
The next subjects I considered were a product of the
"Misión Junkers" in Argentina,
which fostered the acquisition and operation of several F.13 planes: R-ACTA,
R-ACTB, R-ACTD, and R-ACTX (R-ACTV seems a re-registered R-ACTA) but accounts
of the registrations vary. Even a local airline was created in 1925, the Lloyd Aéreo
Córdoba, with regular scheduled flights. Córdoba is a state in the center of
Argentina, famous for many wonderful things, and infamous because some small
enclaves there were recognized nazi harboring places, whose tendrils extended
in time until very recently.
All these schemes followed more or less the dullness of the
Junkers aesthetics, therefore my roving eye went for some more uplifting
schemes. I found several, but their exact colors could not be established even
in the ball park. Among those, the Eddie Rickembacker Junkers Larsen looked
pretty darn good, very colorful...in black and white photos from which the only
certainty that could be obtained were the colors of the "hat in ring"
motif that he carried on from his earlier planes. The rest remained in...many
shades of grey. Same for the plane of director Cecil B. Demille.
Also considered:
-A specific Colombian machine on floats, called "Colombia",
that has an unusual scheme possibly in the colors of the Colombian flag.
-An Imperial Oil machine that I have seen modeled before, for
which a set from Whiskey Jack Decals at one point existed (not anymore).
-Number 6 racer, a Junkers flown by pilot Melchoir
-A few N-registered planes
-A number of British-registered machines, but most, if most
all, can't be built from the Revell short fuselage kit with accuracy as the
fuselage was extended at one point in production.
And what I think are the most serious contenders so far:
-German-registered D-1 (ex D-138), in a specific livery it
wore for a time: possibly yellow,
black and metal.
-German-registered D-224 under Hamburger Fremdenblatt
newspaper ownership, painted red fuselage with white chevrons and metal wings.
Many of these options -if not all- are not just a matter of straight paint and decal changes from the
kit, they require minor tweaks. And a couple major tweaks (shorter wings, for
example, obtainable form the kit but with some work, needless to say.
I decided to start this one from outside the model.
See here:
https://www.alamy.com/junkers-f-13-jl-6-image69750297.html
Glad I found that one, which prompted me to build it:

(Readable and/or Downloadable)
https://ntrs.nasa.gov/archive/nasa/casi.ntrs.nasa.gov/19930085313.pdf
Regarding this "starting the model from outside", I decided I would take this ambience challenge "a step beyond", or "further afield" -if you forgive my puns- and dedicate a portion on an airfield to it.
The base is done, the tracks for the fuel trolley have been installed, and I started to pull some diorama supplies from the most inaccessible crags of my modeling dungeons:


Revell has the ailerons as being of constant chord, but every photo I have to allows a good view of this wing feature shows a slightly curved trailing edge.
It may be possible that some models have this feature, though. The type changed and evolved continuously.
BUT: the alternate livery for this model, CH94 of Ad Astra, for sure had a curved aileron trailing edge. I think Revell messed up here.


With these I will make the upper and lower skins, create a spar, and cap the ends:


(Image from ETH Zurich digital archives):


This matches well my wing, but remember that I shaved some material from the wing's trailing edge insides, to eliminate that chunky feel it had:


Most photos show only ONE control wheel, on the left seat. When there are two, they are miss-captioned photos that are actually from other junker planes, or show a very different inst. panel, possibly of later day.
I will go for the one wheel.
In reality the bulkheads were leaning backwards, to "accompany" the seats recline angle, but the kit has them perpendicular to the floor, which is what I will do, in order not cause fit issues down the lane.
Some minor details on the nose are not particular accurate. I was thinking of opening the "hood" as I naively did on my old model, but that poses many issues that relate to those inaccuracies which will require a lengthy fixing, plus the engine that I so proudly exposed in that old model is frankly less than basic, and will require a new one; thus, I will keep things OOB here.
Again, in that old model I "opened" a door, which was a bold bet that I somehow got away with, since it breaks the self-alignment nature of the parts.
On this occasion the doors will remain closed, but I discovered that the windows could be "rolled down" in reality, and so I will, so I will do that to show a bit of the interior with more easiness.
The kit has Junkers logo decals for the prop, but, in the hundreds of photos of the era that can be found online of the type, I couldn't see those anywhere. In some occasions there are other logos, but not Junkers'. So no logos on my home-made prop.
The kit, as many of us know, has a few accuracy issues, but only some will be addressed (as shown above) for the sake of sanity and practicality.
Revell, from Germany, the birthplace of this plane, by the way, having access to all kinds of data, online and in local museums and archives, could have done a better job. Even in 1992.
I love that they released these very attractive and affordable kits, and in so many liveries and configurations, though.
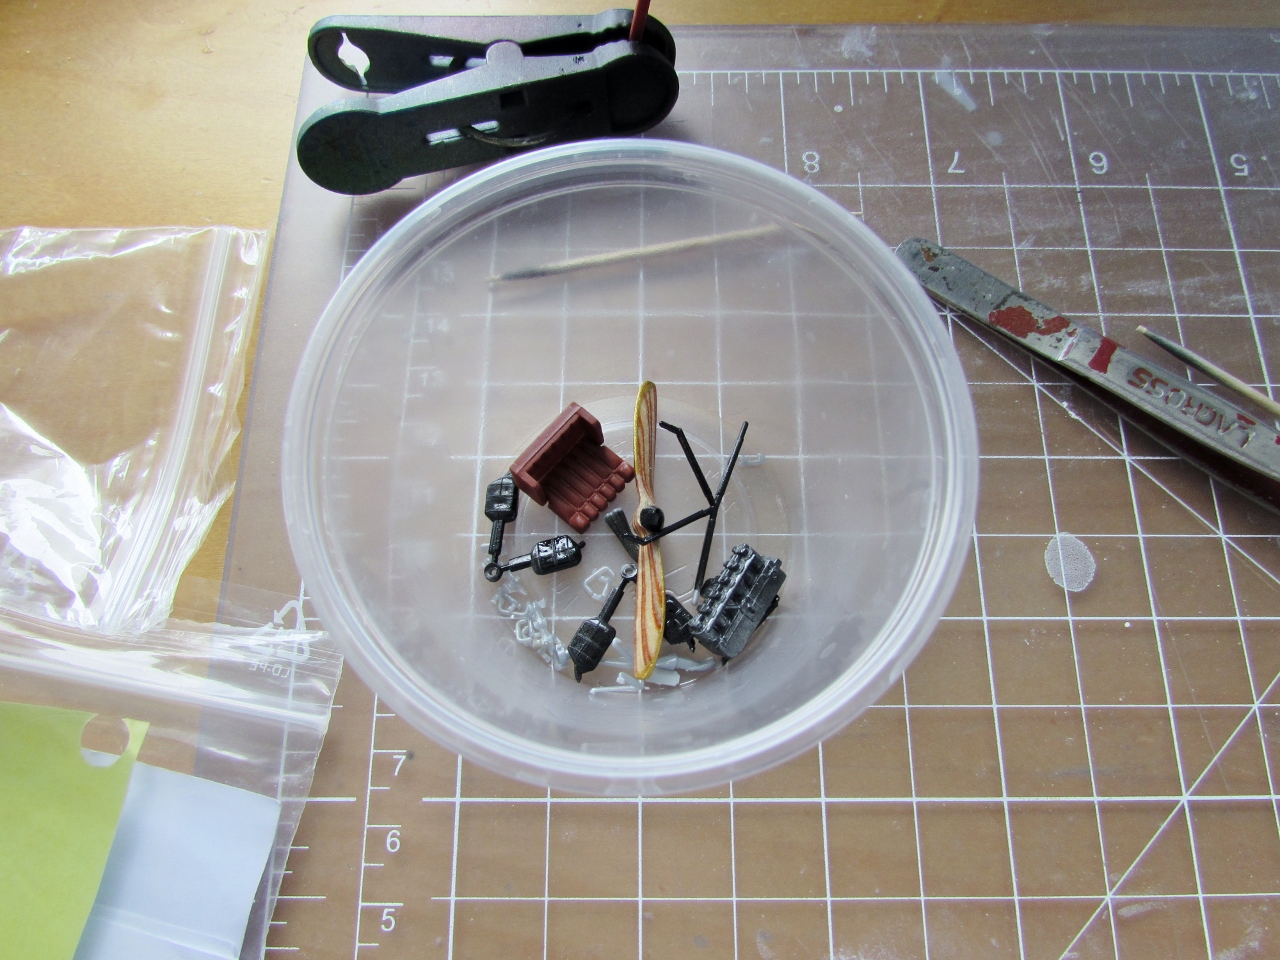
The small parts are being painted and set apart:


No photo I have seen shows belts on the "sofa" seating:


Look at this step (blue arrows are mine): where the heck, exactly, go the bulkheads and floor? ahead of the pips, after them, above them,, between them? No matter what I do, this does not really fits properly. I built this 16 years ago, and I must have solved somehow, ot the instructions perhaps were better.
GGGRRRRRRR!!!!!
*"Romani ite domum" 😄😆

(Photo from ETH Zurich digital archives):
 Corrugated panels are added to the cockpit sides:
 The interior is ready to go in:
 But before that, the transparencies need to be glued from the inside. They are ok, but not crystal-clear:
 Not many know that some Junkers and Fokkers had the traction axis off-set.
 Transparencies went on, a few curtains, and the fuselage halves were united. The nose piece was also glued to add rigidity and alignment, as well as the nose floor (still not attached in this photo, but glued later). No issues to report at the moment:
 Photos show ceiling lights, so those are added (I know, who will ever see them):
 And look what Santa brought!


The top fit is not good, and needs correction:
 Now everything fits perfectly:
 No gaps:


 Well, not too far now:
 These are the evil things, small, full of flash, almost translucent due to the plastic's nature.
The plain "U" handles will be replaced with wire, of course. The others will be cleaned and glued only when all preliminary surface work is completed, otherwise they would be continuously knocked down. The little buggers...:
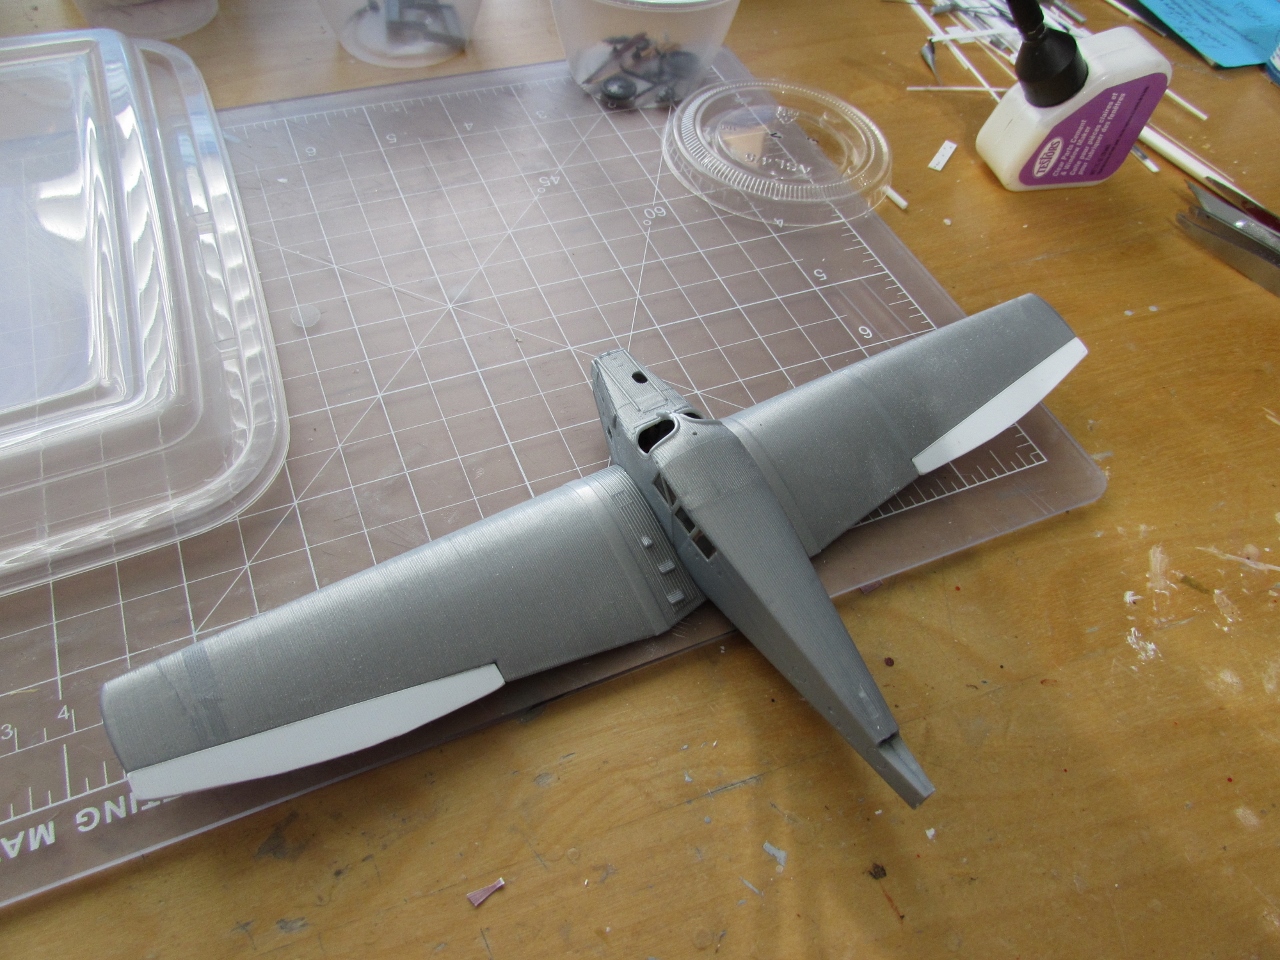
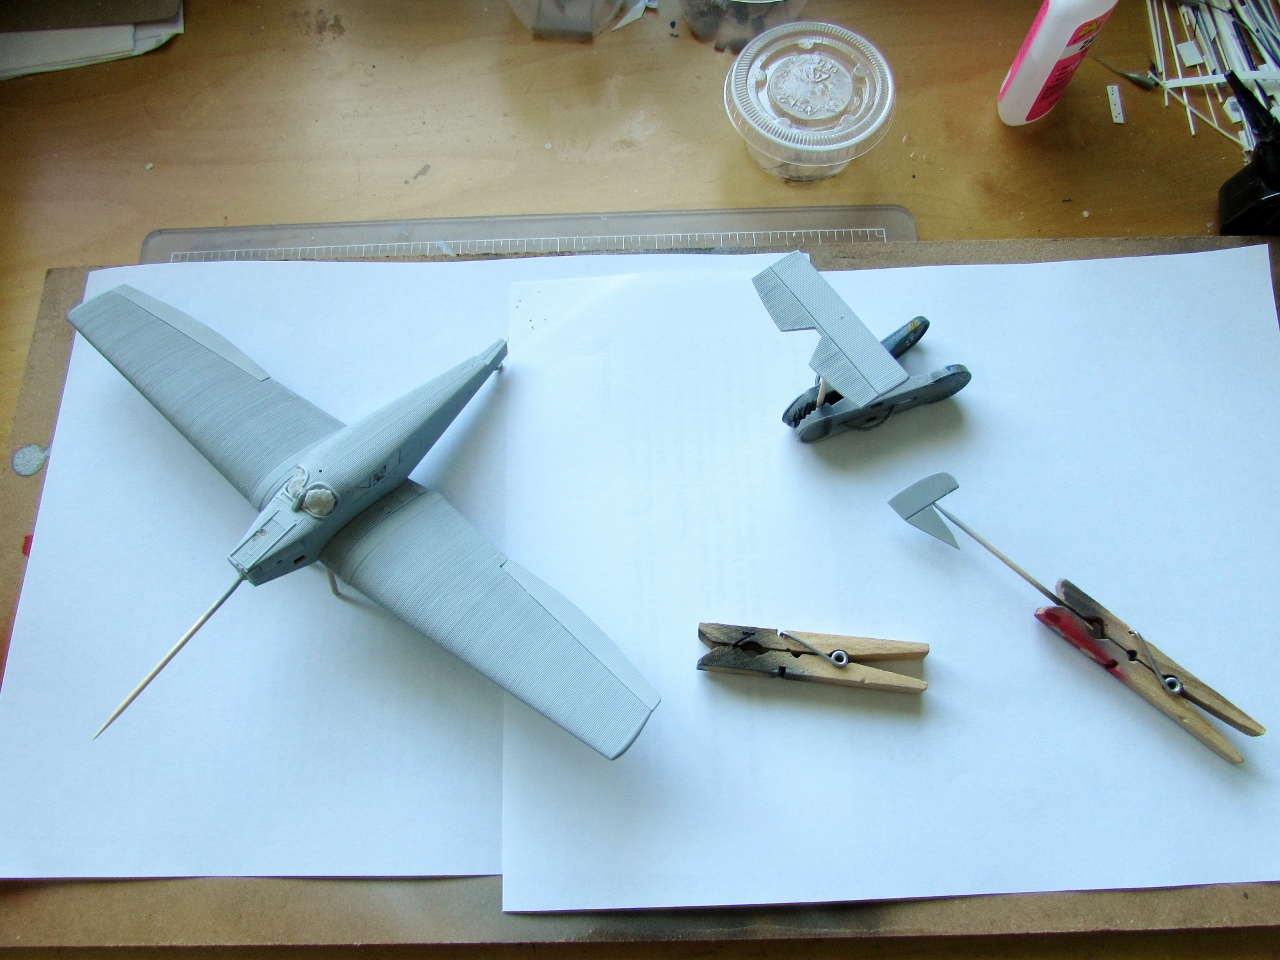
 Primer is applied. I decided to keep the tail feathers separated to facilitate masking and painting, since they will have a geometric pattern:
 Work on the Junkers Airfield continues.
The Miniart kit of the building is not molded to high standards. The fit is indifferent -to say the very least- and the engineering is poor. Gaps will show, mating surfaces will not make positive contact all the way, etc. The quality is much more like that of a toy than of a serious kit, which is disappointing, especially considering the good quality of other of their products. This is obviously a modular system designed to use the same parts in different boxings, and if it does work for some details, it doesn't for others.
There are two ways this kit is useful:
1) You don't give a damn and just use it in the background.
2) You do give a damn, and you modify it to suit your own ends, which will take some work. The least that can be done is to somehow hide the thin gaps that show everywhere where panels join, perhaps from inside with some cardboard or strips or styrene, or styrene sheet to make "walls", or from the front with fillers like Perfect Plastic Putty, which is water-based and very forgiving.
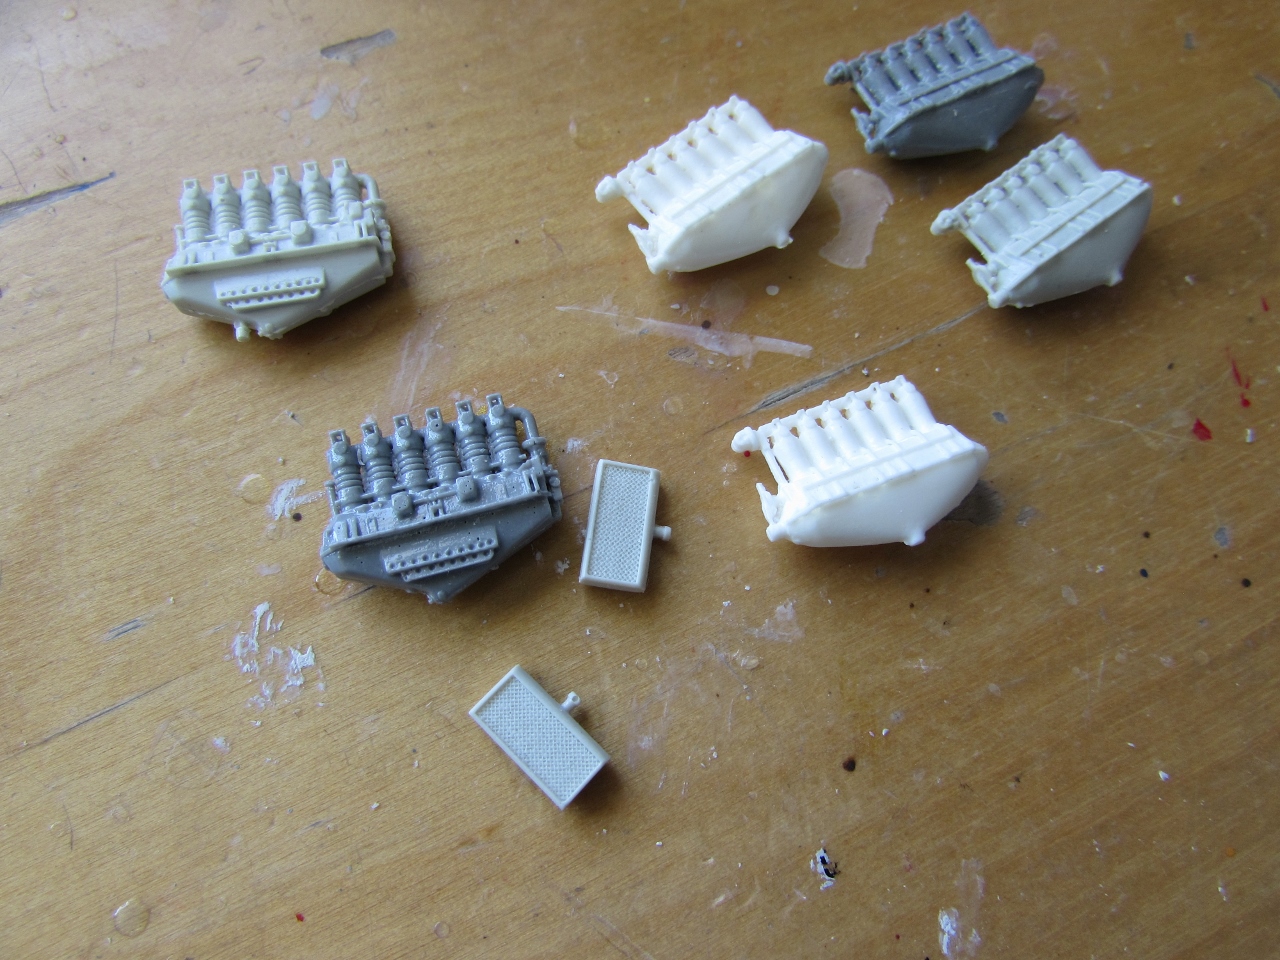
The parts come as you can see in colors, but more serious modelers will apply at least washes and weathering, plus details:
 Nevertheless, they can be put to good use. I am still waiting for a smaller building that got trapped in the Post Office growing Maelstrom:
 Some props for the diorama are primed:
 The model is painted white in preparation for the other colors:
 The white is masked so yellow paint can be now airbrushed:
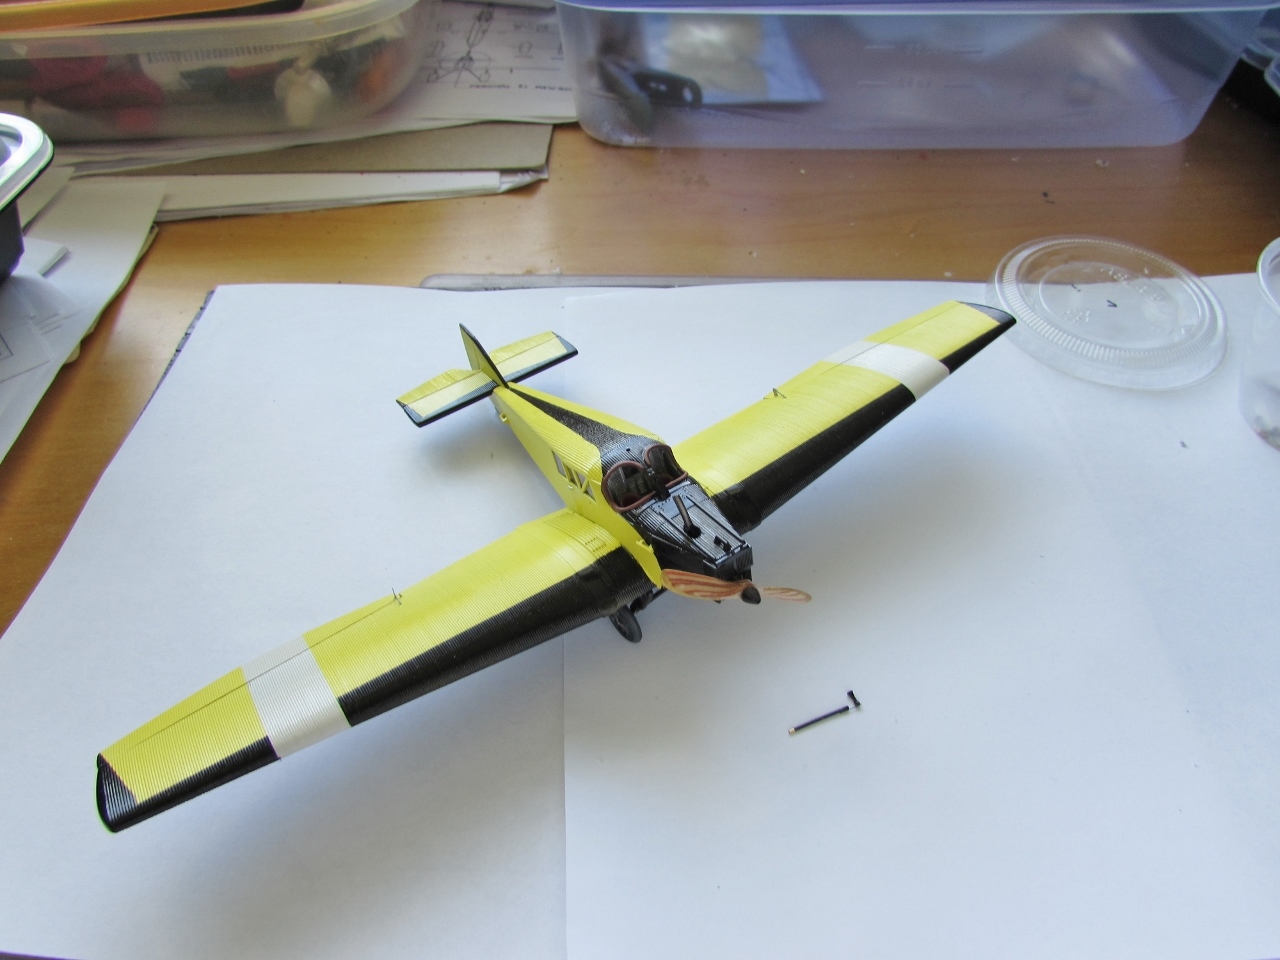
 And the yellow is on:
 Some elements of the diorama are painted:
 A completely unrelated prop for a friend:


 A bit of paint work on the props while the yellow dries:

 Masking for the next color started:
 One of those days. The airbrush started to act out. Switch to other airbrush, also started to act out. Dislodged seal in first airbrush, dirt clogging on second. A festival of sputtering, spilling and dripping. We'll see what comes out of this later...
 So far so good, I still have to peel off a couple of tape lengths from the stab:
 Little by little, a touch here and there, the model is coming to life:
 Landing gear on...
 ...and baby is on its feet!
 All that can be done has been done.
The step is in, I added control horns and rigging to the rudder, the little hatch on the nose is on, the exhaust was glued, the prop has been pushed in.
I can't put the Venturi mast yet until I have applied the decals, which may take a little while to arrive due to the PO delays. I am leaving the windscreen off for the same reason for the moment.
So to the box it goes for now until they do:

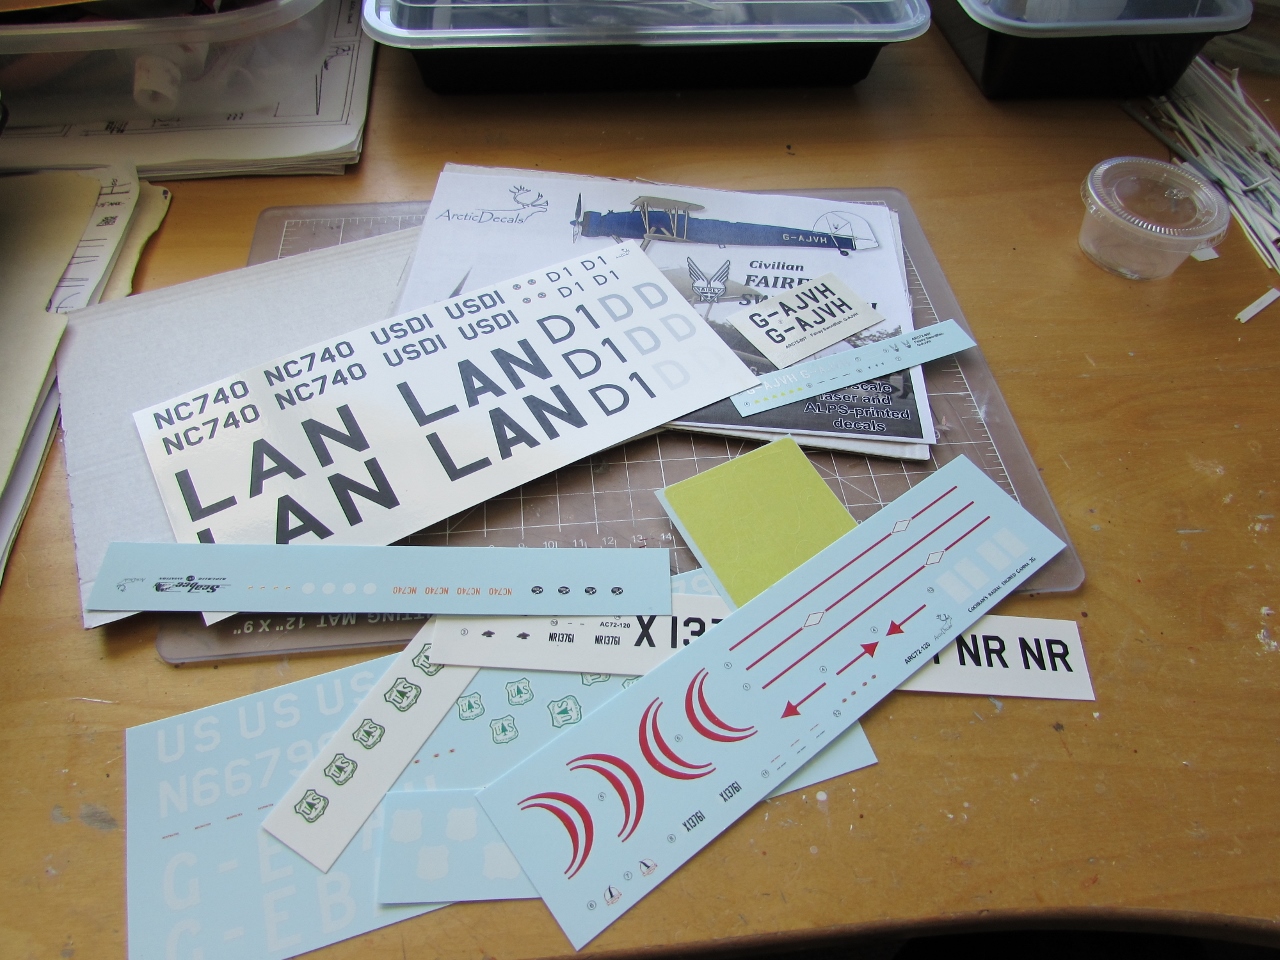
 Yeepee! the other envelope with decals arrived!
The world post offices have proved Eisenstein theory of relativity!
The envelope send 75 days ago arrived almost at the same time as the one sent about two weeks ago!
Nobel price for the Post Offices!
 A future project:

 Decaling begins:
 Well, the second box (on the left) with the additional building for the Junkers airfield also arrived. Two months after buying it. I won't be completed at the same time as the model, but hopefully sooner rather than later:
 I should probably paint some of these:
 (The completed model is here:
https://wingsofintent.blogspot.com/2020/07/junkers-f13-revell-172-kit-with-minor.html


The plain "U" handles will be replaced with wire, of course. The others will be cleaned and glued only when all preliminary surface work is completed, otherwise they would be continuously knocked down. The little buggers...:

The Miniart kit of the building is not molded to high standards. The fit is indifferent -to say the very least- and the engineering is poor. Gaps will show, mating surfaces will not make positive contact all the way, etc. The quality is much more like that of a toy than of a serious kit, which is disappointing, especially considering the good quality of other of their products. This is obviously a modular system designed to use the same parts in different boxings, and if it does work for some details, it doesn't for others.
There are two ways this kit is useful:
1) You don't give a damn and just use it in the background.
2) You do give a damn, and you modify it to suit your own ends, which will take some work. The least that can be done is to somehow hide the thin gaps that show everywhere where panels join, perhaps from inside with some cardboard or strips or styrene, or styrene sheet to make "walls", or from the front with fillers like Perfect Plastic Putty, which is water-based and very forgiving.
The parts come as you can see in colors, but more serious modelers will apply at least washes and weathering, plus details:


The step is in, I added control horns and rigging to the rudder, the little hatch on the nose is on, the exhaust was glued, the prop has been pushed in.
I can't put the Venturi mast yet until I have applied the decals, which may take a little while to arrive due to the PO delays. I am leaving the windscreen off for the same reason for the moment.
So to the box it goes for now until they do:

The world post offices have proved Eisenstein theory of relativity!
The envelope send 75 days ago arrived almost at the same time as the one sent about two weeks ago!
Nobel price for the Post Offices!


Now I will be able to complete several projects!


https://wingsofintent.blogspot.com/2020/07/junkers-f13-revell-172-kit-with-minor.html
Looking forward to more.
ReplyDeleteHi, Would you happen to still have the template for the ailerons for the Junkers F.13 kit? Thanks, Harold harkie111@shaw.ca
ReplyDeleteI will have a look. Never post your email address, you will get spammed, please use the contact form on the right at the head of the page, safer and more direct.
ReplyDelete