Continuing with the saga of civil Japanese planes from the Golden Age, here is a rather stocky plane that briefly flew for a Japanese airline.
I immediately liked the ungainly stance and the sumo wrestler proportions.
I have seen this kit time ago, at a somewhat stiff price, so I waited a bit until it became (just) more reasonable. Still, being this a short run technology kit, and for what it is, it is not a bargain at any rate.
The box announces resin parts (actually one part inside) and super decals. We'll see about the decals.
(This is the construction article, for the completed model, go here:
https://wingsofintent.blogspot.com/2018/04/mitsubishi-ms-1-civil-seaplane.html
Contents. Short run, so thick gates, thick parts, not much refinement:
An itsy-bitsy of flash:
Thick tail surfaces:
Exterior detail:
A view of some of the parts:
Thick exhausts. This was true for the collector, but not for the connecting bits to the cylinders, which are represented too thick:
Restrained wing surface:
Film for the windows and windshield, resin engine that is rather simple:
The super-decals (did Superman made them?):
Instructions:
Some not very fortunate drawings with somewhat strange use of perspective:
Color and decals on box:
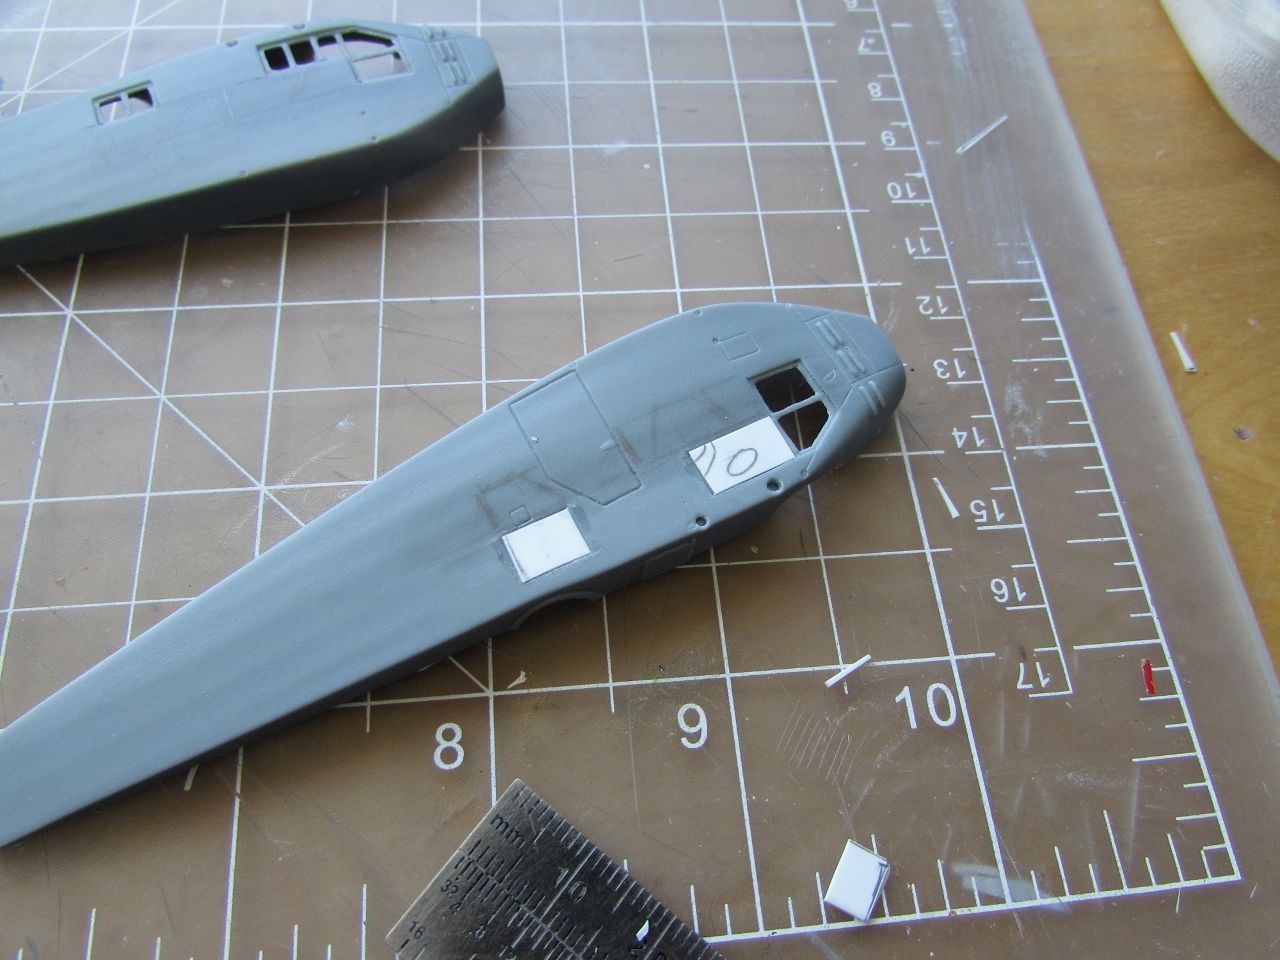
Interior detail, a bonus, but you have to clean the ejector pin marks:
Parts off the sprues:
The rather disappointing resin engine, especially compared to what you see in the market. No advantages that I can tell over an injected part, since there is no relevant detail:
The film for the windows in the instructions goes inside, and there is indeed a recess, but there is also a -shallower- recess outside too:
The kit's registration comes as J-AFTB,but I found these on the Golden Age Registers (
http://www.airhistory.org.uk/gy/home.html):
J-AFTB Mitsubishi
90 (Ki7) J-AFTB 2nd prototype
J-AGTW Mitsubishi
90 (Ki7) J-AGTW
J-AJIZ Mitsubishi
90 (Ki7) J-AJIZ
Ministry of Communications
J-AJTU Mitsubishi
90 (Ki7) J-AJTU Ministry of Communications
J-AJTW Mitsubishi
90 (Ki7) J-AJTW Ministry of Communications
J-AJTU Mitsubishi
90 (Ki7) J-AJTU Ministry of Communications
J-AJTW Mitsubishi
90 (Ki7) J-AJTW Ministry of Communications
J-AKTA Mitsubishi
90 (Ki7) J-AKTA
J-AKTC Mitsubishi
90 (K3M3) J-AKTC
J-BABG Mitsubishi
MS-1 J-BABG(2) TKKK
The kit, although sold as the civil version, has the military parts still in it, and there is no provision to close the round opening for the top fuselage machine gun.
I seriously doubt the passengers of the civil version flew with a hole on the fuselage top, as depicted in the kit instructions and color views (but cleverly not visible on the box drawing...)
In any case, there was J-BABG that flew on floats, and requires other engine, had no Townend ring and needs different windows, plus didn't have hinomaru. I may go for that one.
Here it is in the Arawasi blog:
http://arawasi-wildeagles.blogspot.com/2014/10/mitsubishi-ms-1.html
You better sand those wing halves before gluing them together, or you will end up with blunt leading edges and thick trailing edges:
Floats are cut from a very old Aeroclub generic floats vacuformed sheet:
The halves are fit checked:
The floats need to be shorter, so I will remove a center section to achieved the proper length:
MS-1 had a different window arrangement, so you can't use use the registration J-BABG using the kit as it is.
Accordingly, the kit's aft windows are blanked, inside and out, taking advantage of the kit's surface recesses molded in. Thicker styrene will be needed inside:
The new windows are carved:
Disc to plug plug the fuselage opening, some elements of the interior in place, aft section of the deck not to be used:
Floats marked to be cut:
Wing halves cemented together
The floats' center section is removed to achieve the desired length without disturbing the general shape:
An end cap is glued, it will become once shaped the main bulkhead:
A hole is drilled to help ventilate glue fumes.
This bulkhead will provide -as a secondary benefit- a sharper definition than the one achieved by the original vauforming process:
The new windows:
The old, blanked-off windows area is masked not to disturb the surroundings while puttying and sanding:
Putty applied:
Fore and aft parts of the floats glued. Puttying and sanding will follow:
The curved float flutes can be smoothed with sandpaper wrapped around a tube of convenient diameter:
Decals are printed, the G needs a short leg added to match photos:
I couldn't find an aftermarket Bristol Jupiter VI or VII with the
frontal "Y" exhausts, so I will convert one using leftover parts from
the spares bin. I will also adapt a prop from the same source:
Another way to get the floats will be to adapt, in the same way, the
resin Fairchild P6 floats from Khee-Kha Art Productions in Alaska. They
are much better needless to say than the generic Aeroclub vacs, but some
detail may be lost during shortening and a bit of re-shaping:
The resin floats receive the same treatment.
As they come:
Mid section removed:
Re-united to fit the required length. Be careful with the alignment, a bit of putty at the joint and a light sanding and you have your floats:
So now the two "versions" of the floats are ready for priming, the vac one, narrower, and the resin one, wider:
Acrylic is used to cut and snug-fit the windows individually:
Dry run. Those details on top (round and oblong hatch) have to go, since they belong to the service training version:
Looking more closely at photos I just realized that in the sea version of
this registration the fore right windows are blanked over, so I modified
the fuselage accordingly.
The windows are set apart for the moment:
The interior is being modified to represent the airliner version:
The elevator in this version had compensation masses in the elevator, so those are marked:
The elevator is separated to pose it deflected:
And the masses excised and glued to the other surface. Once set, putty will be applied:
Kit's aileron tip should be more inset:
Modified interior:
Putty on blanked window and aileron tips. Elevator corrected and re-glued deflected:
Basic colors for the interior, which, as usual, will be barely seen:
The frame of the left front window is painted, since it will have to be masked to protect the "glass", which is glued from inside:
The interior is prepared:
Fuselage halves being united:
Fuselage seams are puttied, and the detail on top erased, as it's not applicable to this version.
The conversion of an after-market engine to proper configuration has started:
Primer is airbrushed on some parts to see if touch-ups are needed:
The reworking of an aftermarket engine to fit the version needed here
is done, included exhausts (that were rigged with the engine temporarily
in place).
A base black color is sprayed and the -also reworked- prop from spares is painted at this time too:
In reality, the plane had an adjustable (floating) stabilizer, and the fin was "pinned" through it.
So this was replicated on the model. Prop and engine can be seen now making progress too. Metal control horns were added to the control surfaces:
Oh my, oh my...
Here a view of the struttery and landing gear elements on the kit.
NOTICE SOMETHING??:
Yeap, there are two left fore struts (and no, there not two right fore struts).
How would I like that some manufactures would build their own kits,
just to try them, I mean, to see if thinks work, just saying....
Sigh....
Now I will have to brake one of them and re-position the part in the
opposite angle. No big deal, agreed, but it happens to be on an area
that will carry a lot of stress, plus the additional weight of the resin
floats, plus the additional struts associated with the floats.
Hey, aftermarket entrepreneurs, stuff your pockets with money fabricating the "other" strut. Lotsa kitsa outa there.
P/S: thought of modifying just the faired joint, chopping and reversing
its nose and cone, didn't yah? no can't do, the narrower strut will
need to be re-positioned anyway, since it is sided, aligned with the
leading edge of the main strut:
The floats are being rigged. The strut issue is corrected by separating the main strut from the faired hub, metal-pin it, and re-attaching at the proper angle:
Stop Press!!!!
Looking at photos I realized that the struts have no bend at all!
They are straight, unlike the kit´s parts!
I decided to take matters into my own hands and just make the from scratch.
First, a suitable diameter piece of sprue (yes, you know one day they
might be useful, and we keep them, in case an intergalactic race comes
to visit and happen to have sprue leftovers as currency!) is given the
shape of the tail of the teardrop fairing:
Then that part is cut off, and the head, roundish bit is sanded and in turn also cut off:
Then front and end are glued together, and the struts prepared (hey,
someone wants to get rid of those Contrail airfoiled struts? I really
use them!):
Alternatively, you could look in your spares bin for two identical balloon antennas (unlikely):
Smaller teardrop fairings can be made from styrene rod stock, using the same procedure:
Bigger strut attached to fairing (notice "bent" kit's strut, incorrect):
Smaller struts attached:
But you can just crack just a tad the kit struts and make them flat,
and re-glue and reinforce perhaps with a coat of cyano glue and
accelerator.
The tail is glued to the fuselage. Notice that I have added two sets of
louvers (Archer printed resin transfers) not depicted in the kit:
The corrected kit's struts and the home-made ones (with tiny metal pins at the ends), now both can be used:
In order to get the complex floats' struttery right, I need first to
assemble the fuselage and wing, with wing struts included, therefore
they will be painted beforehand. Here the black base for the aluminium
color. The cowl will have a more metallic tone, whilst the doped fabric
will be more like white aluminium.
Before painting started, all holes for Pitot probes (two), control leads, and fuel tank conduits were drilled:
Aluminium tones airbrushed:
The wings and struts are on, now the floats can be rigged. As they come, the kit's struts will produce an exaggerated dihedral, seen in some plans, but absent on all photos. There is some dihedral, but nearly as awkward as the kit will produce if the struts are not slightly shortened.
The whole process of setting the wings and struts is really not functional, at all. Do yourself a favor and engineer another solution, like cutting the puny pegs on the wings and installing longer (if thinner) ones made of metal, and drill a bit deeper the holes on the fuselage where they go, to obtain a positive lock. The kit fails here in producing a solid joint, and the wings will keep detaching themselves as you try to align and glue the struts:
The seaplane version had an additional diagonal reinforcement strut connecting the "bullet" with the aft wing struts root.
The fore diagonal strut is provided with the kit, as is part of the normal landing gear:
More struttery thingies are added. The short reinforcements go only on the aft wing struts (the kit ignores them).
Also installed are the one that go from the teardrop to the wing root.
All this is good, since the kit-s wings are unnecessarily heavy (kind
of chunky molds) and also the heavy resin floats are going to be
connected to this array, so the more reinforcements the better:
This seaplane had two Pitots, one aiming downwards on the right wing, and another aiming up and ahead on the left wing:
To confer rigidity to the float assembly, the two aft struts that
connect floats and fuselage are measured, made, tried, trimmed, and
glued to the floats.
Once the float assembly is painted like the rest of the model, then it
can be secured to the fuselage stably with four attaching points,
leaving the front connecting struts in turn to be measured, made, tried
and glued on.
To navigate uncharted waters is not only challenging for seaplanes! No kit parts here, you make them as you go!
Black base coat for the aluminium hue:
Fuel lines (omitted by the kit) are added, as well as window frames:
Float assembly is painted:
Floats glued on:
And two float remaining struts are glued in place. Still to go are tail rigging, control cables, decals, engine and prop, Pitots, etc.:
This plane had the tail control cables running externally on its back, partially through tubes.
Here I am threading 0,1 mm line into 0,2mm ID tube segments:
The tubes are glued on the back, trailing filament with threaded tube segments:
Cable sand tube segments are gradually added:
All control cables and rigging in place:
Engine and exhausts are added:
A simple trolley is built:
Prop, one of the two Pitots, cleats and radiator in Place:
Accessories painted:
I have printed the decals for this one at the beginning, but I am not
happy with the paper, which on trials looked a tad thick, making the
carrier noticeable.
I am having trouble finding decal paper of good quality (that is
very thin). My old good stock is gone, and even sheets from the same manufacturers are now close to useless.
Who spoke about technological advances making things better? Not for decal paper, sir.
I have tried all the known brands, to no avail. All have the same
despicable thick carriers. So I commissioned a set, since my decal
provider has good quality paper.
I will have to take a pause to finish the model until they arrive.
See you all soon.
To be continued....


Once again- i build I hope i will live long enough to copy! Genius concept and your research abilities somehow manage to eclipse your building skills- I'll be watching this with interest. Did Lars approve the float choice?
ReplyDeleteDear Keith
DeleteA certification of "proceed with build" was not obtained just yet from the Alaskan float authorities, but considering that shape and length are correct, I don't foresee any issues there.
The Golden Age Registration web page is a gem. Some years ago I searched the web for something like that and found nothing. Thanks for sharing!
ReplyDeleteYou are welcome
Delete