(This is the step-by-step building article, for the completed model please go here:
https://wingsofintent.blogspot.com/2018/03/fokker-fii-modified-classic-plane.html
https://wingsofintent.blogspot.com/2018/03/fokker-fii-modified-classic-plane.html
The mysterious but fascinating realm of vacuum-formed kit (abbreviatedly called "vacuformed" or "vacs") provides us, off the beaten path modelers, with subjects that tend not to be favored by their injected or resin geographical neighbors.
I am fond of them, and through the years I have built a
somewhat large number.
As with other media, quality varies, and you have samples of
all levels in the trade.
The subject that today occupies our attention is from Classic
Plane, somewhat down in the quality spectrum (examples of good quality are, to
mention just two, the late Gordon Stevens' Rare Planes range and Khee-Kha Art
Products from Alaska).
This kit is a rendition of a much beloved plane that had a
very important role in aviation history, providing early passenger transport
and starting a family of well-known designs, the Fokker F.II.
To call this kit simple would be an understatement. There
are no resin or metal parts that many times accompany the molded styrene sheet,
nor decals and somewhat succinct instructions.
The detail parts, provided in the sheet, are better discarded, since
their worth is highly questionable to say the least.
This nice Fokker was gifted to me by fellow modeler Luis
Santos, the friend that long ago also gifted his vac kit rendition of an
Argentinian plane, a cropduster (see link bellow).
Thanks to Luis for his kindness.
Here are a few of vacs I have built, so you see, is not that difficult:
https://wingsofintent.blogspot.com/2013/05/execuform-sikorsky-s43-172-vacuform.html
Work begins patching things up a bit, since this kit has
seen some years of handling, and some areas were a bit squashed and had
cracked. Nothing that a piece of styrene won't cure.
Next, replacement accessories need to be found, not a
problem for a scratchbuilder or a modeller of some vintage: props, wheels,
cockpit items, engine and struts are needed. I have gathered -and many friends
contributed to (thanks Armando Gil and Jim Schubert) a now sadly diminishing
stock of aftermarket items, mainly from the -now in stasis-
Aercoclub range.
I can -and I many times do- carve my own laminated wood
props, though.
The cabin interior (not provided with this kit) is easy to
scratch, and the decals...well, depending on the complexity of your chosen
marks, you may somehow scrounge them or cobble together from defunct kits,
print them yourself, or commission them.
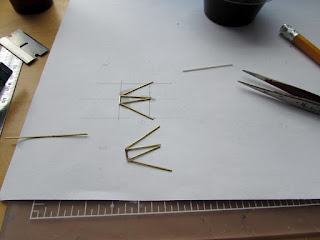
The struts will be coming from Strutz airfolied brass stock
(thanks, Andrew Nickeas!).
Why, ask some of my friends, I launch myself into fixing a
somewhat not very enticing kit prospect instead of scratchbuilding the desired
subject? well, firstly, to honor the gift, and secondly to redeem an object
that otherwise will slowly drift into oblivion. And thirdly, needless to say,
because of the challenge.
What you get:
You get two half wheels. You could glue them together and get one whole wheel, incredible!:
Small bits better left for the erosion of eons....
The detail is there... if not quite crisp:
Kit had surely went thorough some stressful situations:
Parts come easily off if you do it properly, not a science; just score the previously-marked contours with a new blade in successive, precise, not too forceful passes, then bend back and forth CAREFULLY, and voilá:
Cracked areas are reinforced internally:
All major parts out, the rest better leave it where it is:
Here an image of the parts you do not like to use, under any circumstances.
Their only mission is to provide the size for their replacements:
The parts were given a modicum of sanding and truing.
I hate going to the gym, so I sand kits:
Notice to the right that I have already started to rumage my supplies to get accessories:
Obtain thin trailing edges, so your model doesn't look clunky, one of the commons pitfalls of vacs when not done quite properly:
This is how a part looks after some flat-sanding on the internal side:
Remove the pips caused by the suction during the fabrication process. Some will leave a pinhole, don't worry about it now:
Pinholes exposed by the removal of the pips. Good vac kits do not present this inconvenience, or not to this degree:
The pinholes can either be filled with superglue, or blanked when they are in a row like in this case from behind with a styrene "stringer":
I added a spar to help with the wing shape, not trusting the mold:
I made two ventilation holes to help the glue dry, in an area not visible when the model is assembled. The halves are taped together:
Be sure that you got straight leading and trailing edges:
The stab lower half is separated as indicated in the kit:
Pinholes filled with putty:
The stab parts are glued and taped:
Once halves were glued, the surface is approached:
Since the quality of this one is not high, either you make the wing tip halves coincide or the rest. The chordwise panel lines will coincide at the trailing edge, but not at the leading edge. In any case all these way too prominent panel lines will be puttied, sanded and retraced anyway:
Small surface blemishes better dealt with now:
All parts that needed it (that is all parts) are slapped with some putty:
Two spares bin seats, and a hand-made one, just to show you can do it if you need/want to:
Bench passenger seats, beginnings of the cockpit frame:
New prop being carved, new radiator being made using a mesh cast by Matias Hagen from Argentina:
New radiator in progress:
A spares bin engine that will barely show in the model (only the rocker arm from the top) and pass as a BMW III:
Control wheel and engine:
The parts so far, none from the kit:Meanwhile, in Gotham City...
The putty is sanded off. The Windows are drilled out:
And shaped.
Also, the engine ventilation louvers were different on my plane, so I'll have to modify that too, eventually:
Another mark of a so-so vac kit is the difference in plastic thickness. This is -to a certain degree- natural, as the heated sheet is pulled on the mold, but never like here, where in same places is gossamer thin. In this case it is in a very sensitive area and it is deformed and gave up. I am reconstructing it to be able to work with, with styrene and eventually some Milliput:
You could replace the tail feathers with scratchbuilt items, which can be thinner and show the ribs that the in this case the kit's part don't:
You can see the thinness in the standing up rudder:
Elevator separated and control horans added:
Interior in progress:
Interior, prop and engine:
The landing gear structure:
One fuselage side is given some tabs to help alignment and augment gluing contact surface:
Interior painted:
Wheels and radiator painted:The fuselage is assembled.
Here work is hindered and delayed by the faults of this kit, in the sense that given the extremely uneven thickness of the plastic you have to be very careful while sanding and puttying. As we all know, excessive application of cement or putty softens and deforms thin plastic.
Caution is the word, and patience to let things dry properly:
Landing gear on:
State of the union:
Ready to prime:
The "flap" seen in photos on top of the wing at this site:
https://www.erfgoednlr.nl/index.php/2-beeldmateriaal/42-galleryseriev3
thanks to Peter at Britmodeller, was reproduced and will be added to the model:
First coat of primer to reveal blemishes:
Fuselage is given its blue color -in a painting session with other projects-:
A base color is applied on the wing for the oncoming paneling:
Forgot to paint nose with metal color:
Choosing between decals or oil paint for the wood effect:Oil it is:
Nose now painted, liquid window maker still wet:
There is an additional triangular panel on the exhaust side of the nose:
Strut for tail and wing being primed:
Stitches decal added, reinforcement wires on landing gear legs and control leads also in place. Dangling gizmo dangling seen in photos glued on:
Treatment of the wing continues:
Missed part of nose is painted, the wing is varnished in preparation for decaling:
The last window is made once all the others had dried:
More details are added: radiator cap, stab struts, exhaust:
Wheels on:
Wing glued on:
And details started to be added: four of the six wing
struts, aileron horns and control leads, and the varied gizmos that
adorn the exterior of this experimental machine (like the one seen here
on the stab leading edge and in preparation on the foreground):
And while I wait for the decals...


No comments:
Post a Comment