

(The post with the completed model is here:
https://wingsofintent.blogspot.com/2022/04/american-champion-decathlon-vfr-models.html
Isn't it strange that an "industry" (kit-making here, even at cottage level) would chose to use the newest technology to deliver a product in some aspects inferior to what was achieved before by simpler means? Mysteries of the human mind.
I see lots of good intentions, but...
I have been building kits for more than five decades now. You name the brand, chances are I have built a kit from them. Injected plastic, vacuum-formed, resin, even wood. So, after seeing the field getting better (although not always in a straight line), I am now quite befuddled witnessing this bloom of 3D-printed kits that are visibly inferior in some regards to many of their contemporaries manufactured with the usual technologies. Kit makers started to use digital tools some time ago (CAD, 3D print). This has produced good and bad results. 3D-printing at the beginning was used to produce the base for masters, later refined before being used to cast the real masters for production. Now, with the ever-lowering costs of some technologies, many hobbyists have access to 3D printers, thus a new cottage industry has emerged. This growing trend produces everything from unsightly crap (that some modelers for some unfathomable reason even buy) up to not-that-bad "kits". This is a case of the latter. It's definitely not in the horrid category, but still leaves much to be desired. I will try to present to you why, as I advance with this build. I have chosen this kit as I believe it is representative of a manufacturer that achieved an almost good product, that could almost be built, into an almost good model. It depends on your expectations, how much do you want that specific type, how much time and effort are you willing to spend, and the knowledge of what's out there in terms of options. Bear in mind that, in the best of cases, after quite a bit of work, the results will be inferior to what a normal kit with the same effort may have rendered.
Would you like to have a new photo camera that uses the "latest technology", costs more or the same than a normal camera, is difficult to operate, AND renders pixelated photos? Yeah, me neither.
First, the pros:
-Nice subject (a point that the kit maker puts forth -rightly so- as to why
you should buy this type of kit that no big firm may touch). VFR has a very interesting range of offerings.
-Good, sturdy box.
-Finer than usual for this media (but ultimately a bit below "normal" kit standards "resolution" -as in surface "grain"). That is, the hallmarks of 3D-printing, those unsightly ridges due to the printer layering, are less noticeable than in some other, rougher kits on the same media, but not like the nice, smooth surface of a good "normal" kit, being injected, cast resin or vacuum-formed.
-Nice detail parts are provided: full interior (no rudder pedals) and some external details
-Simple but satisfactory instructions, with a very good explanation of the 3D-printing process and the different approach you should attempt, with good advice.
-The kit's intelligent approach is to provide ready-made sub-assemblies that normally come as several parts. No fuselage seams to deal with!, interior already assembled, etc. This is mostly an advantage, and it is well done, but may occasionally hinder a bit other things (see below the building process notes)
The cons:
-Those unsightly ridges, less noticeable here than in other 3D-printed offers, but there nonetheless.
-Poor quality vacuum-formed clear parts, a blur of the interior will be seen through that awful mold, unfortunately made from an "untreated" (i.e. not polished) 3D-printed master (yes, ridges here too).
-Poor quality decals for the fuselage and details, you can clearly see the
printing"dots", but the white, second decal sheet seems good.
-Parts incorrectly rendered (wing struts with a completely
inaccurate "kink" or "step"), irregular back windows shape
-Parts broken/deformed in transit
-I disagree with the instructions' statement that the ridges are "easily sanded" or that the surface can be "polished". The model is very small, the volumes complex, and there is surface detail you don't want to obliterate in the process. The cured resin is somewhat soapy, and responds in a different way than normal plastic. Be my guest trying to "easily sand" or polish that surface. In case you are wondering, primer and paint may help, but it will not be a complete cure to hide the ridges, I know by experience with other kits similarly produced.
What's in the box. A fair deal for the price, but with many caveats:


One bag held the smaller parts. Many of them came already separated/broken.


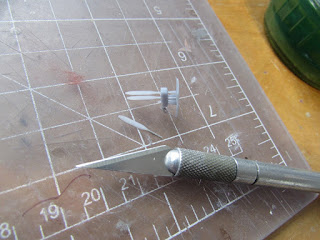
These small parts, as I opened the bag, had detached and were "missing". After looking around for half an hour it occurred to me to look for them among the forest of "pips". And there they were. Unfortunately one of the prop blades broke in three pieces and I couldn't find the missing little bit to repair it:

Broken blade and one missing bit that went lost. Other manufacturers use "ears" at both ends to protect such castings, this would have surely benefited from that thinking:

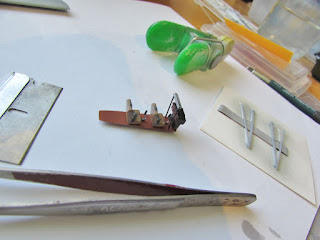
Small little buggers:

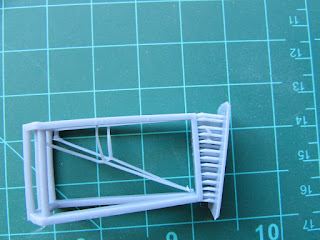
The cockpit frame came broken and deformed:

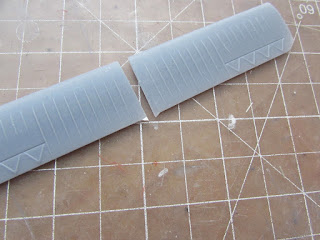
Once you remove the part from its printing cradle, you woes just started:

After some careful sanding, the surface is still uneven:


The spinner has three holes on one side:


After many attempts and using hot water I managed to right the deformed structure, and later add the broken little parts from stretched sprue. I can guarantee you that this took a time
What may be convenience for the manufacturer may not be so for the modelers, in this case good luck painting the different elements (floor, seats, control columns, instrument panels, frame) maneuvering your brush (no airbrush here, subtlety is not an option) amongst all those tiny volumes interfering with your reach:

The engine vents are see-through, you may like to block them or add detail from inside, otherwise your model will look like a toy:

This little corner broke in transit, couldn't find the missing bit:


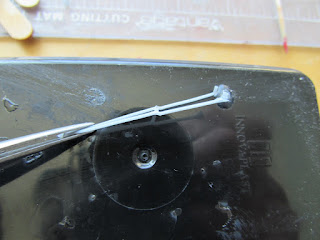
Repairing the broken prop blade:
There are no means provided to lock the wings in, and their position is vague. Structurally, you will be depending on the fragile window frame top sides (that are deformed inwards) and a piece of clear plastic with rather undefined edges. Something to look forward to.
The topographic relief map:


The real plane wing surface is closer to something like this:

And when applying the decals, you don't have to follow the instructions' advise (i.e. "do not use our decals, the ribs are too prominent, better paint it"):

The interior is designed to slide inside the fuselage:


Also as mentioned before, the one spinner has 4 holes, to cover the 2 and 3-blade props. I would have liked two spinners, which is not unreasonable to ask from a product where 70 percent of the resin goes to waste in "cradles". As the plane I will represent has a two-blade prop, the remaining holes are plugged with stretched sprue and superglue:


I decided to add a spar more or less where the real one should be, as I think the area -as engineered- is fragile. I will carve a notch on the fuselage sides to lodge it:


The horizontal tail halves are glued in place. A coat of primer is airbrushed:

Found a way to straighten those kinked struts. First, remove the short reinforcement struts (you can clearly see the kinky zigzag):

If correctly done, the kink is almost nonexistent. A careful swipe with a sanding stick should help. Now the only thing you need to do is to fabricate those little auxiliary struts and place them, after the struts have been glued to wing and fuselage, later in the build. Get the right length, as a too long or too short bit will push the main struts in or out, as they have almost zero mechanical strength:

This wavy top window side should actually be a straight line. Can't really correct it without messing with the structural members in the way:

Although the fins in this plane's engine are squarish, I thought I could add leftovers I had from inside:

No matter how cleverly I prodded them even on a bit of wax at the end of a bent wire, I couldn't get them behind the vents, due the fuselage being in one piece and having no room (or visual) to maneuver:

For one moment of madness I thought of sawing the nose off, install the
cylinders, and re-glue, but fortunately it passed, and I recovered my
common sense. I guess I will just push a blob of Milliput from inside
into the nose to cut the see-through effect. Again, some perceived advantages of certain engineering approaches may look as disadvantages to builders.
I am trying to fabricate new windows, as the ones provided in the kit are absolute crap:

As mentioned, one of the issues with computer-generated kits is their frequent disassociation from reality. Things that look wonderful on the computer screen are sometimes not particularly practical/convenient, structurally strong, or look like the real thing confronted with reality. I am not sure designers/kit-makers think much of the building process, painting of the model, mechanical strength of parts, etc. Another problem frequently found is that vacuformed transparencies are bigger than what they should be, being just plunged on a mold without accounting for the thickness of the clear plastic. This is exactly the case here, the transparency not conforming to the fuselage, being bigger by exactly the thickness of the plastic, creating yet another problem for the modeler to solve.
Not sure why the interior (molded in one piece) didn't include the front part of the coaming, instead of creating a gap dividing that volume in two. The extremely fragile structure in front of the pilot, that came deformed and broken and was repaired, broke two more times, no matter how carefully handled. The "spar" at the top does not reach the sides as I think it should:


This is a very loose dry-run of the approach I am attempting to compensate for the lack of a "ruling" element and proper locating devices in the engineering of this area of the kit. I had to ballpark the dihedral looking at photos and plans, as the kit does not provide a front view to clue you to the right amount, relying on the flimsy struts I guess to provide the right angle:

Basic colors on interior walls and pan:


The plane I am modeling did not have the wheel pants, therefore a new landing gear has to be fabricated:


The plane has a light at the nose. I will add a home-made lens there in the recess. Once every few years I would run out of these self-made lenses and have to fabricate more...

...a lot more, in several sizes. The resin takes a couple days to fully cure, so they have to be left alone:

It took me two hours to finally fit the two home-made replacement front windows, not my idea of fun. And I still need the two back windows:

I had to install a spreader bar immediately behind the kits' "spar", after sliding the interior in, to achieve the right width to match the front transparency, and add much needed strength:

If you just build this kit without often checking fit, parts, measurements, etc., you will be up for a few not very pleasant surprises. So far, thanks to my deeply rooted distrust of most kit manufacturers (that saved me many a headache), I was able to correct/adapt/substitute what's not good. I advice you to do the same. Keep a vigilant eye, this is not a shake and bake kit, as you have surely abundantly guessed by now.
The transparencies (front one the kit's, side ones home-made) are given a bath in acrylic floor polish:

As today. Still to go: adding the side windows, wings, and the front transparency. Pity that with all that computer fuss no masks -or at least mask patterns- are provided. But anyway, it almost seems that this could be completed hopefully without major hurdles:

As I worked with the parts, drilling, sanding, etc., I noticed that some are more or less like plastic, and others more akin to hard and brittle resin. This may be due to the "curing" of the resin with UV light, that resulted in different levels of hardness, may be due to their curing time, part's thickness, or other factors. It doesn't hinder the build, but may be something to have in mind as you work.
The transparencies are installed in place and masked. I decided to cut the mask short just below the inaccurate wavy top edge of the aft windows, thus obtaining the straight line that should be there.


New legs and axles for this pant-less version:

The transparency is wider than the fuselage, so you have to press it a bit against it until the glue is set:

A stirrup is made to be added once the model is completed (too fragile to add now):

There is hope:

The front/top transparency is masked and white is airbrushed:


The white is masked:

Yellow color is airbrushed:

Masks are off:

Main wheels, tailwheel, whip antennas, nose light lens, and exhaust tube added; nav lights painted:


Seems close, but still to be added are: all decals, wing struts and its aux struts, tail rigging, control cables, fin antenna, prop, stirrup, aileron mass balances, etc.
The decal set from Arctic Decals in Finland has arrived:
.jpg)
Decaling has begun:
.jpg)
The decals go on as usual like a dream. The work toning down the kit's original horribly exaggerated, toyish and ridiculous wing ribs paid off:
.jpg)
I don't have this kit (it must be relatively new), but I have several other VFR kits and I have generally been impressed with them. A cursory look at them does not reveal any of the issues you point out with this one. Perhaps you just got a bad example.
ReplyDeleteWell, those ridges for sure are there in all their kits, and so are the not good transparencies (I can see them online in other builds), as for the rest, it would really be good news if they are better than this one. Please report back when you actually build them, that will give us the full picture.
Delete