

(The completed model is here:
https://wingsofintent.blogspot.com/2022/04/gulfstream-g-450-amodel-welsh-models.html
Zipping About in Style
(This is a kit surgery tale, impressionable readers please abstain).
Disclaimer: those who know me or visit this blog know that I am mainly a staunch Golden Age man, with frequent forays into the Early Aviation and Weird Aviation realms. I know nothing about jets -which I have been known to mockingly call "Riveted Sausages"-, nor I want to learn about them, but only just enough to complete this specific build.
This story began when a dear friend had the chance to travel on a Gulfstream jet. Being an aviation buff, he lusted after a model of it. But Toby the Mathematician Dog, his pet, got the type of the plane wrong, so an Amodel G-550 was bought, only to realize that the jet he flew in was a G-450, a different kettle of flying fish (but not that different, as we will find out). Thus the Welsh Models G-IV was bought, only to discover that the version it portrays doesn't entirely correspond to the plane my friend flew in. This is because the G-IV and G-450 are not strictly equivalents, as many changes were introduced. Comparing kits and photos, his plane actually seems to have features depicted on both kits, requiring a kit surgery to graft some of the 550 parts into the 450 kit.
At first glance, the vertical tail and engine exterior are more like the 550 kit, besides the convenience of using the cockpit detail and landing gear, a bit better portrayed in the Amodel kit, and the flurry of diverse antennae that populate the entire fuselage (absent on the Welsh Model kit).
The ebil master plan as it stands now (things may change) dictates that the Welsh Models kit will provide the basics: a good portion of the fuselage shell, wings, horizontal tail. The Amodel kit will provide the fuselage aft section containing also the vertical tail (if a good match of the fuselage cross section is found), the engines, the cockpit, all the external details, and most likely the landing gear. The access door shall be opened to show part of the interior (neither kit provides passenger cabin detail, so this will have to be fabricated), and I have acquired a 3-D-printed aftermarket access stair, and a set of window masks.
The Welsh Models kit delivers only the vacuum-formed cockpit transparencies, and just decals for the cabin windows. Unfortunately, instead of molding a whole upper nose clear section that can be then comfortably blended to the rest of the fuselage, masking the windows, the cockpit windows are set to be inserted individually, previously carving the fuselage molding. As windows are flush with the fuselage, this approach in my view creates more problems than it solves. In addition, the Amodel kit clear cabin windows may have to be used for the Welsh Models fuselage, as some of cabin interior will be made and shown, but the window shapes are different in both kits.
Confused already? Imagine me.
One of Amodel's G-550 boxings:


The plane we want to model (photos by my friend):


Welsh Models kit box contents. Well molded, sharp, and with surface detail:


The resin parts already cleaned up (again, this engine is not the one seen on my friends plane). The parts are generally well cast, but not exempt of blemishes that need fixing:

There is some fan blade detail on the front, nil on the back:


As it should be, the fuselage length and wing, winglet, and stab spans are larger in the G-550 Amodel kit:


The 3D-printed stair arrived, and it's very good. Here it is after some light sanding on the back to smooth the ridges of the printing (door exterior surface) and a coat of primer:

The "tubes" that are part of the engines are sanded smooth:


In case I can use it, the injected cockpit is built.
Unfortunately Amodel strictly follows the "More or Less Here" school of graphic instructions, and the well-known "Meh" school of fit. As it is customary with these manufacturer's parts, all need clean up and many some sort of adjustment:

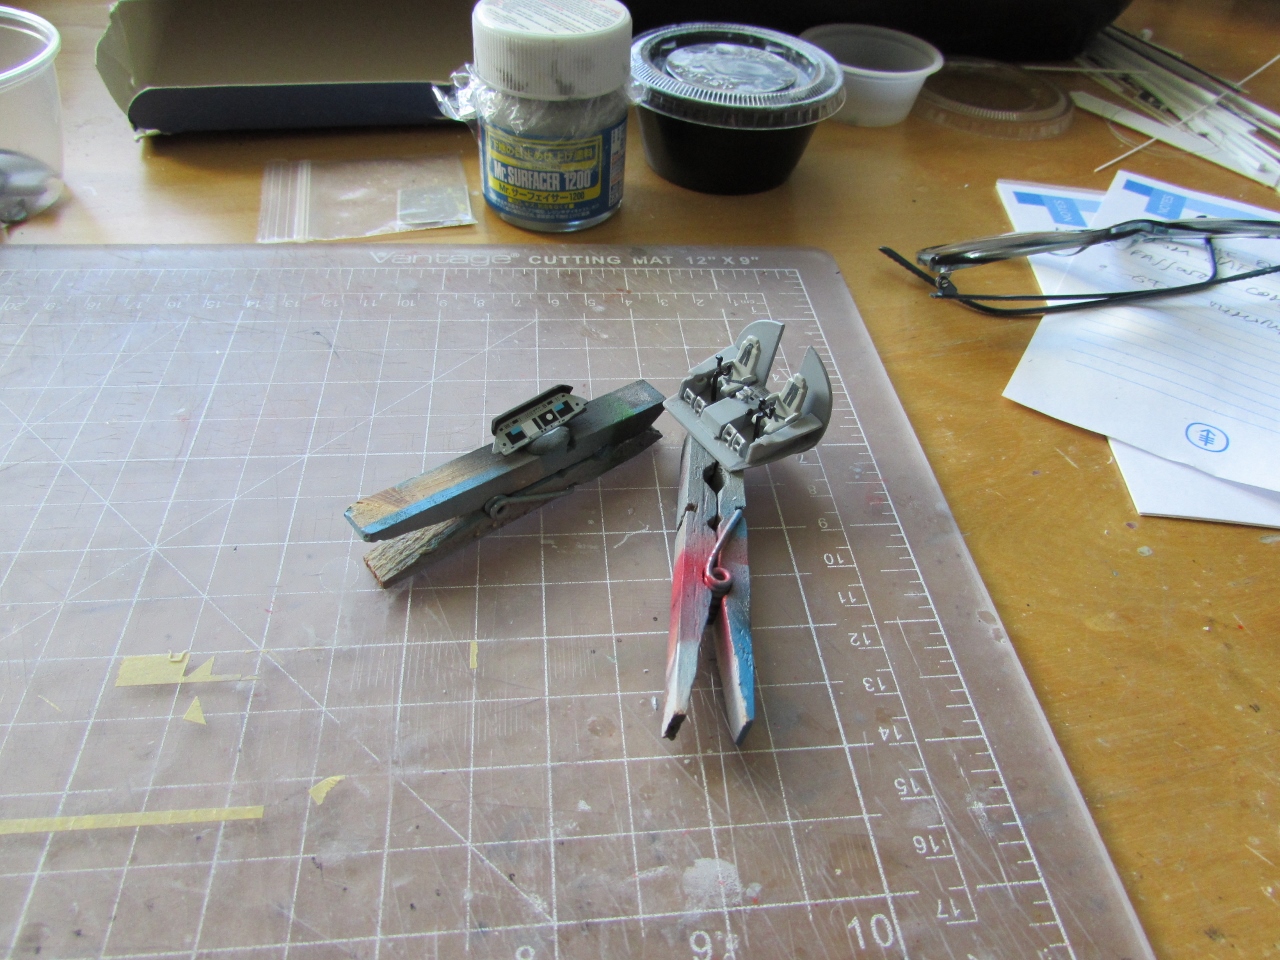
The idea is to replicate the pose of the header photo. In the foreground some trials to obtain another clockwise-rotating fan, instead of the inaccurate counter-rotating one provided in the kit:

The cockpit is airbrushed in neutral gray, other colors will be hand-painted:

The cockpit is more or less ready. One decal is provided for the back of the central console, and another for the inst. pan., ins spite of the front console and the side consoles also have buttons and such, no decals are provided for them, but granted, not much is seen after completion of the model. Engine parts are given a base for the oncoming metal colors:

The decals are extremely thin, take a little while to come off the backing sheet, they don't "slide" much, and are prone to folding, so be careful. The inks are opaque and the colors solid and sharp:
Different metal hues are airbrushed:

Some engine assembly goes on. the fit is indifferent, and has to be worked. While the aft part is glued in place before joining the nacelle halves, the front can be painted, assembled, and slid-in once the nacelle is closed with some touches:

A (let's call it a) person, at the moment sinking together with the State of Florida, by the name of Xtmos' Doggy Ensemble, figured out a way to get the best of both worlds. Utilizing only the section of the Welsh kit that supports the wing, which makes sense, as also the wings themselves and horizontal tail will be used. As the Amodel fuselage has the right door position for the version I am building, plus the right tail, similar engine nacelles, better window shape, better cockpit and cockpit transparencies. I will have to remove a slice from the Amodel fuselage to delete a window and obtain the right length. This of course will involve some knee-shaking and surely some patching, contouring, and additional structural reinforcements:

The engine nacelles are closed. The fit, as mentioned, is quite indifferent, and a few touches were necessary to obtain a more or less good fit:

After a hiatus due to vacations and:

The first stage of the surgery:


It is a perfect day for modelling, rainy outside, cozy inside:

The door has been filed away to make room for the deployed aftermarket part. Tabs were added to a section of the fuselage for strength at that seam:

Part of the internal structure and furnishings are under construction. The bulkheads came with the Welsh Models kit and are a good fit:

And now we go for a two-hour session at the Modeling Gym, endlessly rasping and sanding the flying surfaces until a reasonably thin trailing edge, and a straight and accurate leading edge are obtained:


Two of the fuselage sections are now joined:

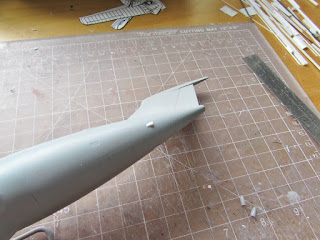
The nose halves are now added. These are, as many other parts in the Amodel kit, a mere butt joint. As the moldings are not perfect, a little touch up here and there are always necessary:


I would like to hang a couple suits from the closet I made, so I printed them:

If the saw ate your homework, no matter, a sliver of styrene, some cautious sanding, and you are back in business:

Tabs are added from the inside to support the wing box:

A few seats are made to fill the area where that would be (barely) visible from the door:

The wing box is glued. More reinforcements are going to be glued as needed, filler applied at the seams, and Milliput added inside the areas that may need some re-contouring:

It seems to be working so far (dry run):


The stab halves are glued:

Landing gear doors are cut out:

Some priming and painting will take place (shared session with another project) when weather improves:

Wing halves glued. They match pretty well, and seem also a good match in airfoil to wing root and winglet:

Some paint is airbrushed. The forward cabin walls in a light vanilla, the carpet in a buff tone, the aft cabin patched styrene is obscured in grey (no detail will be there, and the windows will have curtains). A few other parts are given color:

The winglets are glued to the wings. The fit is fair enough:


Dry run. Some weight has been placed between the cockpit deck and the nose wheel well:


Departing from the most common approach, I decided to deal with the seams while the parts are not glued together. This is meant to be a fair approximation regarding surface finish, the final touches given later when the main parts are assembled. Hopefully this may save some time and structural stresses later, and avoiding some of the knocking around I tend to inflict when dealing with large models:

Other seams are dealt with:

Landing gear, wheel hubs and stairs (with grey steps painted and masked) are painted white. The APU exhaust comes as a plastic part with the right shape, and as a flat, thin, P.E. replacement, which is inaccurate. The plastic part is drilled and painted gloss black in preparation for the metal hue:

The putty has been sanded, primer will be applied to help find the spots that need attention:

A cruise in the bay at night. Images like this one remind me of Federico Fellini's "E La Nave Va" (1983) and "Amarcord" (1973):

But before the coat of primer I decided to deal with the section aft of the wing that was left open. Two pieces of styrene were used to achieve the basic shape:


A coat of primer, and all is going fairly well so far:

A few touch-ups with putty, sanding again, and re-priming. The Sisyphus destiny of the modeler, pushing that rock up the hill again and again. Most of the tiding is now done, and they can eventually be assembled when the fuselage is ready:

To the left, the Welsh kit metal parts, to the right, the Amodel plastic parts. The latter are slightly bigger, but that could correspond to the two different types represented in each kit. I haven't decided yet which one to use:

Time to insert the transparencies. The fit is bad, so they have to be adjusted one by one:

A few windows already in. Tedious and frustrating. One lesson for myself: never again build something you personally don't have an interest in, especially when the build itself is anything but straightforward:

Eventually all the windows are on. Curtains are printed and added. The interior is once more checked. Soon the fuselage halves will be united:


An aluminium tube bush is inserted in the fin, and a steel spigot provided to later anchor the horizontal tail halves:

The wing roots are capped:

As I would like to insert an aluminium spar trough the fuselage to ensure rigidity:

Well, partial interior in place with nose weight:

And main section of the fuselage now glued together:

The tape is off, and the canopy is added. The fit was good. Here is a view of the main components. Much is yet to be done, as I still have to install the wing spar, leaving for the moment the tail apart to be able to clear the debris that operation will create (the aft cabin bulkhead will prevent contamination of the fore section). Then the clear parts will be masked in order to deal with the prominent fuselage seams. As you do this, bear in mind that there is a sizeable length covered by a fairing that goes all the way to the fin, and you don't need to tidy that section as much, is it will be covered:

The aluminium spar with its dihedral is on. I ended up using a round tube, but may switch to a square-section one:

Holes are made for the leading edge light recesses. I will be using my home-made lenses:

After gluing the spar, the tail section is added. In typical Amodel fashion, the fuselage is about 1.25mm larger in diameter than the tail, so a lot of sanding is in the forecast to even the surfaces. At this point the size of the model starts to be evident:

Size comparison between the jet and a sports 2-place machine I am scratching:

And now dealing with the seam trenches:

The never-ending priming and sanding cycles:


The two-part spine long fin is very difficult to clean and apply, and it came "snaked" in my sample, creating the need to straighten it. These two parts could be made from styrene sheet, saving the time to clean the kit's renditions:

A vast array of antennas and probes needs to be extracted, cleaned up and installed:


The spine is on:

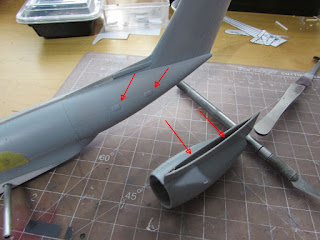
There are two faired exhausts, large in the 550 kit, but smaller for what I can seen in photos of the 450, and positioned differently, thus they are made and properly located:

A short ventral spine seen in photos is added:


Wings are added, and their seam filled. As these and the wing box in the fuselage came from the vac kit and the fit is not that precise, it needs tiding up:

Engine nacelles added, and the priming-correcting cycle continues:

Horizontal stabilizers in place:

And the rest has been already prepared, so hopefully this last leg won't be too long:

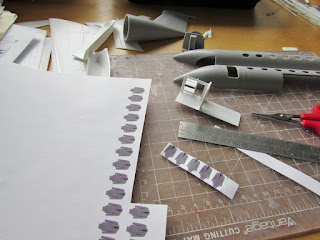
The masks:


The process of installing the large number of antennas of every possible sort begins:


A few antennas/probes that were too big (out of scale) were replaced by home-made items. The Amodel kit provides a small set of photo-etched parts, it would have been much better to include some of those antennas there, adding the benefit of a small stem for which a small locating hole could have been drilled. But once again, perhaps easiness of production, or just mere oversight, ends up passing the buck to the modeler:

Aftermarket stair and the figure that was adapted for the purpose:
Ready now for the white paint:

This is a trial on a discarded part. You can see -to the root side- Mister Color Gloss White 1, applied with shelf normal thinner (I have two types). It leaves a slightly grainy, not really gloss surface. Towards the tip, the same color applied with their brand thinner, Mister Color Leveling 400. Then it is gloss, if slightly grey, no matter how many coats. It seems that this type of lacquer paint really needs retardant. Both mixes dried very quickly:

The first coat of white is airbrushed. I got the last white Humbrol tintlet from an obscure online vendor.It's not an easy job to evenly cover a large model, or handling it during painting. A small model can be dealt with in a single session, but this will require at least another coat, and possibly a third one, then masking and airbrushing the metal sections, and then seal with a gloss coat:

Second coat with Mr. Color gloss white, a lacquer paint I couldn't hate more if I tried. We know lacquers are very "hot", and care must be used. I have some hobby lacquers and used them once in a while with no issues, but this Mr. Color just exhausted my patience. It doesn't cover well, it runs at the least provocation, the paint is somewhat translucent, and it wrinkles too easily. Tomorrow I will sand the spots where things didn't go well for various reasons (crackling, dusting, runs, etc., "accidents" that fortunately I haven't had for years when using good and tried products) and coat the model with the very last tintlet of Humbrol gloss white in the known universe I was able to find. Since enamels can be airbrushed on lacquers, this -hopefully- will allow me to complete the painting stage of this model.
All the blemishes were very carefully sanded, being cautious not to knock down antennas, landing gear or other parts. After a cleanup, Alclad II white primer was used to cover the dark spots where the either the grey primer or plastic appeared due to the sanding:

After all the work successfully completed to mix and match the two kits needed to represent this version, fabricating parts for the interior, and achieve a flawless satin primer finish, I can't even start to communicate the level of frustration for having a bad product ruining the job, and sending me back a few squares back. Hopefully the white enamel will work and the model can be painted to satisfaction, leaving only decaling and final details remaining.
What the darn Mr Color couldn't do in many sessions of much huffing and puffing and grief, Humbrol gloss white enamel did in 20 minutes:

Wheels on:

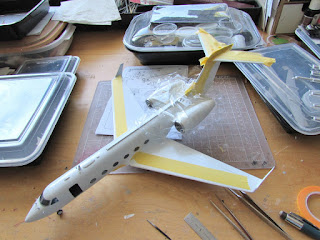
Engine pod intake rims are on, masks removed, and the windshield and aft window decals are on. Amodel decals are well printed, with a very good register and sharp. They take forever to loosen from the backing paper, though, more than half an hour in a balmy day here, and had to be sort of prodded to get them to release. They are thin (which is good) but for the same reason they have to be handled carefully. I will be using Arctic Decals for the balance of the decoration, so I can't comment further:

Masking follows to be able to paint the bare metal leading edges on all flying surfaces. Not easy or comfortable, so it will be done in short sessions, as mistakes here (knocking small details off, peel paint, crack a seam) are not something you want. In retrospect, it was a very costly mistake not to have painted those beforehand and then mask them before applying the white:
I look forward to the time when this model is completed, believe me.
The masks for the winglets are created:


The gloss black base is airbrushed:

Polished aluminium airbrushed, masks removed:

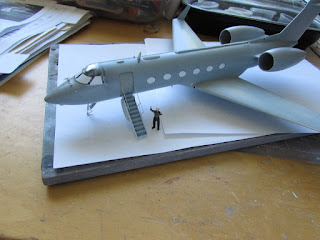
This is how it should look adding the stairs and figure of my friend, after the model is decaled:

The set from Arctic Decals has arrived:

Decaling started:
.jpg)
To be continued....
That’s different, Claudio. A friend of mine (a Brit) works in sales for Gulfstream, living in Savannah. I will keep him updated as he loves anything about them :)
ReplyDeleteMartin
Oh, Martin, he will find all the mistakes I make! ;-)
Delete